Climate control is what makes a campervan comfortable year-round. It’s not just about staying warm or cool, but also about managing moisture and condensation.
After living full-time in our van through hot summers and freezing winters, we learned that comfort comes from combining proper ventilation, heating, cooling, and insulation. Each plays a different role, and they must work together as a system.
This section covers the fundamentals of climate control, along with the solutions we tested and implemented in our vans.
Ventilation

Ventilation helps regulate temperature, remove moisture, and improve air quality by exchanging indoor air with outside air. At minimum, you’ll need a roof fan (exhaust) and ideally a window (passive intake). The intake should be located across the van, to promote air circulation throughout the van. Good mosquito screens are a massive quality-of-life improvement, and a wall fan can help circulate air inside the van.
Roof Fan
A roof fan is a must to control temperature, moisture, and air quality (CO2). Installed at the highest point, it takes advantage of natural heat rise for maximum efficiency, providing forced exhaust to remove hot, humid, stale air, and recycle it with fresh air.
Many people adds a second roof fan as a passive, or forced, intake (the flow of air out must equals the flow of air in!), but personally we prefer a window as it leaves more real estate available on the roof.

Where to install
The goal is to optimize to try to meet these requirements simultaneously:
- Temperature control: Install the roof fan (exhaust) away from the intake(s) to create a nice breeze and promote air circulation.
- Air quality: Install above, or near, cooking area to remove smell and gas quickly.
- Remove moisture: Install above, or near, the interior shower (if applicable).
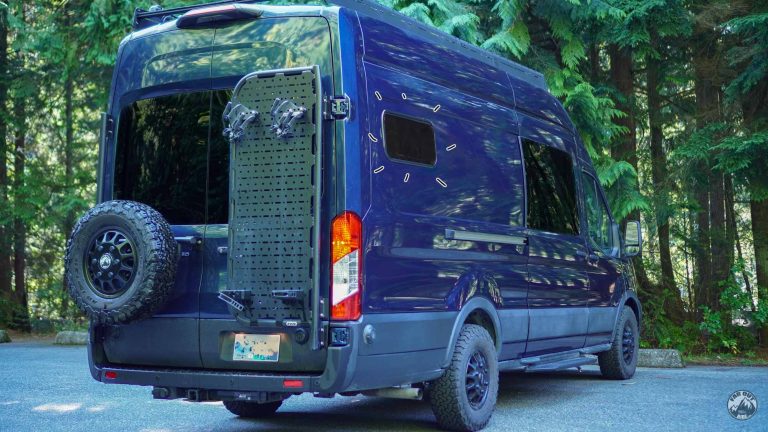
- Roof layout: The roof fan shares roof real estate with the solar panels (FarOutVan 1 Solar -VHB | FarOutVan 2 Solar – roof rack), Starlink antenna, etc.
So installing the roof fan either at the front or back of the van is totally fine depending on your layout!
How to install
We installed a Maxxfan at the front in both FarOutVan 1 and FarOutVan 2:
Our long-term experience with the Maxxfan

Windows
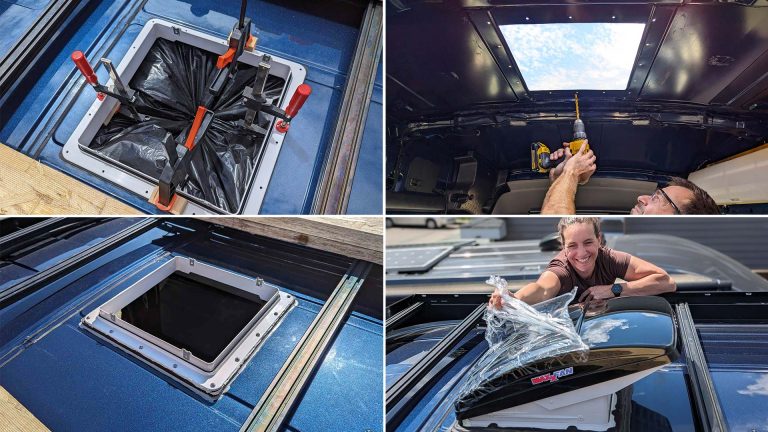
Windows provide passive intake, allowing fresh air to enter as the roof fan exhausts stale air. Ideally window(s) should be placed away from the roof fan, to promote air circulation inside the van. There are several aftermarket options, but Arctic Tern Windows are well known for top-tier quality and excellent thermal protection (thank to the double-pane acrylic design). That’s what we installed in FarOutVan 2:
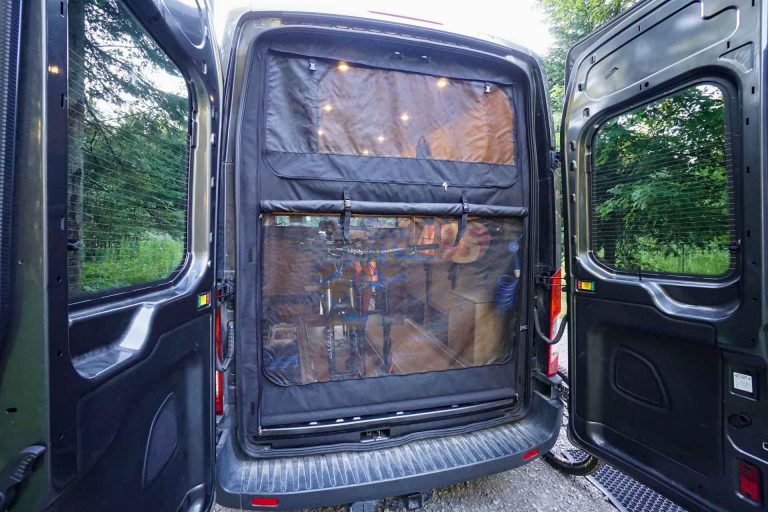
Mosquito screens
There’s nothing more annoying than mosquitos buzzing around your ears while trying to sleep. So in our opinion, Mosquito Screens are a must! The make a HUGE difference for ventilation. We honestly use them all the time, and they were especially essential during our trip to Yukon!


Most high-quality bug screens have a magnetic door, our favorite feature!
We loved our Rolef mosquito screens in FarOutVan 1, but there are now so many options out there! From the cheap Temu or Amazon options (we’ll pass thanks), to top-tier options made in the USA (VanMade Gear) or Canada (Overnight Van Supplies):
Wall fan
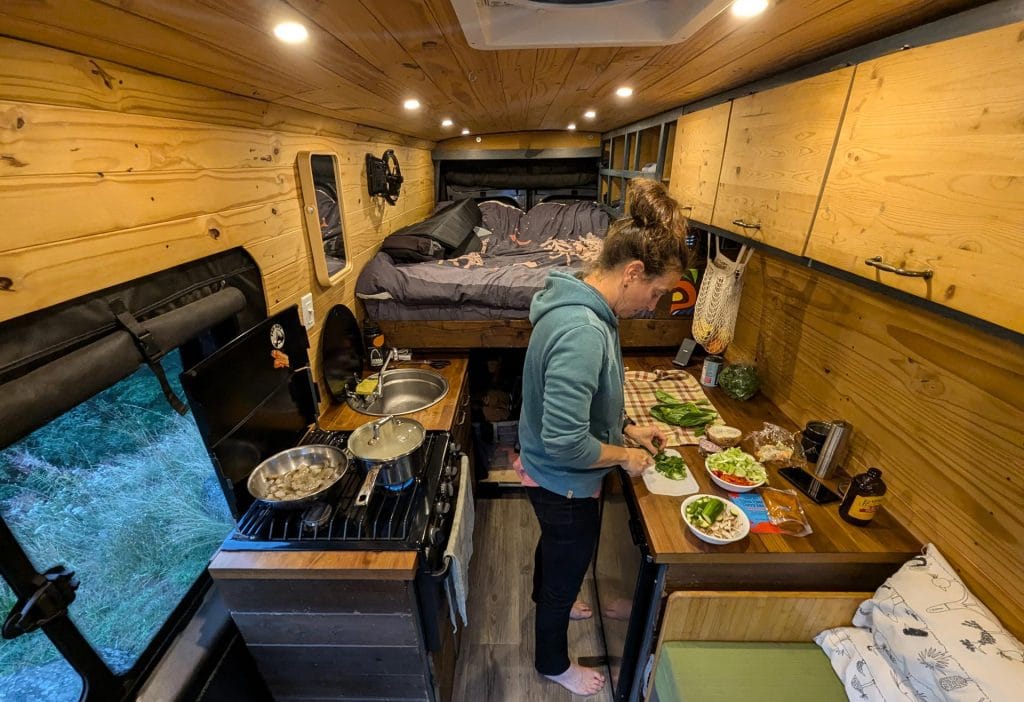
A wall fan circulates air inside the van, helping eliminate hot or cold spots and improving overall comfort. While it doesn’t exchange air with the outside, it makes ventilation and heating systems more effective. It also improves comfort during sleep by creating gentle air movement and white noise.

Floor vent
We did add floor vents in FarOutVan 1, but we’ll go straight to the point and based on our long-term experience, we wouldn’t recommend it. While the theory makes sense (cool air intake from floor to ceiling, and very safe in the city), the floor vents let through so. much. dust. Because of that, we did NOT add them in FarOutVan 2 and installed a window instead!

Heating

Heating keeps the van warm and helps reduce condensation by raising interior temperature. You’ll want to prioritize vented heaters that provide dry heat (Diesel/Gas: Webasto, Espar, Velit | Propane: Propex) over non-vented heaters that release a lot of moisture into the air during combustion (such as the Mr. Heater Buddy), which significantly increase condensation and CO2 levels.
Diesel/Gas Air Heaters
Diesel and gasoline air heaters are the most common heating solution for campervans, because they use the same fuel as the van (no need to monitor/fill an auxiliary tank), and they are VERY efficient. They’re vented heaters, and by exhausting the combustion gases outside the van, they don’t add moisture inside. This makes them efficient, safe, and well-suited for vans.
For a deep dive on diesel and gas heaters, follow this guide (which also covers step-by-step installation or a Espar AS3-B2L in FarOutVan 2):
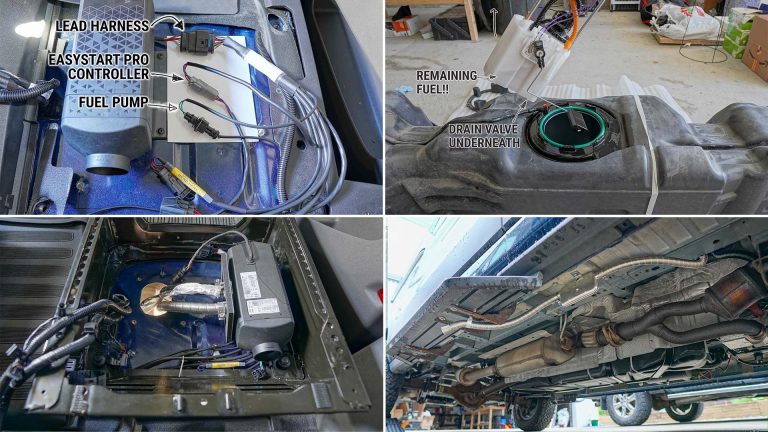
We had a Webasto Air Top 2000 in FarOutVan 1, here’s some relevant information about that:


Propane Air Heaters
Propane air heaters such as the Propex provide dry, vented heat similar to diesel heaters. They are a good option for vans already using propane for cooking. They’re quite efficient and the reliability is exceptional (no carbon buildup issues). However, having to monitor and fill a propane tank quickly gets old… We had one in FarOutVan 1, as a backup, but we’ll pass in FarOutVan 2 (no propane in FarOutVan 2).


Electric Air Heaters
Electric heaters are simple to install but require a large amount of power, making them impractical for most off-grid vans. They are best suited for campground use with shore power. When the van is parked at home during winter, we sometimes use a small space heater (plugged into the garage) to lower humidity. But running them from batteries alone is usually not really sustainable.
Radiant Floor
Radiant floor heating provides gentle, even warmth from the floor surface, improving comfort in cold conditions. However, it consumes significant power and we prefer forced-air heaters (Gas/Diesel). That being said, Heated Floor Systems are a thing if you’re into it!
Cooling

Cooling helps keep the van comfortable in hot conditions by removing heat. Ventilation is the first line of defense and is quite power-efficient, but it cannot reduce temperature below outside conditions. In very hot climates, air conditioning may be required, but it comes with significant power and installation requirements.
Air Conditioners
Air conditioners require substantial electrical power and system capacity. This makes them one of the most demanding systems to install and operate in a campervan. Being based in Canada we don’t installed A/C in our van, but they’re quite popular down south. We do have a guide about off-grid air conditioners here:

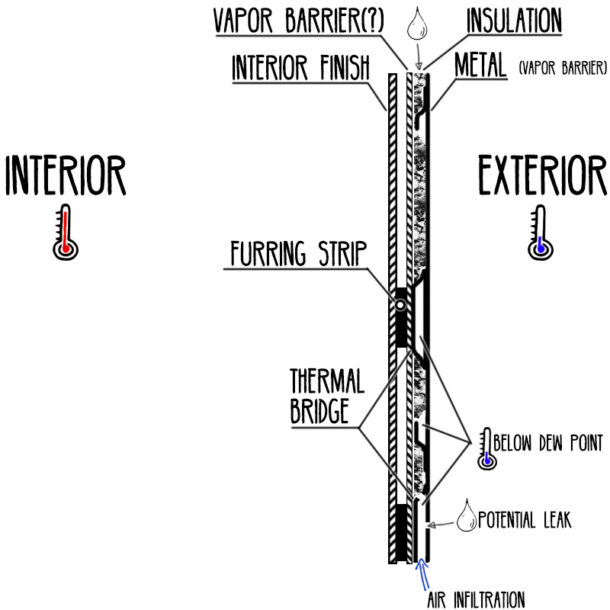
Insulation
Insulation slows heat transfer between the inside and outside of the van, keeping it warmer in cold conditions and cooler in hot conditions. It improves comfort and reduces the workload on heating and cooling systems.

We already wrote a deep-dive about insulation, so follow this to learn more:

Floor
Floor insulation reduces heat loss to the cold metal chassis and improves comfort underfoot. It also helps stabilize interior temperature. Because heat naturally rises, floor insulation is beneficial but less critical than wall and ceiling insulation. Our approach for insulating the floor in FarOutVan 2 was quite similar to FarOutVan 2:

Walls & Ceilings
Wall and ceiling insulation play the biggest role in slowing heat transfer, as these areas make up most of the van’s surface. Proper insulation improves comfort in both hot and cold conditions. It also reduces condensation by keeping interior surfaces warmer. Which is the BEST insulation material used to be quite a debate, but without much surprises most people use Thinsulate nowadays:

Insulated Window Covers
Insulated window covers reduce heat loss through glass, which is one of the weakest thermal areas in the van. They improve comfort in cold weather and help block heat from entering in hot weather. They also provide privacy and help darken the interior for sleep. Back when we built FarOutVan 1 we built own own DIY covers, but it’s not really worth it anymore as there are really good options out there:

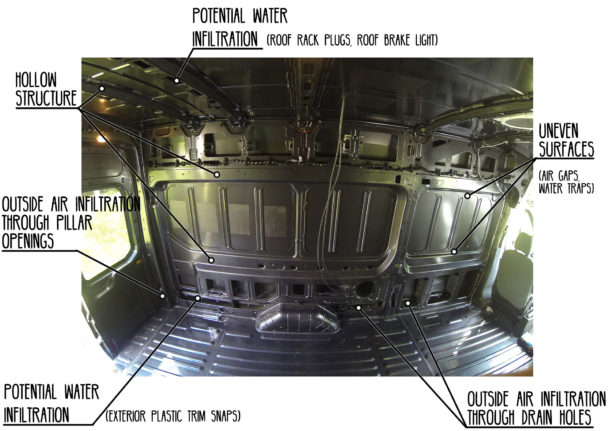
Moisture & Condensation

Moisture and condensation are inevitable when living in a van, as breathing, cooking, and daily activities constantly release water vapor into the air. While some condensation is normal, excessive moisture can lead to mold, damage, and reduced comfort. Proper ventilation, dry heat, cooling (air conditioning), and insulation help keep moisture under control.


