

Figuring out how to handle bathroom needs is one of the first questions people ask — and one of the most important decisions in any van build.
This guide covers everything: whether you need a toilet at all, how the different types work, how to pick the right one for your situation, and which specific models are worth considering.
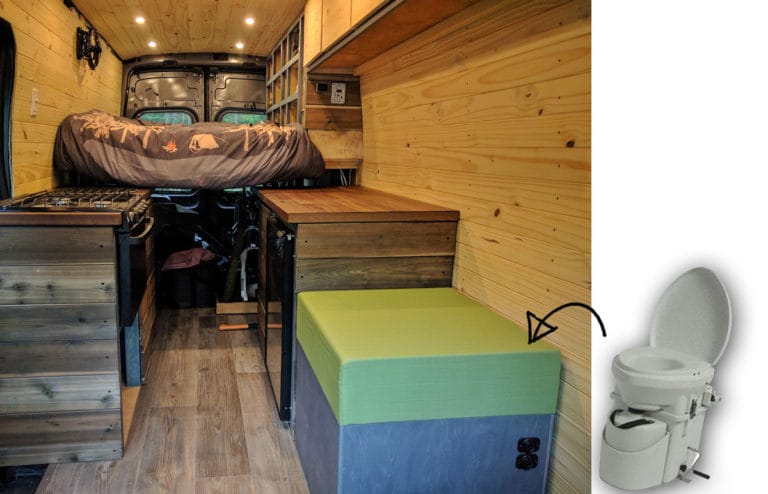
Overview
Toilet Types
| Composting | Cassette | Bucket / Bag | Dry Flush | Incineration | |
|---|---|---|---|---|---|
| Cost to buy | $175–$1,200 | $80–$350 | $20–$50 | $700–$2,000 | $3,750–$4,450 |
| Cost to run | ~$50/yr in coco coir | ~$1–$1.50 in tablets per cassette (~$100–$200/yr full-time); dump fees $0–$10 | ~$0.10 per visit in litter, plus a bag a day (~$200–$400/yr full-time) | $0.35–$1.40 per use in bags | ~$0.35–$0.55 per visit in liner + propane (~$600–$1,400/yr full-time) |
| Install | Portable; vent hose + 12V fan on most | None; bench models need a cutout | None | None; recharge the battery | Vent pipe, propane, 12V; 44 lb |
| Using it | Some technique: separate, then scoop or crank | Like a regular toilet | Basic; scoop of litter after each use | Press a button | Liner each use, then a burn cycle |
| Emptying | Liquids every 2–4 days, anywhere; solids every 1–4 weeks, in the trash | Every 15–20 uses, at a dump station | Bag to the trash when full | Sealed bag or cartridge to the trash | Ash pan; no dump station |
| Smell | None when used right | Sealed; chemicals control it | Depends on medium and emptying | None | Vented outside |
| Best for | Full-time, boondocking | Campgrounds, part-time | Budget, backup, during the build | Part-time, guests and rentals | High-end builds with propane |
Choosing the Right Type
With five types and dozens of models to choose from, it helps to narrow things down with a few key questions.
- How long are your typical trips?
- Weekend trips and occasional travel → cassette or dry flush.
- Extended trips and full-time living → composting (here’s the math).
- How remote do you go?
- If most nights are at campgrounds with dump stations, a cassette toilet is perfectly practical.
- If boondocking for days or weeks at a time is the goal, a composting toilet is the better fit — no dump station needed, ever.
- How many people are using the van?
- More people means more frequent emptying regardless of type. For two people using a composting toilet full-time, plan on emptying liquids every 2–3 days and solids every 2–3 weeks (model depending).
- How much space do you have?
- Measure before buying. Composting toilets vary significantly in footprint. Compact models like the Trelino Evo S or OGO Origin are built specifically for tight spaces.
- How hands-on are you willing to be?
- Composting toilets require some learning and regular maintenance. Dry flush requires almost none. Honest self-assessment here saves a lot of frustration later.
- What’s your power situation?
- Fan-equipped composting toilets draw a small but continuous 12V load (it’s almost negligible).
- If power access is an issue, a fan-free model or a dry flush toilet might be a better fit.
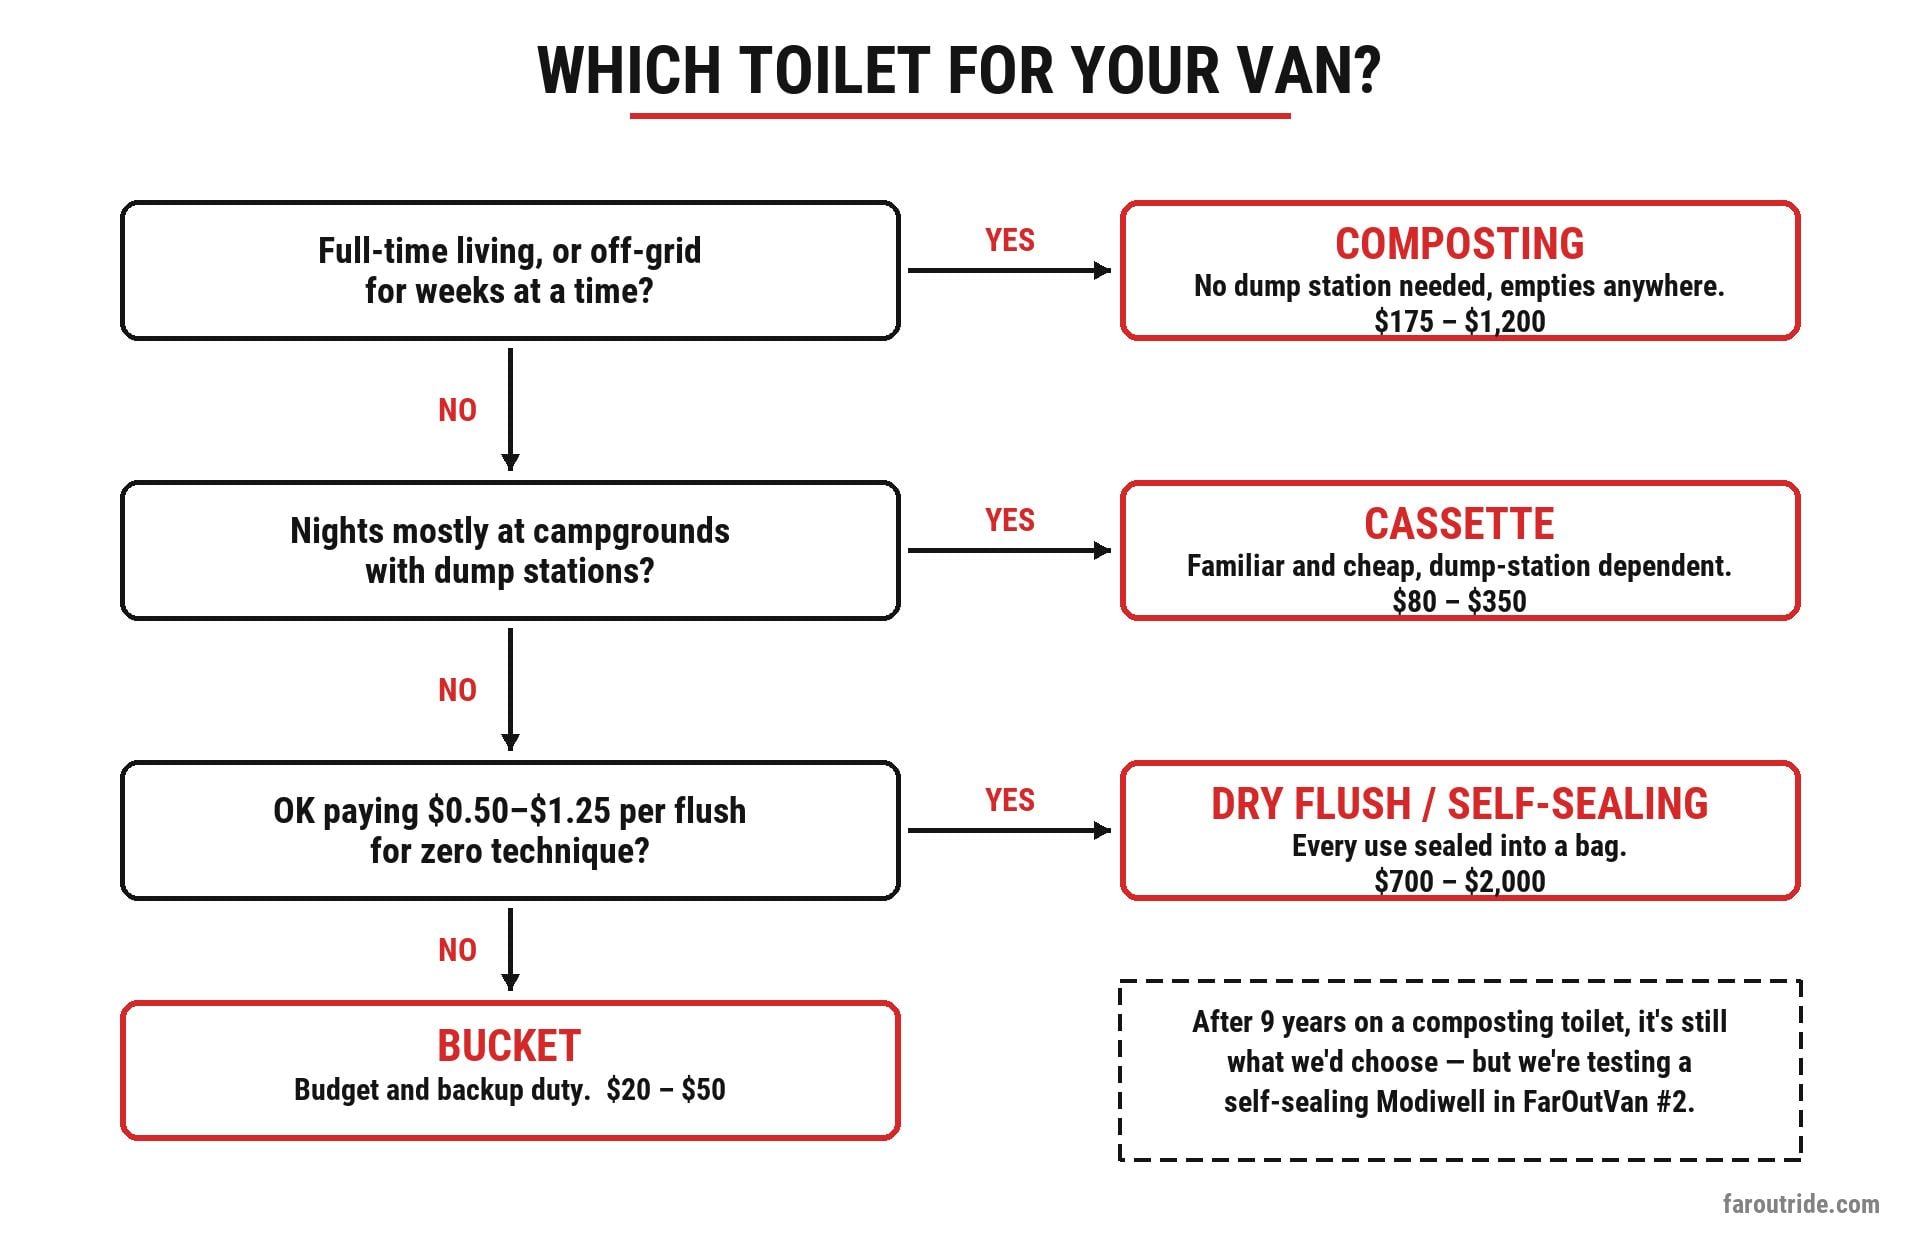
What would we do? For the way we travel — part-time now, with a lot of boondocking — we’d pick composting again: nine years on our Nature’s Head and counting. But speccing a weekend-only van in 2026, we’d test the self-sealing category first; that’s exactly why there’s a Modiwell Elite on order for FarOutVan #2.
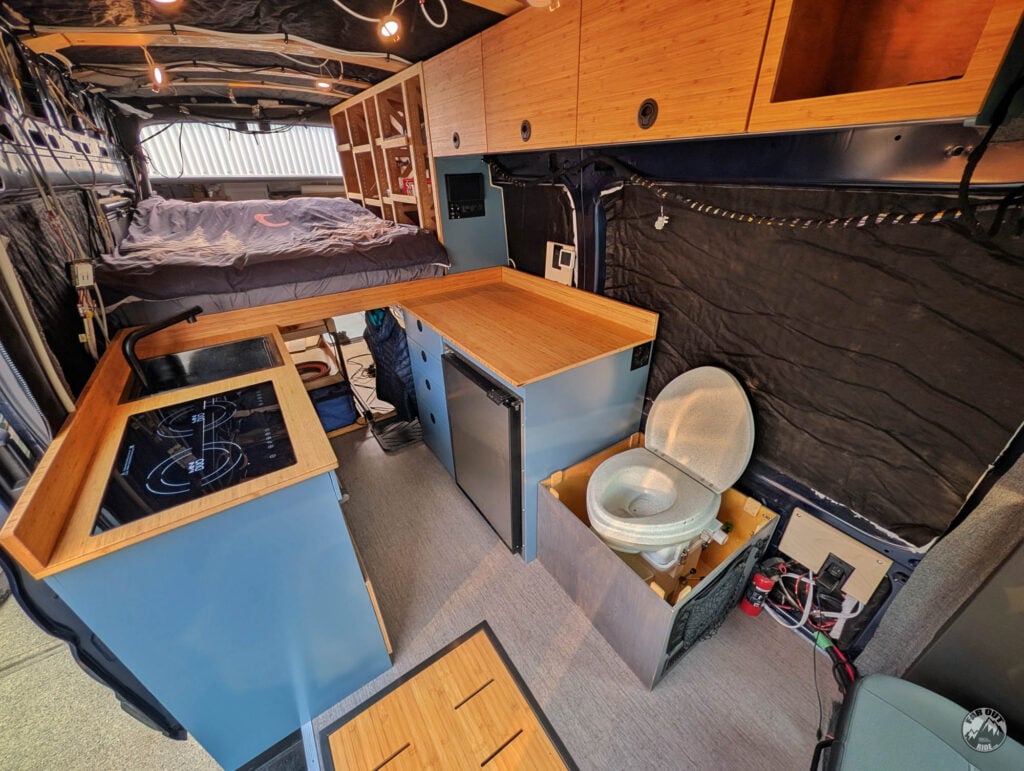
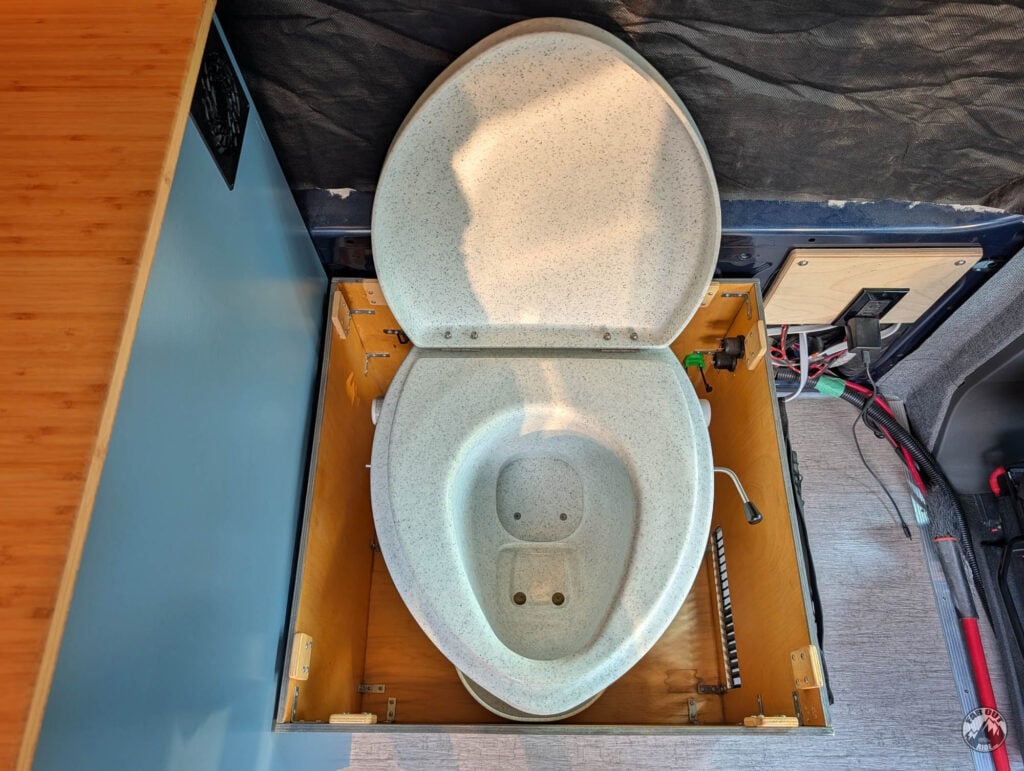
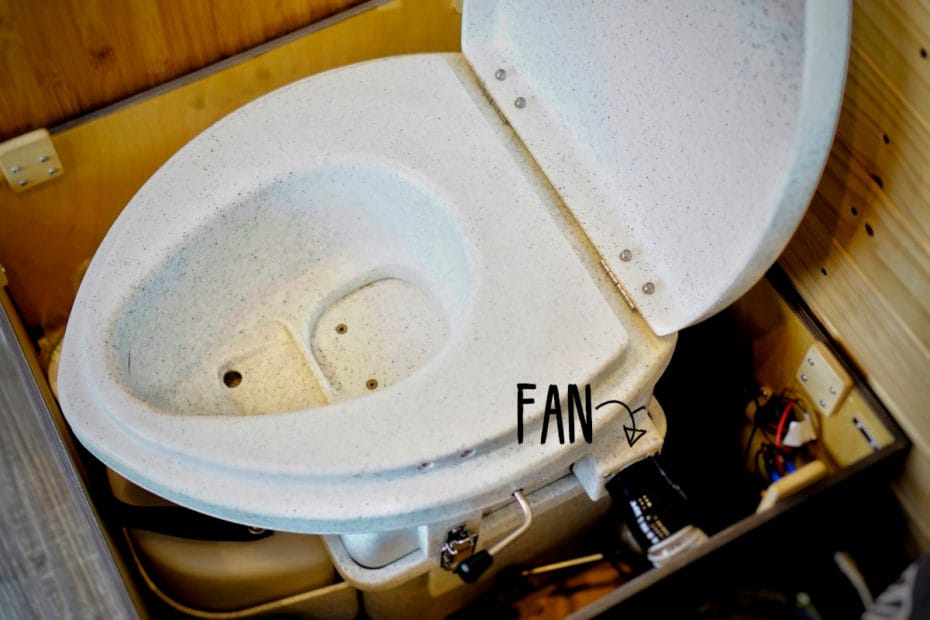
Until FarOutVan #1 sells, the whole toilet cabinet simply hops between vans. We haven’t installed the fan in van #2 yet — after a week or so of use it starts to smell a bit. So take it from us: the fan is optional on paper, strongly recommended in practice.
The Full-Time Math
Whether a sealing toilet makes sense comes down to one number: flushes per year. Our assumption for a full-time couple: roughly 5–7 bagged visits a day — one solid visit each, plus two or three liquid ones, minus whatever happens outside or at a public washroom. Here’s where that lands:
| Scenario | What Gets Used Up | Cost per Year |
|---|---|---|
| Full-time couple — non-separating sealer | Every visit (5–7/day) | $1,100–$1,800 |
| Full-time couple — propane incineration toilet | Every visit: a bowl liner + a 140–180 g propane burn | $600–$1,400 |
| Full-time couple — urine-separating sealer (S1, or Modiwell + $40 urine insert) | Solids only (~2/day) | ~$500 |
| Full-time couple — bucket toilet with litter | Cover material every visit, plus about a bag a day | $200–$400 |
| Full-time couple — cassette toilet | A treatment tablet per fill (~120 fills/yr); dump fees extra | $100–$200 |
| Full-time couple — composting toilet | Nothing — coco coir instead ($15 brick every couple of months) | ~$50 |
| Weekend van (40 nights/yr) — any sealer | Every visit | ~$150 |
At the full-time rate you’d spend the price of the toilet again in bags inside a year. The urine-separating fix has two catches: you’re back to emptying a pee bottle every day or two — exactly the chore a composting toilet imposes — and you’re dependent on proprietary liner rolls, which no small-town hardware store stocks. Coco coir is at every garden store; a sealer with no refills left is an expensive bucket. The flip side of the same math: at 40 nights a year the bag bill is basically lunch money, which is why our recommendations split the way they do — sealing for part-time, composting for full-time, urine separation in between.
Composting / Separating Toilets
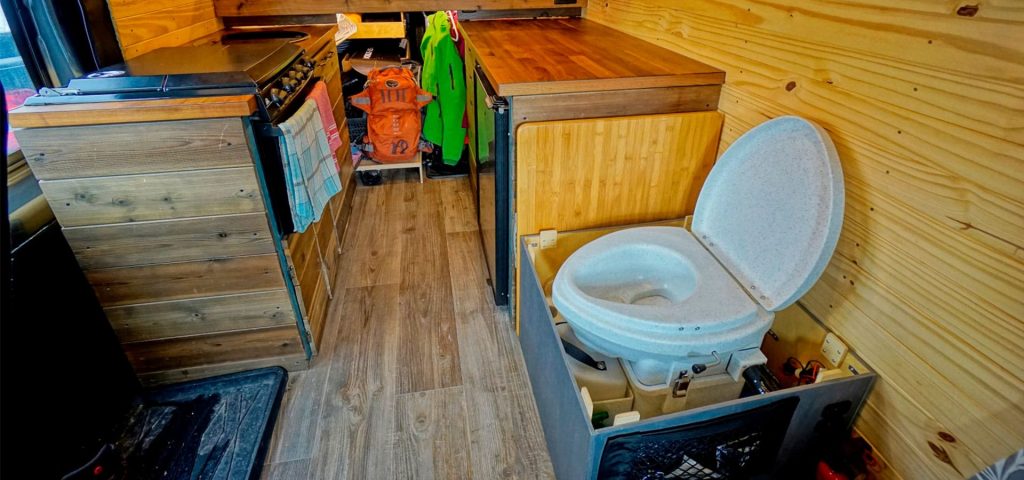
Most people’s biggest fear with a van toilet is smell. The good news: odor is almost entirely a solved problem — as long as you understand what causes it.
The smell associated with toilets comes from one thing: urine and solid waste mixing together. That reaction produces ammonia and hydrogen sulfide — the gases responsible for that unmistakable sewage odor.
The solution is separation. Keep liquids and solids apart, and the smell problem largely disappears. This is why urine-diverting designs have become the standard in vanlife — and why old-school “bucket with a lid” setups smell bad by comparison.
Composting toilets separate urine from solid waste using a built-in diverter. Liquids drain into a removable bottle, while solids fall into a separate compartment lined with a bag or filled with a composting medium like coconut coir.

Depending on the model, solids are either:
Layered
A scoop of medium is added after each use, and the bag is emptied when full (simpler, more frequent emptying)
Agitated
A hand crank or electric motor mixes the waste with the medium, accelerating breakdown and extending time between empties
Most fan-equipped models vent moisture and odor outside the van through a small hose. Some compact models skip the fan entirely and rely on frequent emptying instead.
Pros
- No chemicals required
- No black tank, no dump station
- Liquids can be emptied anywhere (toilet, grey-water dump, or responsibly in nature)
- Solids go in a regular trash bag
- Odor-free when used correctly
- Most are portable — no permanent installation required
Cons
- Higher upfront cost
- Requires some learning to use correctly
- Liquids need emptying every 2–4 days
- Solids need emptying every 1–4 weeks depending on model and usage
- Fan-equipped models need a 12V power source
Best for: Full-time van lifers, extended off-grid trips, anyone who wants to avoid dump stations entirely.
Price range: $175 – $1,200 USD
Models Compared
For most van lifers, a composting toilet is the clear winner — and the market has matured significantly over the past few years. Here’s how the top models compare.
| Toilet Model | Dimensions | Solids Capacity | Urine Capacity | Vent/Filter | Feature | Cost |
|---|---|---|---|---|---|---|
| Nature’s Head | 19″ D x 20″ W x 21″ H | 24L (40-60 uses) | 8.3L | 12V Fan | Agitator | $1,025 USD |
| Nature’s Head Weekender | 18″ D x 18″ W x 16.75″ H | (14-28 uses) | 6.6L | 12V Fan | Agitator | $965 USD |
| OGO Origin | 15″ D x 16″ W x 18.4″ H | (20-30 uses) | 9.0L | 12V Fan | Agitator (Electric) | $985 USD |
| CompoCloset Cuddy | 17″ D x 15.2″ W x 16.3″ H | 14.7L (20-25 uses) | 6.4L | 12V Fan | Agitator | $800 USD |
| CompoCloset Cuddy Lite | 17″ D x 15.2″ W x 16.3″ H | 14.7L (5-10 uses) | 6.4L | Fan Optional | Bag and layering | $650 USD |
| Trelino Evo S | 15.4″ D x 13″ W x 11.7″ H | 6L (6-8 uses) | 4.5L | N/A | Bag and layering | $375 USD |
| Trelino Evo M | 15.4″ D x 13″ W x 14.2″ H | 7.9L (6-10 uses) | 4.9L | N/A | Bag and layering | $475 USD |
| Trelino Evo L | 15.4″ D x 13″ W x 16.9″ H | 9.8L (11-20 uses) | 9.8L | N/A | Bag and layering | $599 USD |
| Joolca GottaGo | 16.5″ D x 14.9″ W x 16.9″ H | 9.4L (10-20 uses) | 4.6L | N/A | Bag and layering | $369 USD |
| Boxio | 15.75″ D x 11.8″ W x 11.0″ H | 5.5L (6-8 uses) | 5.5L | N/A | Bag and layering | $179 USD |
Top Picks
full-time vanlife
Nature’s Head
The most battle-tested composting toilet on the market. Large solid capacity (40–60 uses), proven over decades in marine and off-grid applications, and built like a tank with stainless steel hardware throughout. Bulkier than newer options, but for full-time van lifers who want something that just works year after year, it’s hard to argue with. Ours is nine years old and still on its original everything.
Long Trips
CompoCloset Cuddy Lite
No agitator means bags can be used, which is easier to clean between trips.
tight spaces
OGO Origin
At 15″ wide, it’s one of the narrowest composting toilets on the market. The electric agitator means no manual cranking. Ideal for builds where every inch counts.
compact no-power
Trelino Evo L
No fan, no electronics, no power needed. Lightweight, German-made, and available in multiple sizes. A solid choice for builds with limited electrical capacity or for those who prefer simplicity.
Already own a composting toilet? Jump down to use and maintenance.
Installation
Most composting toilets are fairly easy to install. Here’s what’s involved.
Mounting
All composting toilets can be used as freestanding units — just set them down and go. For permanent installs, most models include mounting holes and hardware to bolt them to the floor. Stainless steel hinges on units like the Cuddy and Nature’s Head allow them to sit flush against a wall, saving space.
Venting
Fan-equipped composting toilets come with a small diameter vent hose (typically 1.5″–2″) that needs to route to the outside of the van. Most people run it through a floor, wall, or roof vent. Keep runs short and avoid sharp bends.
Some models (Cuddy, OGO Origin) include a carbon filter option that eliminates the need for an external vent entirely — useful if drilling through the van body isn’t an option.
Power
Fan-equipped models run on 12V and draw very little current — typically 0.07–0.3 amps continuously. A direct wire to the 12V system is the cleanest install. Most models also include a 12V plug adapter as an alternative.
Urine drain kit (optional)
Several brands offer a drain kit that connects the liquid bottle to a grey water tank or drain line, eliminating the need to manually empty the liquid bottle. Useful for permanent installs in vans with an existing grey water system.
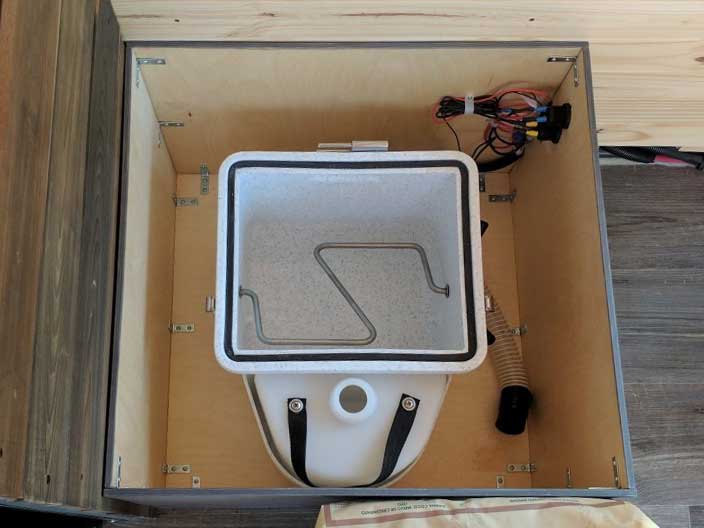
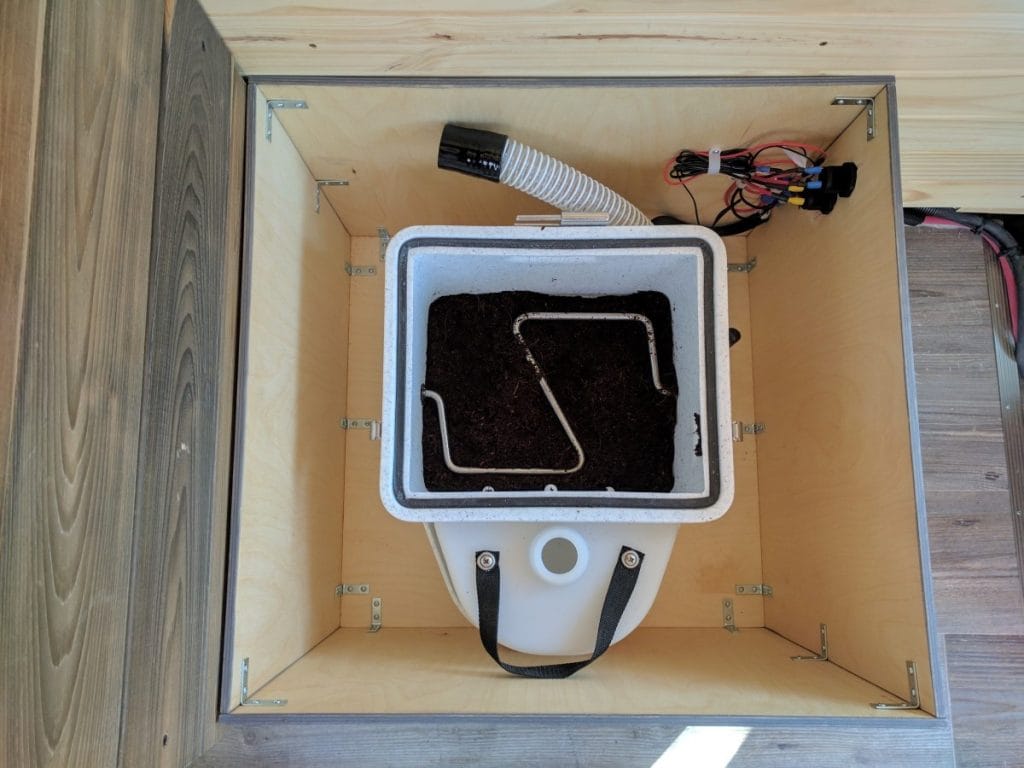
Here’s how we mounted the toilets in our vans:
FarOutVan #1

FarOutVan #2

Use and Maintain a Composting Toilet
This is where most first-timers have questions. Once the routine is established, it takes almost no thought. (Still choosing a model? Back up to our composting toilet picks.)
Before first use
Add your composting medium to the solids bin before the first use. Coconut coir (sold as compressed bricks — add water to expand) is the most popular choice. Cover the bottom of the solids compartment with a 1–2″ layer. For layering toilets, line the bin with a compostable bag before adding medium.
During use
Liquids only: The diverter handles everything automatically. Sit slightly forward to ensure urine hits the diverter and not the solids compartment.
Solids: After use, add a small scoop of medium on top. For agitator models, give the handle or button a few turns to mix. For layering models, just add the scoop and close the lid.
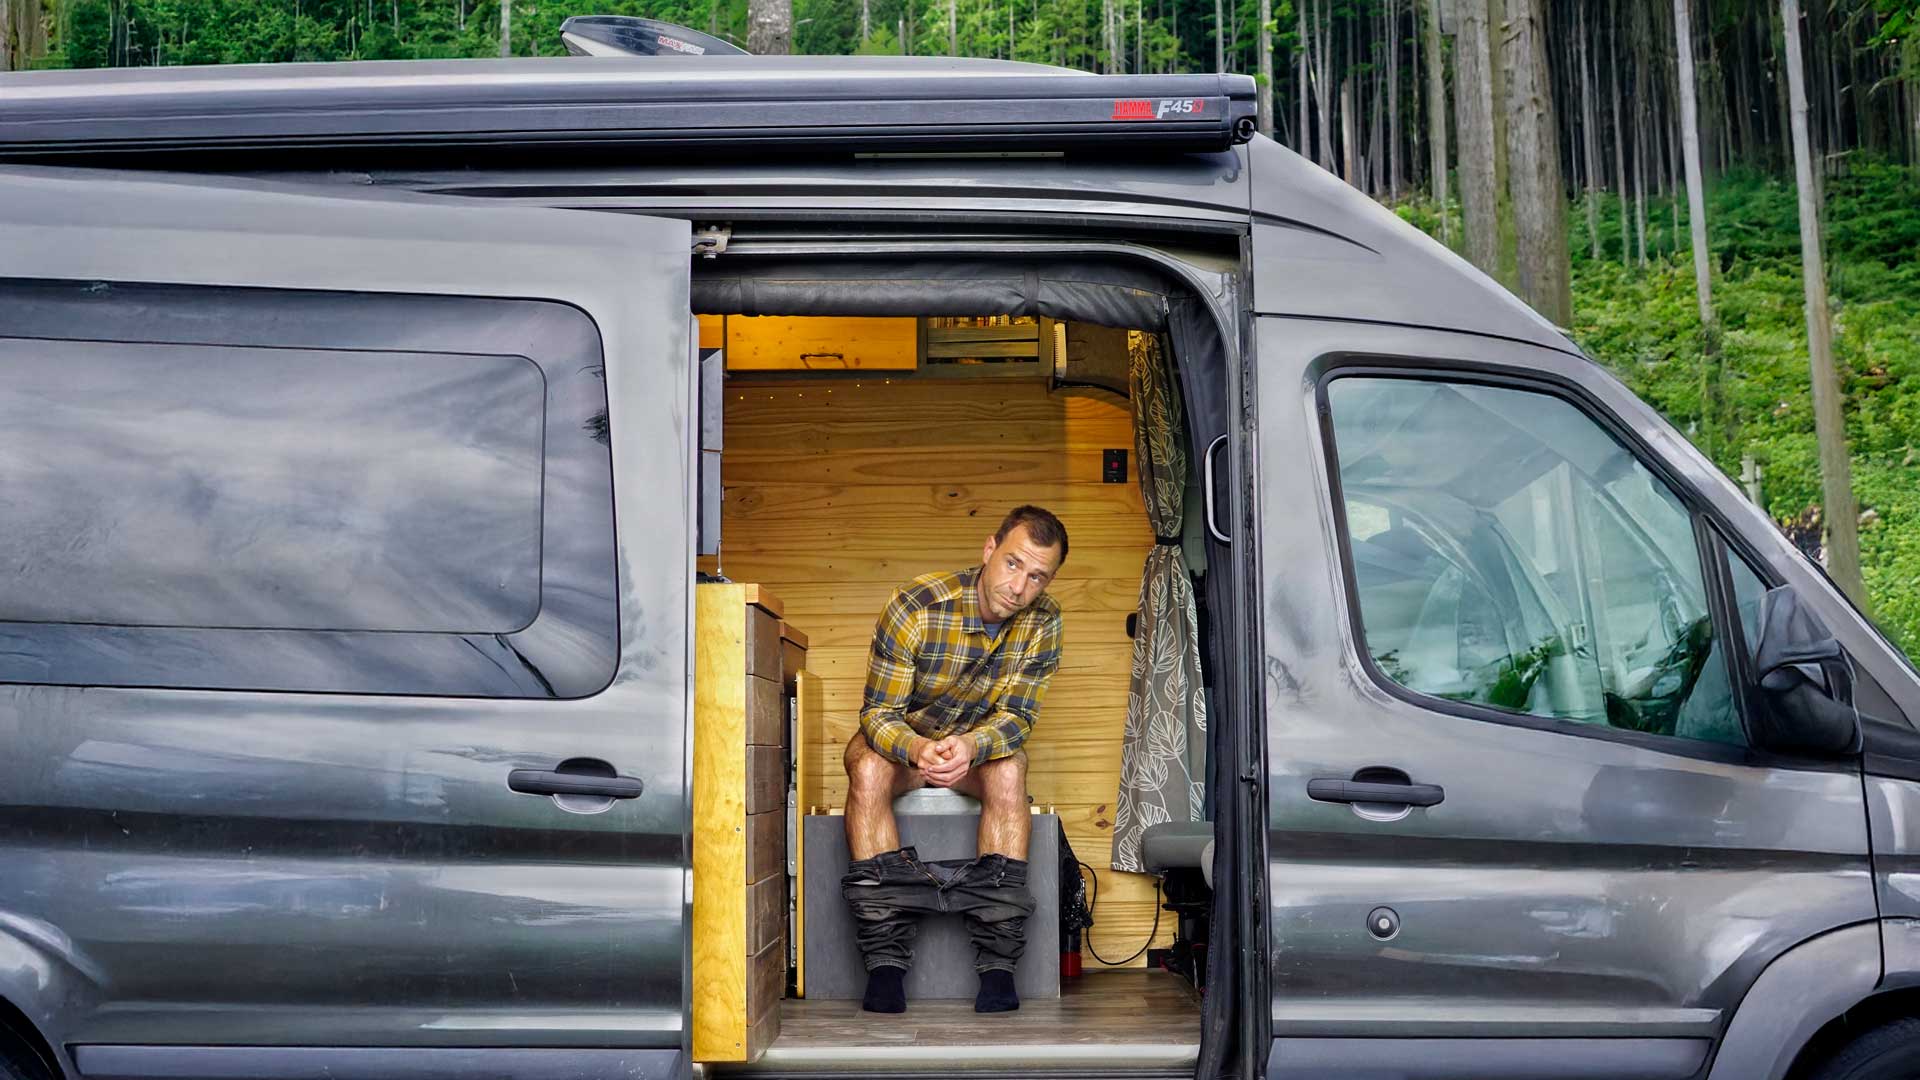
Toilet paper can go in the solids bin — single-ply or RV-grade TP breaks down faster and is recommended.
Emptying liquids
The liquid bottle typically needs emptying every 2–4 days for one person, more frequently for two. It can be emptied in any toilet, a grey water dump, or diluted and poured on non-edible plants (urine is an excellent fertilizer when diluted 10:1).
Emptying solids
How often depends on the model and usage:
- Layering toilets (Trelino, Cuddy Lite): every 1–2 weeks for one person
- Agitator toilets (Cuddy, Nature’s Head): every 3–6 weeks for one person
For layering toilets, lift out the bag, tie it off, and place it in a regular trash bin. For agitator toilets, tip the solids compartment into a bag over a trash can.
Odor tips
- Never mix liquids and solids — this is the single most important rule
- Keep the fan running continuously if the model has one
- Empty the liquid bottle before it overfills
- Use enough medium in the solids bin
- In hot climates, empty more frequently
Cleaning
Wipe down the bowl and seat as needed. For the liquid bottle, a rinse with diluted white vinegar or citric acid solution every few empties prevents mineral buildup. Avoid bleach or harsh chemicals — they can kill the beneficial microbes that help break down solids.
Cassette Toilets
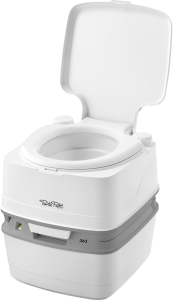
A cassette toilet has a small fresh water tank on top for flushing, and a removable sealed waste cassette (tank) below. When the cassette is full — typically after 15–20 uses — it detaches and gets carried to a dump station to empty and rinse.
Most cassette toilets use chemical treatment tablets or liquid to break down waste and control odor inside the tank.
Pros
- Familiar to use — closest to a regular toilet
- No special technique or medium required
- Sealed system means no odor during use
- Compact and affordable
Cons
- Requires chemical additives
- Dependent on cassette dump stations
- Emptying is unpleasant
- Not great for true off-grid travel
Best for: Part-time travelers and weekend warriors who stick to campgrounds and RV parks.
Price range: $80 – $350 USD
Models Compared
The cassette toilet market is dominated by one brand: Thetford. Their Porta Potti line covers everything from basic weekend-use models to larger-capacity options for extended travel.
Our own cassette time predates the van: the cabin we used to stay in had one, and emptying that mix of poop and urine is what pushed us to composting. If the chore doesn’t faze you — or your nights are mostly at campgrounds with dump stations — a cassette is the cheapest route to a proper-feeling toilet.
| Model | Fresh Water Tank | Waste Tank | Price |
|---|---|---|---|
| Thetford Porta Potti 135 | 5.3L | 10L | ~$65 USD |
| Thetford Porta Potti 365 | 15L | 15L | ~$120 USD |
| Thetford Porta Potti 565E | 15L | 21L | ~$175 USD |
The 565E feels significantly more like a regular toilet, and the 21L waste tank gives a reasonable interval between empties for one or two people. If we were buying a cassette today, the 565E is the one we’d get.
On additives: the greener enzyme-based tablets are the safer default — some dump points ban the formaldehyde-based blue stuff.
Note that the Porta Potti line is the portable end of the market: Thetford also makes bench-style cassette toilets (the C220/C260 series) that install permanently, with the cassette pulled out through an exterior service door — the setup you see in most European factory motorhomes. And if you install one and change your mind later, there’s an exit ramp: the Clesana C1 sells with an L-adapter shaped to retrofit into the Thetford C220/C260 cutout.
Bucket / Bag Toilets
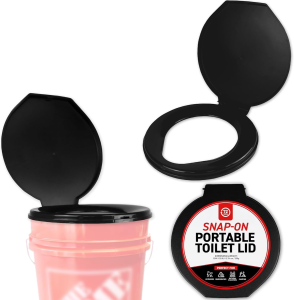
Bucket toilets are exactly what they sound like — a sturdy bucket with a fitted seat lid, lined with a heavy-duty bag. After each use, a scoop of cat litter, sawdust, or coconut coir gets added to absorb moisture and control odor. When the bag is full, it ties off and goes in the trash.
Some van lifers DIY their own from a 5-gallon bucket and a snap-on seat. Others use a urine-diverting version that separates liquids from solids, functioning similarly to a composting toilet at a fraction of the price.
Pros
- Extremely affordable (DIY under $30)
- No power, no installation
- Works anywhere
Cons
- Least comfortable
- Odor control relies entirely on the medium and emptying frequency
- Not ideal for full-time use
Best for: Budget builds, backup use, or a temporary solution during the build phase.
Price range: $20 – $50 USD
Dry Flush / Self-Sealing Toilets
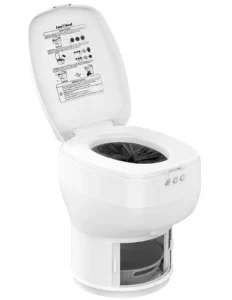
Dry flush toilets work like an automatic waste-sealing machine. After each use, a button press activates a mechanism that wraps the waste in a mylar liner and seals it — similar to a diaper pail. No water, no chemicals, no medium needed.
Depending on the model, waste collects in a multi-use cartridge (~15 uses on the Laveo) or each use is sealed into its own individual bag.
Pros
- Zero technique required
- Completely odor-free
- No venting or power hookup needed (rechargeable battery)
- Great for shared or rental vans
Cons
- Ongoing bag cost ($0.50–$1.25 per use depending on model)
- Not eco-friendly — generates plastic waste with every cartridge
- Not practical for full-time use
Best for: Part-time travelers who prioritize convenience, or vans used by guests/renters.
Price range: $700 – $2,000 USD for the unit + $0.50–$1.25 per use in bags
Models Compared
For a long time there was essentially one player in the dry flush toilet space: Laveo by Dry Flush. In the last two years this has exploded into a full category — the industry now calls them self-sealing toilets — with five brands shipping models. They all do the same fundamental job: seal your business into a leak-proof, odor-proof bag that goes in the trash. The difference is how the bag gets closed:
- Twist cartridge (Laveo): the whole ~15-use cartridge twists shut and is emptied all at once — simple, but a partly-used cartridge either gets tossed early or rides along until the next trip.
- Per-use seal (everyone else): each visit is heat-sealed into its own airtight pod, so nothing sits open between uses.
- Urine-separating + seal (CompoCloset S1): pee goes to a separate container and only solids get bagged — by far the cheapest per use.
| Model | Type | Size | Uses per Refill | Cost per Flush | Price |
|---|---|---|---|---|---|
| Laveo Dry Flush | Twist cartridge | 16″ W x 20″ D x 18″ H | ~15 | ~$1.10–$1.25 | ~$1,000 USD |
| Wrappon Trekker | Per-use seal | 15.8″ W x 18.6″ D x 16.7″ H | 50 | ~$1.15–$1.40 | ~$1,600 USD |
| Wrappon Sunny | Per-use seal | 14.2″ W x 18.5″ D x 16.6″ H (folds to 9.7″ tall) | 30 | ~$1.15 | ~$700 USD |
| Modiwell EVO LE-310 | Per-use seal | 17.5″ x 16″ footprint (folds to 10.75″ tall) | 60 | $0.58–$0.70 | ~$730 USD |
| Modiwell Elite R1808 | Per-use seal | 17.4″ W x 14.4″ D x 18.9″ H | 60 | $0.58–$0.70 | ~$900 USD |
| Clesana C1 | Per-use seal | 14.3″ W x 18.1″ D x 20.3″ H | ~40–50 | ~$0.50 | ~$2,000 USD |
| Clesana X1 | Per-use seal | 13.5″ W x 15.1″ D x 11.9″ H (folded) | ~50–60 | ~$0.35–$0.50 | ~$1,600 USD |
| CompoCloset S1 | Urine-separating + seal | 15.2″ W x 17″ D x 16.5″ H | ~25 (solids only) | ~$0.70 (solids only) | ~$1,500 USD |
Cost per flush is based on manufacturer refill pricing (2026). Wrappon figures are film only — their coagulant packs add about $0.55 per use. Modiwell refill kits include coagulant. The S1 consumes a bag only for solids, so liquid visits are free.
Laveo replacement cartridges (3-pack) run approximately $45–$55 USD, making the cost per use around $1.10–$1.25 — high for full-time use, but reasonable for occasional travelers.
Wrappon invented this category — the original was designed in Japan for in-home medical care, and overlanders adopted it because the aluminum-case Trekker tolerates being bounced around in a truck bed (it’s also a favorite for hidden-drawer DIY installs). The newer Sunny is the budget version: smaller, lighter, and about $700.
The Modiwell toilets appear to use the same internal mechanism as the Sunny, and the refill bags look interchangeable — which is good news: consumables you can source from more than one company are consumables you won’t get stranded without. The EVO LE-310 is the portable version; the Elite R1808 is shaped and sized like a residential toilet, collects the sealed bags in an internal compartment, runs ~100 flushes per battery charge, and costs about $0.58–$0.70 per flush — roughly half the Laveo’s running cost.
Clesana is the premium pick: Swiss-made, and the fit and finish shows it. The C1 is a fixed install with a full-height 18.8″ seat running on 12V; the X1 packs the same mechanism into a collapsible 12″-tall box and can run off an 18V tool battery for fully remote use. Ready.Set.Van, an installer with the C1 in about twenty client vans, reports zero complaints so far — at $2,000 it had better be good, but that’s a real field record.
CompoCloset currently has the S1 Dry Flush Toilet on pre-order and reached out to us with the following info:
The twist type (Laveo) needs to be emptied all at once, vs. the sealing type (S1) that cuts the bag off. With the twist type, if you only use it 7 times over a weekend, you need to bin the whole cartridge (15 flushes and lots of $$) or leave it to fester in your van till the next trip. 🤢 Also, the S1 dry flush only bags poop, which makes it about 5x cheaper to run! (And less plastic 🐠)
That urine-separating design is the S1’s whole pitch — a 1.7-gallon bottle up front collects the pee, so only solids consume a liner. New orders are estimated to ship end of August 2026.
We haven’t lived with any of these yet, so treat this as an on-paper comparison. But if we were choosing today: the Modiwell Elite is the value pick for a fixed install, the Clesana C1 is the premium pick with the longest field record, and the S1 is the one to watch once it ships — urine separation fixes the category’s biggest running-cost problem. For hands-on demos of all seven sealers, Ready.Set.Van’s showdown video is worth a watch.
Incineration Toilets
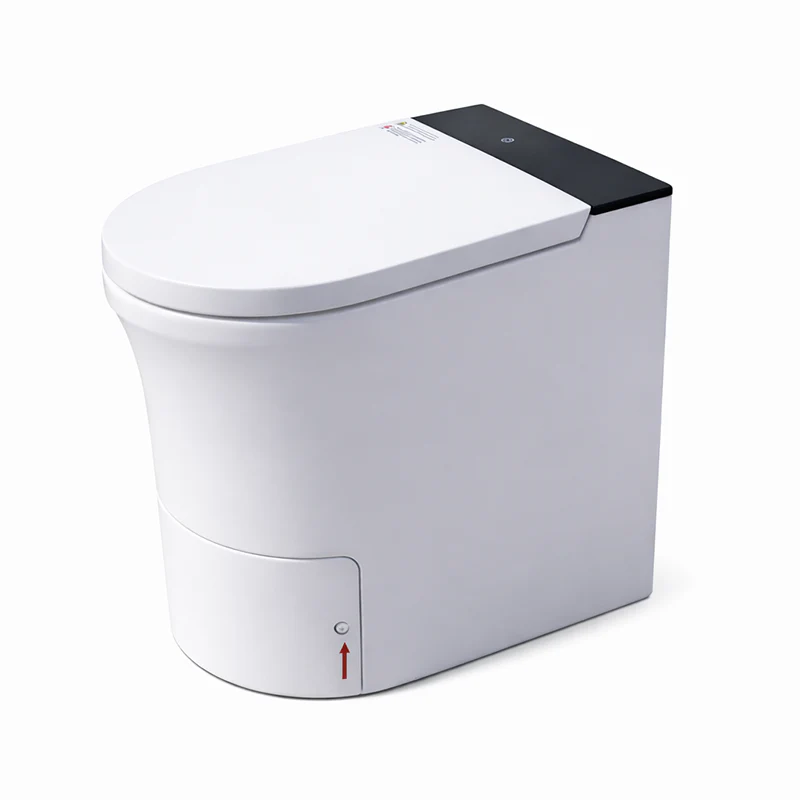
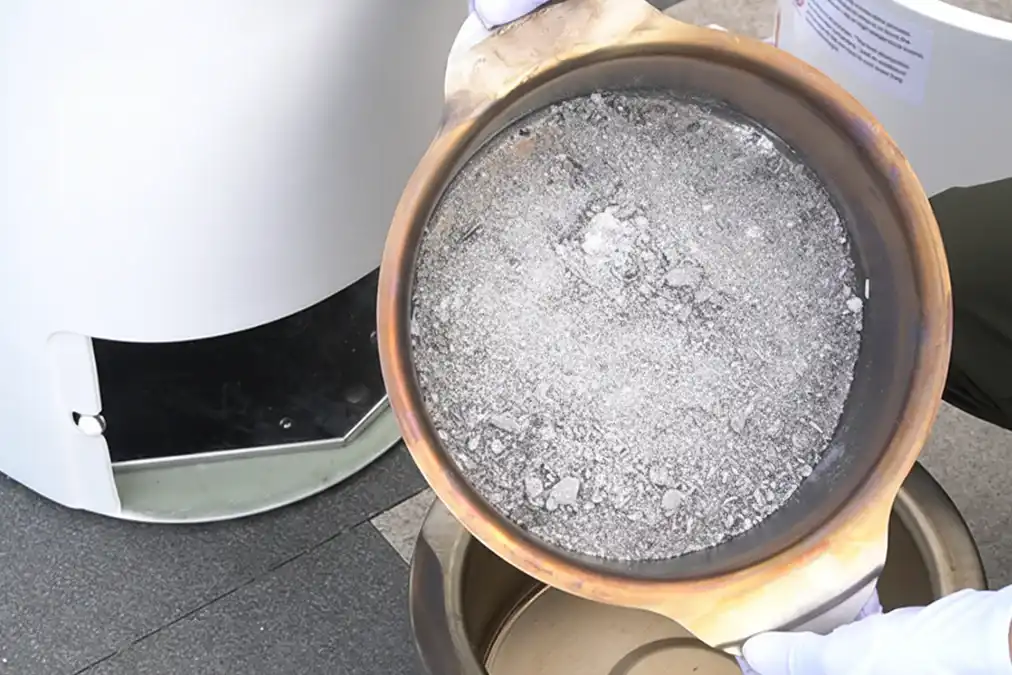
Incineration toilets burn waste to sterile ash — no water, no chemicals, no dump station required. There are two types: electric and propane.
Electric models (like the Modiwell T02 Electric Incinerating Toilet) draw about 1,700W and consume about 1.5–2 kWh per burn cycle, putting them out of reach for most van electrical systems without shore power or a generator.
Propane models (like the Cinderella Travel, purpose-built for RVs and motorhomes) are a more realistic option if your van already runs propane. They use LPG for incineration and only need 12V for the control board — so you’re not taxing your battery system. Cinderella rates the Travel at 140–180 g of propane per burn, so a 20 lb tank is good for about 50–65 flushes; full-time, that’s a tank every nine days or so. The catch: the Travel lists at about $4,450 USD (dealers discount to around $3,750), weighs 44 lb (20 kg), requires a dedicated vent pipe, and needs a bowl liner for every use (an ongoing consumable cost; see the full-time math). For most van builders, the price alone rules it out — but if you’re doing a high-end full-time build with existing propane infrastructure, it’s worth knowing about.
Final Thoughts
For most van lifers, a composting toilet is still the right answer: compact, odor-free, genuinely easy to live with, and it frees you from ever needing a dump station. Nine years on ours, zero regrets.
If the upfront cost is a barrier, start with a bucket toilet and upgrade later. If trips are short and convenience is the top priority, a cassette or self-sealing toilet gets the job done — and the self-sealing market is moving fast enough that we’re testing one in FarOutVan #2 right now. We’ll update this guide with what we learn.
Whatever the choice, having any toilet in the van almost always turns out to be worth it.




Our AirHead Composter has been going strong for some 4 years.
We picked over the Nature Head mainly because it saves a few inches side to side.
And you can empty the pee without opening the toilet up, which I thought that was a complaint with the Nature Head.
I don’t get the critique of the 5 gallon bucket – obviously, it only replaces the solid part of a diverting toilet. The people using the bucket pee in a bottle and dump that separately. This is what every vanlifer on Bob Wells’ channel has done in 10 years, it seems.
So it should be just as good as the diverting toilet, except maybe a bit more “learning curve?”
Also how is a bucket less discreet than a full size toilet?
The bucket is a bit less convenient that the diverting toilet, it’s fair to say. I know people that’s can’t do only one task at the time…
That’s why we conclude with “if the upfront cost is a barrier, start with a bucket toilet and upgrade later. If convenience is the top priority and full-time use isn’t the plan, a cassette or dry flush toilet gets the job done.”
We did the bucket at first when we didn’t have a toilet, it did the job for a while 🙂