Adding an aftermarket window to a van seems like an intimidating task, but it is actually totally doable by the average DIYer. When you think about it, it is very similar to adding a roof fan… which is an -almost- obligatory rite of passage for all DIY van builders! We personally didn’t add a window to our van, but it is part of our “If we had to start over” list… Keep reading!
Disclosure: This post contains affiliate links, which means that if you click a product link and buy anything from the merchant (Amazon, eBay, etc.) we will receive a commission fee. The price you pay remains the same, affiliate link or not.

1- Theory
1.1- Ventilation
The first obvious role of a window is ventilation. A proper ventilation system typically has an exhaust and one/several intake(s):
EXHAUST
The Maxxfan has an integrated cover that prevents rain from entering the van, making it possible to run at all times. That’s a big deal because ventilation is essential during episodes of rain. We’ve been living full-time in our van since 2017, and we highly recommend the Maxxfan:

INTAKE
The same volume of fresh air must continuously replace the air volume “removed” by the roof fan; otherwise, the ventilation system will not work. In most cases, there is no fan to push the air inside: as the exhaust fan creates a negative pressure inside the van, the air is “sucked” into the van by any intake available (windows, holes, cracks, etc.) These are referred to as passive intakes.
A passive intake offers a lot of resistance to airflow; too small, and your intake won’t be effective! Ideally, the intake should have a similar area as the exhaust. For example, the Maxxfan exhaust is 12in diameter, with a surface area of 113in2. It’s quite large, so a window is ideal for passive intake.


Adding a window helps controlling:
Temperature
Thermal comfort for a person at rest is around 72±4F (22±2°C). While an air conditioning unit can be used to control ambient temperature under extreme heat (actually, unless you have a generator or you are plugged to shore, it’s not too realistic for off-the-grid applications), ventilation can do it, too, under normal conditions for a fraction of the energy bill.
Indoor Air Quality
Indoor pollutants can cause respiratory problems, and proper ventilation helps recycle the polluted air with fresh air.
Non-exhaustive list of pollutants:
- Cooking Odors and Fumes
- Carbon Monoxide
- Other’s Farts
- Burning Candle (yep! Google it!)
Relative Humidity
Thermal comfort also depends on temperature and relative humidity: the ideal range is 50±20%. We have a pretty solid article about controlling moisture and condensation; we think you’ll like it:

Air Movement
Humans are more comfortable when air is not stagnant. A window works great, but help is sometimes welcomed:

1.2- See The Outside World
Of course!
B-U-T! There are a few things to keep in mind:
Storage
Small spaces are fast to clean, but they get messy in the blink of an eye. Trust us! When living in a van, the key to sanity is organization. Having multiple storage options all over the van is important so that each thing has its own dedicated place and can be easily put back to where it belongs.
Windows reduces storage potential; it’s a trade-off. That being said, we could add windows without removing storage in our layout. That’s food for thought!

winter
Windows are the weakest link in heat loss. Each additional window reduces insulation capacity and allows cold drafts. So, if you intend to use your van as a ski hut like us (faroutride.com/winter-vanlife), think twice before adding windows all around.
Finally, adding insulated window covers is a must to keep the van comfortable; it makes a huge difference, and we can’t emphasize that enough!

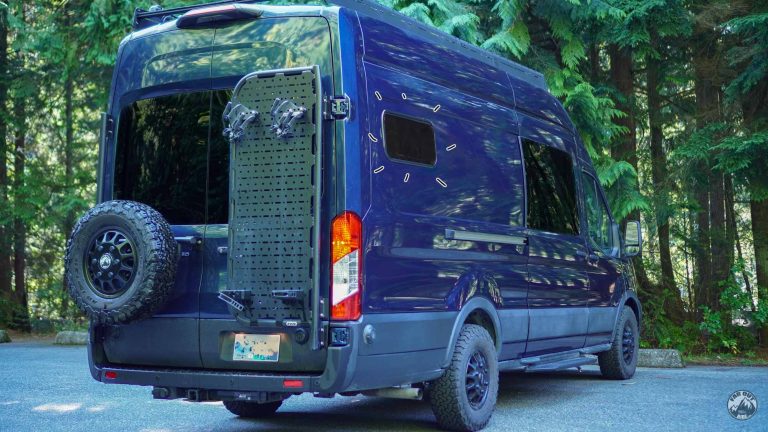
Rear Door Windows
Number of times we removed the insulated window covers (faroutride.com/insulated-window-covers) from the rear door windows to look outside: ZERO.
This seems to be a consensus among people who have a layout similar to ours (garage and raised bed). It’s romantic to think we wake up and look outside and stay in bed and all, but that just doesn’t happen in real life. If we want to see outside, we grab a coffee and go outside. In winter, we get out of bed, grab a coffee, and hang out by the “fireplace” (a.k.a. the Webasto faroutride.com/air-heater-installation) while looking through the sliding door window.
The bottom line is that if your van comes with factory rear windows, that’s fine. But we think it’s not worth adding them if you have a garage + raised bed layout.
1.3- Window Location
Most folks position their roof fan towards the rear of the van. We personally cook (stove/oven) a lot inside the van during winter, so we positioned our roof fan towards the front of our van near the kitchen range as shown on the next photo.
Ideally, you want your exhaust (roof fan) and your main intake (window) far apart from each other. The goal here is to create a draft that travels through the van’s length to optimize circulation and ensure air is recycled in every corner.

2- Van Window Types & Where To Buy

![]()


3- Window Installation
We plan on installing a half-slider bunk window during summer 2019, so here is the planning:
We still haven’t install a window on this van, but we did on FarOutVan#2 !
On Second Thought…
We didn’t add a window to our van, but it is part of our “If we had to start over” list… During those hot summer days, a window would definitely increase ventilation, and purging hot air while driving would be neat!


Looking for side wondows in my 2021LDV Van G10 , side doors
My husband and I have started our sprinter build. Love your page and the details you have shared, thank you! We plan on using the truck bed liner paint, as it’s more durable and has that rugged look I like. My question is, do you recommend cutting the and installing the windows before or after painting the exterior?
Hello there from Ashland, Oregon. I’m starting to build out my extended high roof AWD dually. Trying to decide on T-Vent vs Slider for door and second row windows. I have a two person bench for passengers and fresh air and visibility are needed. Also think the slider door could help bring in light and add ventilation. I see you guys have a slider on your door. Do you have any thoughts you could share about pros cons of the two types? I will be winter camping a bit so wonder about snow blowing in slider and safety from break ins vs T Vent? Any thoughts much appreciated.
Hello Isabelle and Antoine,
We have our windows! Still waiting for the van to arrive, though 🙁
I LOVE the idea of using the electric metal cutter shear for installation of the window (as well as the fan, if possible). According to the description on the Amazon link, the shear will cut through “up to 18 gauge sheet metal.” Do you happen to know the gauge of the Promaster walls?
Thank you so much for your incredibly detailed site. We will be referring to it throughout our build.
Don’t know the metal gauge of the ProMaster, sorry. Please note that some people have reported that the shear cutter does not deal well with corners and with internal bracing, so maybe a jig saw will do better after all… We removed the shear cutter recommendation until we try by ourselves.
This may be silly but I am currently waiting on my window to be shipped (was supposed to ship 1/15/21, now saying April :(…the window is 11 3/4” x 33 1/2” or :9- can’t remember exact numbers). Do you think it will weaken the integrity of the roof or anything else to cut through the ribs (not sure what they are called) to install the window? It will be placed near the front on the passenger side.
Read the BEMM to be sure. There should be a section called body that shows you all the places to avoid drilling BUT Im not sure about your question specifically because I only skimmed through the BEMM for now and I am not sure what you mean by “rib”. If you do cut through anything to install you will probably have to frame and reinforce it.
Thanks for the detailed write-up. Great job! My wife and I are planning to convert a LWB non-extended Transit for winter camping, but we’re waiting for it to be made by Ford. I like your suggestions for putting the fan at the front. Did you mount your fan as far forward as possible? If so, could you provide a dimension to reference its location that is _not_ specific to your LWB extended roof (for example, one of the factory mounting holes for the roof rack that is common to extended and non-extended roofs, or some other feature)? If we use the forward location, I’m trying to estimate how much room we have for solar panels. Thanks!
Salut, au lieu de placer une fenêtre half side bunk, penses-tu que 2 Maxxfans aiderait la ventilation? Merci Alain
On a vu plusieurs setup comme ça, en effet. Ca l’air de bien fonctionner!
Hi ?? Building out the same van I was wondering what the dimensions of your bed are and if you are happy with the size?
Hi. Dimensions are here: https://faroutride.com/platform-bed-installation/
Yes, we’re happy with it! 🙂
Hi guys,
Our experience mirrors that of others. We put a half bulk window in the rear passenger side. Saber saw worked well, and by sawing at an angle, we also took out the majority of the offending reenforcement metal that interferes with the interior trim of the window.
In terms of ventilation, worked great. We were in California in August, and the temp in the bed area at night was what ever the outside temp was. We sleep transverse, so the window breeze was coming in right in our faces, nice.
Anyway, one problem was figuring out a window _still_ (or _stool_ is actually the correct name I think). It was a challenge, but very important. The window is water tight EXCEPT when we leave it open. (Duh.) We left for our first trip before doing anything. We would go out for a ride, leaving the window open for ventilation, and come back with water in the van after a thunderstorm. This was because the water went thru the screen, into the van wall and came out at the bolts for the bed supports. Very bad. Later, when I took apart the wall to see what was going on, the wood at the bed supports was already molding and that was only three months after the installation. (!)
Our solution was to use oak corner guards (google: evertrue lowes oak corner guard 1″ x 8′ x 1″). Because we sleep transverse, a 3′ by 2′ portion of the wall is quite thin where our heads (and feet on the drivers side) are, only insulated with 1/2″ foam plus 1/4″ mini cell. So, the corner guard is the stool, and all cracks were carefully sealed with silicone. Now, when it rains, it goes into a towel that we strategically leave on the bed, no problem. Even if the bed or pillow should get a little wet, it quickly drys, no problem.
One other problem is, when sleeping at -11C, those windows ice up, and good luck opening them. Maybe another window cover? We haven’t figured this one out yet.
Anyway, the half bulk window is great, highly recommended.
Cheers, Don