Swivel seats help optimizing the precious space in a campervan conversion or in a work van. The Ford Transit, Sprinter van, and Ram ProMaster can be ordered with factory swivels (with some limitations), but installing an aftermarket adapter is often cheaper and it’s actually quite a simple task. In this article, we’ll go through the installation process of swivel seat (passenger & driver) into our Ford Transit van. Let’s get into it!

Disclosure: This post contains affiliate links, which means that if you click a product link and buy anything from the merchant (Amazon, eBay, etc.) we will receive a commission fee. The price you pay remains the same, affiliate link or not.

Swivel we recommend
We had the opportunity to try a few different swivels during our first years of full time Vanlife: Scopema, Amazing Auto, SwivelsRus and DiscountVanTruck. Our comparison criterias for selecting the best swivel to buy are: height, weight, installation, operation, wobble and squeaking. You can read more in our Swivel Seat Review & Comparison.

Too long didn’t read: Scopema is the swivel we preferred and we recommend!
Scopema Swivel Seat Adapter
(Ford Transit, Sprinter Van, Ram ProMaster)
Get 5% Discount with “FarOutRide” Coupon at Checkout
Benefits of installing swivel seats
A swivel seat is a bit like the swiss army knife of your van interior layout; it adds versatility and create extra space in your campervan or your work van. Indeed, you can unlock the full potential of those single-purpose cabin seats and turn them into so much more:

Dining

Living Room

Gear Room

Good to know
Factory swivels
The Ford Transit can be ordered with factory swivel seats (for more info on all options to consider: Ford Transit Order Guide for Campervan Conversion). Let’s see the pros and cons:
Pros
- No installation.
- Shorter base (better driving posture).
Cons
- Not offset (like most aftermarket options). To complete a 180° rotation you need to play with the seat settings (fwd/rear) in order to clear the steering wheel, the center console and the door panel.
- Only available with 4-way manual seat.
- Safety alarm constantly on when key is in the ignition and the swivel is not facing forward. (we were told you can simply unplug the speaker wire under the seat to turn off the alarm!).
- Can’t start the engine when a seat is not locked in forward position.
- Costs more than aftermarket.
10-way power seats
Scopema swivel can be added with the 10-way power seats. Note that you will have cut the lower part of the outside trim piece that houses the seat controls (see this example on the Ford Transit USA Forum) AND raise the seat with a few spacers so the motor doesn’t catch. Amazing Auto has swivels specifically for the 10-way power seats, so that no trim is required (at the detriment of the height and driving posture). Because the seat has to be moved forward/back during the rotation, some people have reported that the power seat makes it a bit irritating if you have to swivel often (e.g. full time Vanlife). Indeed, the forward/back motion is quite slow because of the motor.


Dual AGM batteries
Yes, an aftermarket swivel can be added on the driver side with the dual AGM batteries option. This is actually what we have in our van, so keep reading to find out!
E-brake (emergency brake/parking brake)
In 2020 Ford introduced an electric e-brake to replace the standard hand e-brake. This is a very welcomed change, otherwise the hand brake has to be lowered for the seat to clear the hand brake during the rotation. Please note that not all Ford Transit models includes the electric e-brake: only the single rear wheel axle with 9,500lb (or less) payload:

Our new 2021 Ford Transit has the electric parking brake:


Our 2016 Transit had the manual hand brake in between the seats; we have the procedure to lower the hand brake (Section 6) for those of you who need it.

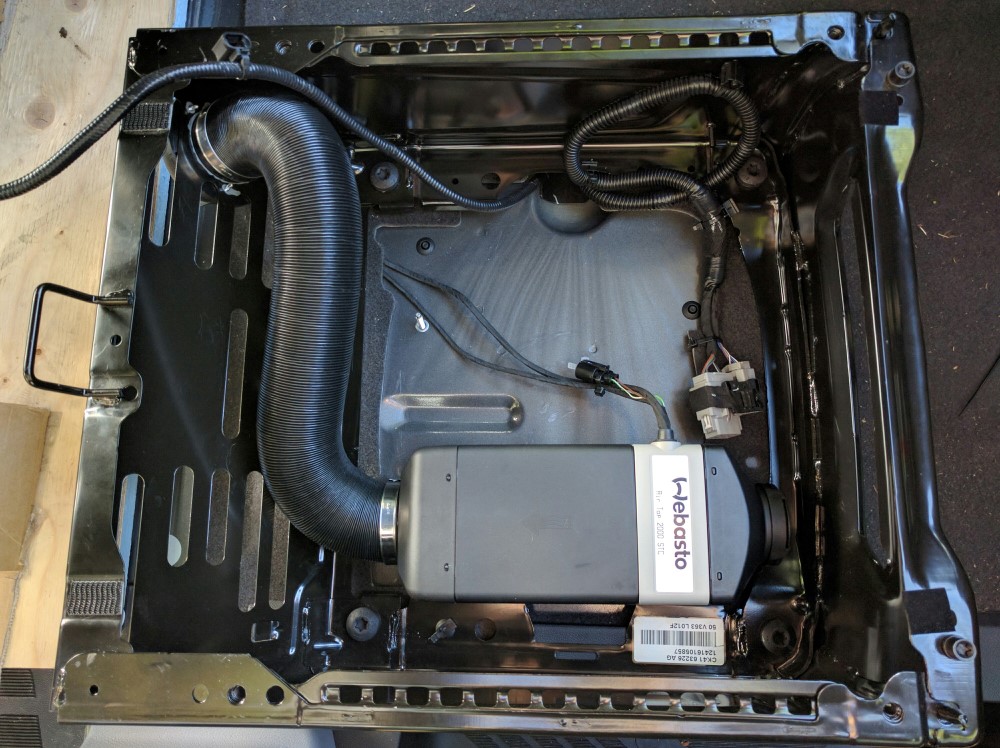
Espar/Webasto heater
You can install an aftermarket swivel seat in a Transit van with a Espar/Webasto (gasoline/diesel) heater installed under the passenger seat. This is actually the configuration we had in our 2016 Transit van! We do have an extensive Espar/Webasto Air Heater Guide which covers the theory (installation requirements, choosing the correct size, effect of altitude, etc.), the installation (ALL of it!) and our long-term feedback (issues we had and how we fixed them).

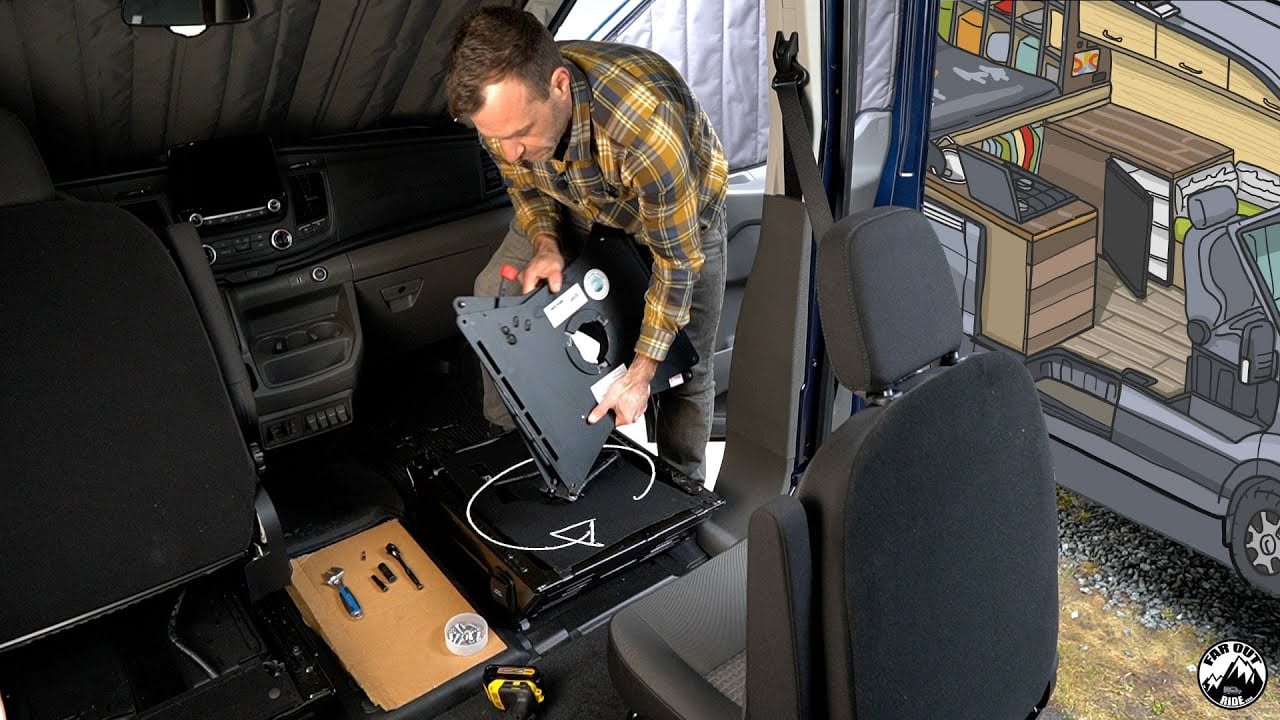
Passenger swivel installation
Time
1 hour
Cost
$399 USD
Weight
30 lbs
Material
| Item | Description | Buy Link |
|---|---|---|
| Scopema Swivel (passenger side) | Added between the seat base and the seat | The Swivel Shop |
| Rust-Oleum | To touch up the trimmed baby seat anchor | Amazon |
Tools
| Item | Description | Buy Link |
|---|---|---|
| 7mm, 10mm & 13mm Hex Socket | To disconnect/connect the electrical harness, uninstall/install seat | Amazon |
| Adjustable Wrench (or 13mm wrench) | To install the seat on the Scopema swivel plate | Amazon |
| 5mm Hex Bit (or 5mm Allen key, same thing) | To install the Scopema plate on the seat base | Amazon |
| Mini Hack Saw | To trim the baby seat anchor | Amazon |
| Sand Paper | To smooth the sharp edges after trimming the baby seat | Amazon |
| Banana | Required for Step 4.6 |
Remove the Ford Transit factory seat
4.1.1. Slide the seat backward and remove the screw (7mm hex socket) to disconnect the electrical harness under the seat:

4.1.2. Pull the retaining clip down to detach the electrical harness from the seat (no tool required, it’s fairly easy):

4.1.3. Still with the seat backward, remove the 2 front screws (10mm hex socket):

4.1.4. Slide the seat forward and then remove the 2 back screws (10mm hex socket):

4.1.5. Put the seat aside, get into the seat base, and hand-pull the 2 clips to detach the electrical harness from the seat base. This is to give the electrical harness some slack during the rotation:

Keep it up!
Trim the Seat Rails (Optional)
4.2.1. During the rotation, the seat rails may rub against the door (passenger or driver) and might eventually damage it. We didn’t do anything to mitigate that on our previous van, and we honestly don’t think it’s that big of a deal:

4.2.2. But if you’d rather do something to prevent damaging the door, now would be a good time to trim the rails. We trimmed only a small angle and that was enough to clear the door (don’t forget to touch up with paint):

Install the swivel adapter
Place the Scopema swivel on the seat base, route the electrical harness in the center, and install the 4 screws (5mm hex bit or 5mm Allen key). The holes might not be perfectly aligned, that’s OK. Start by installing each screw with just a few threads in, then once all 4 are fitted, torque them all the way in.

Reinstall the Ford Transit factory seat
4.4.1. Place the seat on top of the Scopema swivel and route the harness behind the bar (towards the back of the van) so it doesn’t catch during the rotation:

4.4.2. Still with the seat forward, install the bolts, washers & screws (13mm hex socket on top, 13mm wrench/adjustable wrench at the bottom):

4.4.3. Slide the seat backward and install the bolts, washers & screws (13mm hex socket on top, 13mm wrench/adjustable wrench at the bottom):

FIY. This is the correct way of assembling the 13mm bolt, washer & 13mm nut at the seat/swivel interface (2 previous steps):

4.4.4. Reconnect the electrical harness (7mm hex socket):
We’re almost done!
Trim The Baby Seat Anchor
The baby seat anchor interfere with the rotation and has to be trimmed.
4.5.1. We used a Dremel to trim the baby seat anchor, but we would recommend a mini hack saw instead. Sparks (tiny metal chips) can stick to surfaces and promote rust. Metal chips from a mini hack saw would be easier to catch!

4.5.2. Smooth the sharp edges (by sanding), clean & touch up the bare metal with corrosion-resistant paint. We used Rust-Oleum, but it’s a bit messy to spray so we first sprayed some in a small jug and applied it with a brush for a nice finish.

Swivel check
For the very first rotation, slowly swivel the seat and make sure the electrical harness is not catching. All good? Sweet, you can go crazy with it now!

Video
And now let’s do it again for the camera!
That’s it for the passenger swivel!
Driver swivel installation
Time
1 hour
Cost
$399 USD
Weight
30 lbs
Material
| Item | Description | Buy Link |
|---|---|---|
| Scopema Swivel (driver side) | Added between the seat base and the seat | The Swivel Shop |
Tools
| Item | Description | Buy Link |
|---|---|---|
| 7mm, 8mm, 10mm & 13mm Hex Socket | To disconnect/connect the electrical harness, remove/put back the metal plate, uninstall/install seat | Amazon |
| Adjustable Wrench (or 13mm wrench) | To install the seat on the Scopema swivel plate | Amazon |
| 5mm Hex Bit (or 5mm Allen key, same thing) | To install the Scopema plate on the seat base | Amazon |
| 5/8″ Spade Bit (or drill bit) | To make hole in battery box cover | Amazon |
| Dremel with Cutting Wheel | To make cutout in battery box cover | Amazon |
Remove the Driver seat
Removing the driver seat is the exact same procedure as for the passenger seat (refer to Section 4.1 for the photos):
- Disconnect and unclip the electrical harness (7mm hex socket).
- Remove the 4 screws (10mm hex socket).
- Optional: Trim the seat rails to prevent damaging the door (hack saw or Dremel).

Reroute the electrical harness
The Scopema swivel plate sits completely flush with the seat base, so there’s no more room for the electrical harness. In the following steps, we will reroute the harness inside the battery box:


5.2.1. Drop the swivel in place and trace the center hole on the plastic cover (you’ll use this later!):

5.2.2. Now put the swivel adapter away and remove these two screws (8mm hex socket):

5.2.3. The electrical harness is secured to the metal plate with a rubber grommet and a clip. Remove them to free the harness:

Removing the battery box cover exposes the battery terminals. Be very careful not to create a short between the positive terminals and the van chassis (e.g. with the metal plate or tools).
5.2.4. Remove the metal plate and the battery box plastic cover, then reroute the electrical wiring harness as follows:

There is a pre-cut slot in the battery box (nice!). Route the harness through it and slide the rubber grommet in.
We secured the harness with a cable tie, otherwise it would chafe against the sharp edge of the battery terminal (vibration + chafing = danger).
Route the harness between the two batteries.
This is where the harness will exit the battery box (next steps).
5.2.5. Drill a hole (5/8″ drill bit or spade bit) where the harness will exit the cover and create a cutout (we used a Dremel) to slide the harness all the way to that hole:

5.2.6. Slide the electrical harness all the way to the hole, snap the plastic covers back in place, put back the metal plate with the two screws (8mm hex socket). Looking good!

Install the swivel adapter
Place the Scopema swivel on the seat base, route the electrical harness in the center, and install the 4 screws (5mm hex bit or 5mm Allen key). The holes might not be perfectly aligned, that’s OK. Start by installing each screw with just a few threads in, then once all 4 are fitted, torque them all the way in.

Reinstall the driver seat
Reinstalling the driver seat is the exact same procedure as for the passenger seat (refer to Section 4.3 for the photos as needed):
- Install the 4 screws, washers & nuts (13mm hex socket and wrench).
- Connect the electrical harness (7mm hex socket)

Swivel check
For the very first rotation, slowly swivel the seat and make sure the electrical harness is not catching. All good? Sweeeet!

We’re done with the driver swivel!
How To Lower The E-Brake On The Ford Transit (Optional)
If you have a Scopema swivel and the manual hand brake (e-brake) on your Transit, it must be lowered to create clearance for the rotation. Here is how we did it on our first van conversion (Ford Transit 2016)! Note that we didn’t have the Scopema Relocation Bracket at the time, so today, it should be a bit easier.
6.1. Remove the 2 plastic covers by pulling them up:
6.2. Got it!

6.3. Here is the idea of this modification: we take the 3 existing attachment points (start of arrow) and re-locate them lower in other existing holes (end of arrow). Not clear? Keep reading!

6.4. To remove the metal plate, we need to remove these 2 screws:

6.5. All the batteries posts can be detached. The two batteries are “linked” together with this small tube (to locate in the picture, follow the arrow head). It looks like it is a venting tube. It can be detached (and re-attached later, no problem) to remove each battery individually (unless you’re much stronger than me).

6.6. The two batteries are located in a plastic basket. Remove it!

6.7. You can now remove the 3 screws that attach the e-brake from inside of the seat base (we have no picture, but you’ll see, it’s pretty obvious). The e-brake is not yet free! Remove the 4 nuts that attach the metal plate to the seat base and trim the plate as shown to be able to remove it:

6.8. Then, disconnect the e-brake electrical wire (at the red arrow).

6.9. The nut below is welded. We need to remove it, because we will use the hole that is under the nut.

6.10. The nut is gone! Sweet!

6.11. We’re about to lower the e-brake, but doing so makes the cable housing rub with the sheet metal. Indeed, it off-centers the cable housing through the cutout (the rubbing happens below the van, not shown here).
6.12. We must prepare a device to protect the cable housing from rubbing with the sheet metal. We kept the sheet metal that we trimmed when installing the Maxxair Fan! Neat!

6.13. We will now lower the e-brake. The back screw fits nicely, the front screw “fits” in the large cutout (where the e-brake switch wire grommet was). The cutout is way too big, but adding a fender washer will make everything secure! The third screw (the lower one) is no longer used… (but we feel that it is strong enough with only 2 screws):

6.14. We must now crawl under the van to install the part that will protect the cable housing from rubbing with the sheet metal. We fixed it with a worm-drive clamp:

6.15. We’re not done just yet! See, the airbag control module is located just forward of the e-brake. The metal bracket that we removed previously was acting as a shield, since the module is supposed to be pressure-sensitive.

6.16. We need to modify the metal bracket, and put it back in place.

6.17. Re-connect the e-brake electrical wire previously disconnected and put everything back in place!
Unfortunately, the two plastic parts that we first removed do not fit anymore, but this is only aesthetic. We still have to do something about that… trim them or something.
We’re done!
Long Term Review
Back in 2016, on our first Ford Transit van conversion, we installed cheaper swivels to save a few bucks. After a few years of full time Vanlife, we upgraded for the Scopema and we didn’t look back. At the time of writing these lines, we’re building our second van and choosing Scopema again was a no brainer. They do cost more, but the driving ergonomics is much better and they operate soooo smoothly. In our opinion, it’s worth paying a little extra for something we will use almost everyday and for a long time. For more: Swivel Seats Review and Comparison.
Conclusion
If you’re reading this, there’s a pretty good chance you’re just about to start your own van conversion and you’re a bit stressed out about it. It’s totally normal! Starting your build with the swivels is a good way to break the ice: it’ll boost your confidence and get you going.
That’s it for now. Hope we could help 🙂
#SwivelLife ON


look i understand the other tools.. but where does the fruit come into play? i tried to mash the banana into the swivel to lubricate the swivel motion and it ended up a bit messy.
I have to agree with no access to batteries after installing swivel without removing seats it’s worrisome. I bought both $$$$. I’d only get the passenger if I did this on another transit. Besides the ebrake installation was quick. You guys made some dough off me with your articles a few times! Lol
I’m planning to install a battery disconnect switch that is accessible near the swivel.
Hi there! Great post! I’m interested in getting the Scopema swivels, and I noticed that the link to purchase them above goes to travoiswest.com. I thought that was a bit odd, since it seems Travois has another domain name: travoisusa.com. Are both sites maintained by Travois? Is one of them unofficial? Just figured you might want to know!
Hello,
Before anything else I would like to thank you both for the easily digestible documentation that you have put up on the web for free.
You guys have saved me enormous amounts of time and research in my own transit build.
I find it funny, and thought I would let you know that I just purchased the SwivelsRUs swivel (Scopema is out of stock everywhere, and time is an issue for me.)
Their official guide to lowering the e-brake on the Americano Transit is just pictures of your guide in a pdf. I had a good laugh.
Huh, didn’t know that. Would you mind sending us the pdf? far out ride at gmail
Thx
Antoine
I’m the guy that asked about your long sleeve shirt earlier this year. I came across your post on Ford Transit forum regarding jacking up the van to install your air springs. I want to install Sumo Springs Bumpers and I need to unload the body to get these guys installed. As noted the normal jacket points are the rear axle but his will not unload the body. How did you do it? Did you use the hitch? From other posts I have found it’s not required to lift the tires off the ground just jack the body up 3-4 inches upward.
We have the factory hitch, so we used that to lift the van: https://faroutride.com/air-lift-springs-installation/
Hi Isabelle and Antoine,
Thanks for your great website. It’s one of the best that I have found.
I am still in my design phase of a Transit.
Have you made van layout changes since having two swiveling seats? I have only seen one layout (2021 Coachmen Beyond 22D online at https://www.youtube.com/watch?v=oFcAUyG6wcA at 1.35′ in) that fully takes advantage of it to expand the habitat to include the cabin. I think it’s a great way to extend the habitat instead of putting an insulation panel there to insulate it. I assume the current layouts are “historical” mindsets where the driver seat couldn’t easily made to swivel and perhaps also because of insufficient cabin insulation.
I have the following additional related questions, info or topics for next articles 🙂 :
. Do you provide such a layout design with engineering drawings?
. Could you provide information on how to insulate the cabin (roof, floor, windows, dashboard) now that it becomes part of the habitat? It seems that an insulation curtain placed between the seats and steering wheel could take care of the windows and dashboard. What about roof and floor?
. What software do you recommend to design campervans?
. FYI, I have seen a video of someone who replaced the emergency brake handle with a button on the dashboard: 24’25” into https://www.youtube.com/watch?v=OcxBq2cMtdc.
Thanks again
Hi guys,
Just installed my scopema swivel seats; however, we are not able to swivel driver seat with the door closed (the right top corner hits the door)
Do you guys have the same issue?
Thaaaaanks again
To complete a turn, we have to move the seat forward and incline the seat during the rotation; otherwise it won’t work. You’ll get use to it, you don’t even have to think about it after some time 🙂
Will this work if I want to put my 60/40 bench seat on a swivel? I have a 2020 Ram ProMaster 1500 and can’t seem to find a single bucket to fit.
I just installed the Scopema swivel for the driver, and noticed some quirks. I had my steering wheel column pulled out in its farthest position (i’ve got long legs), and the steering wheel will block the swivel in this orientation. Also, no matter what, my seat scrapes the door plastic panel when swiveling. Anyone else have these problems?
Cheers!
Watched you ride on BCpov video last week (nice riding). I love your blue plaid shirt/jacket. Brand and model? Thanks
Hey! In which video? Was it Isabelle or Antoine??
https://www.youtube.com/watch?v=fsyeAfmOjWE&t=18s Antoine, Greenish blue plaid shirt
Will
https://www.walmart.com/ip/Troy-Lee-Designs-Grind-Solid-Flannel-Long-Sleeve-Jersey-Large-Green/697612587
Did you ever give any thought to simply drilling new holes in the side of the seat to lower the EB?
Using the large hole to reattached the EB where the EB switch wire is located, how or where did you reroute this wire?
Antoine
I understand removing the brake handle and cutting the metal bracket allowing you to remove the bracket without disconnecting the brake cable. With that said is the bracket that holds the brake hand to the seat also attached or is part of the bracket that covers the air bag controller? It looks in the final install you simply took a grinder and cut the back half of the bracket that rests on the floor and is attached to the seat on the side.
Antoine
Just read the complete install story. I’m ordering the Scopema tomorrow from the ebay supplier in your link. My biggest concern is modifying the ebrake lower cover. What did you guys do? Simply grind or trim down to fit. I haven’t looked that cover but would trimming down the cover compromise the tabs used to lock into place?
We simply removed the cover… We planned on making something nicer but it never happened! You can probably trim it and make something nice.
Good luck!
I would like to add that. I just installed the scopema swivel chair for the passenger side and I have two notes.
1) the holes lined up perfectly.
2) they actually provided all the screws needed for the install
3) in your notes you say to purchase 3/16 screws. I’m quite sure that is too small as the screws provided with the scopema were likely 5/16.
4) I noticed when I swivel the seat there is a metal part that Scrapes into the plastic part of my transit seat near the back, closer to the door. With some trial and error I was able to use a utility nice to shave the plastic back. No more scraping !
5) Maybe I’m just kicking ass, but I was able to complete this install in about 90 minutes
Thanks for all your help, this has been a great resource. I am so excited to build this custom camper van so my partner and I can experience the abundance Of natural beauty in North America!
Hi Farouts:
Okay, been meaning to ask this Q for a long time, and now that you are contemplative mode, now is the time!
So.
Um.
Do you actually use the emergency brake? Ever? In the last three vehicles with automatic transmissions that we have had, the emergency brake stopped working after about 100K. And we never missed it.
And to be honest, it is in the way all the time. Maybe I might remove it entirely…
Morning,
We actually use it (and it’s still working fine at 110 000km) when we park on steep incline; I don’t want my 9000lbs home-on-wheel to go for a ghost ride!
I guess someone living in the prairies wouldn’t really need it, but we spend most of our time in the mountains.
Have a good one,
antoine
Hi!
So I just purchased the Scopema swivel seats for my 2019 Sprinter Van and ran into an issue. The bolt pattern doesn’t line up! The guy on Ebay said that I should just “wiggle” it! hahaha…it’s atleast 3/8″ out of alignment…definitely no wiggle room. I’m going to call Scopema direct and see what they say. My wife really likes the new height because her feet couldn’t touch the floor with the stock swivel seats that came with the van. Hopefully Scopema has a solution. I don’t really like the idea of drilling new holes either in the swivel sear or the base for that matter. Just wanted to let others know about this.
Thanks for the blog…really been enjoying reading it while we build our van out!
I just ran into the exact same problem. Did you ever get it sorted out? The factory swivels with the lowered seat base are still ridiculously too high especially when the seat will raise an additional five inches from its lowest setting. Probably a safety airbag issue otherwise I don’t get it.
You said: ” My wife really likes the new height because her feet couldn’t touch the floor with the stock swivel seats that came with the van”. How did you mount Scopema on factory swivel seat?
He might mean that his wife have tested out the stock swivel seats and ended up buying a van with regular seats.
Antoine,
Are you aware of a dual swivel setup for passenger side? I plan to use swivelrus or scopema but I cannot find a dual option! Hoping something is out there that y’all have heard of! Thanks!
What do you mean by dual setup?
Thanks so much for the thorough write up! I purchased both Scopema swivels and am just about done installing the driver side now (after a good amount of cutting, grinding, and drilling) using the newly added plate that Travois included to make dropping the E brake easier. It’s good because it keeps the alignment of the cable housing the same so no modifications are required there, but you do have to cut off some welded studs and bolts which is a pain.
My question is what did you do about the wiring harness under the seat, since it seems to get mashed up by the swivel as it rotates. The clearance under the swivel above the plastic battery case cover is not enough for the wiring loom that mounts under the seat in the harness. Wondering if you came up with a crafty solution other than removing the battery box lid assembly?
Geez, just realized I didn’t update the article 🙁 Thanks for the heads-up.
Year we re-routed the wire inside the battery case and modify the cover; I just added the pictures in the article. Hope that makes sense!
Antoine
Do the seats swivel a full 180 degrees or only 120 or whatever that knee-cap and foot crowded angle is that all the swivels seem to stop at? I see some photos on the web that allow 180, so I know it can be done. Why wouldn’t they all be that way? Who wants their knee and foot space jammed up in someone else’s?
Having said all of that, your review was very well done and the photos were a big help.
Cheers.
They do swivel a full 180 degrees, actually more than that (until they hit the wall). So yeah, the picture doesn’t show the maximum rotation. Cheers!