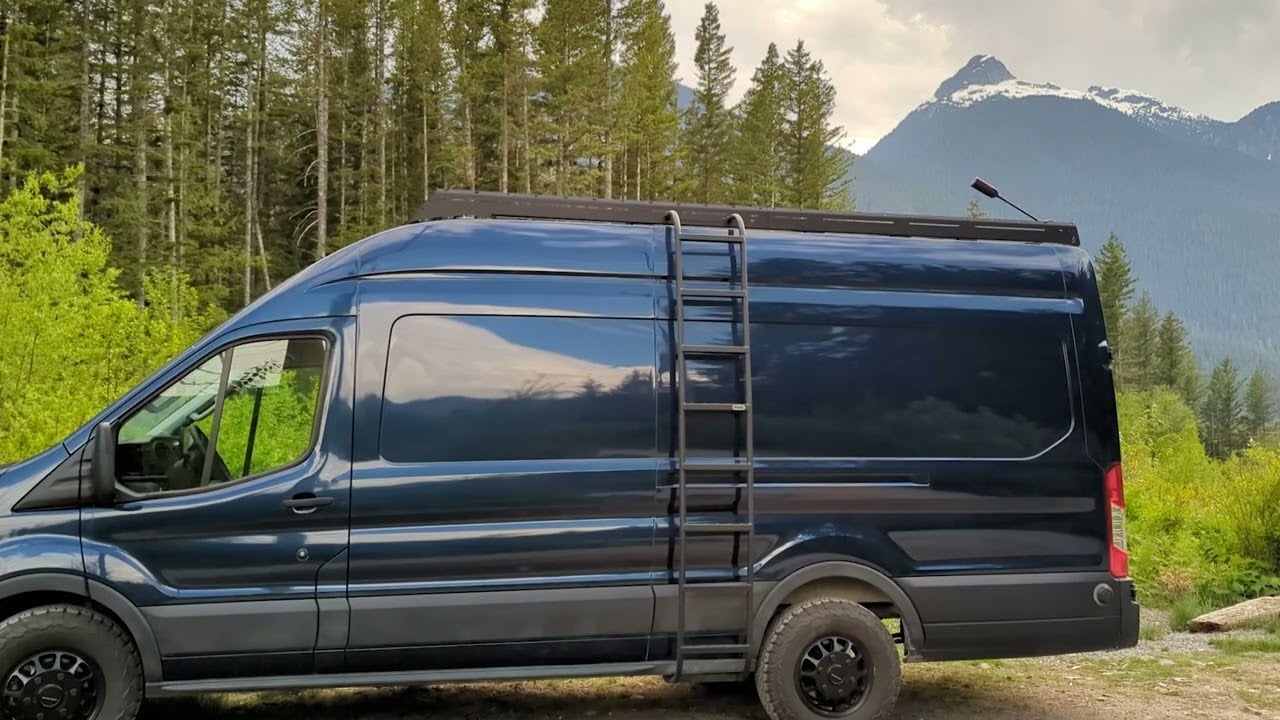
Here is the solution we came up with to remotely fold up and down an antenna on the roof of our campervan. It allows us to tilt our WeBoost antenna up or down (90 degrees) by the press of a button inside our van, neat! This electric motorized system would also work with HAM radio antennas (or any Series-C coax cable antenna) and on pretty much any vehicle (Van, Jeep, Car, etc.). Let’s get to work!
Disclosure: This post contains affiliate links, which means that if you click a product link and buy anything from the merchant (Amazon, eBay, etc.) we will receive a commission fee. The price you pay remains the same, affiliate link or not.

2026 Update: Removed From Our Van
We removed the WeBoost booster — and this tilt system with it — from FarOutVan 2 in July 2026. Nothing failed; we expected better data performance from a roof-mounted MIMO antenna feeding our router directly, and we don’t make phone calls, which is where a booster shines. The replacement is documented in our MIMO Antenna and Router installation. This guide stays up as a reference: the motorized tilt works with pretty much any coax-cable antenna (WeBoost, HAM, CB…), whatever your reason for wanting one.
Material and Resources
Time
2 hours
Cost
~$200 USD
Weight
1 lbs
Material
| Item | Description | Quantity | Buy |
|---|---|---|---|
| K9000 Motorized Antenna Tilt | To remotely fold the antenna up or down. | 1 | Amazon |
| Mounting Plate for Roof Rack (Optional) | Simplifies and speeds up the K9000 installation. Clean and low profile. Compatible with any roof rack that utilizes 10-series or 15-series aluminum extrusion crossbars (80/20 T-Slot profiles). | 1 | FarOutRide |
| Cable Entry Pad (or Cable Seal) | No-Drill / No-Screw Cable Entry Pad for Ford Transit (6.5mm – 10.2mm PG11) (Scanstrut Cable Seal) | 1 (1) | FarOutRide (Amazon) |
| WeBoost Drive Reach RV | (Or any antenna with Series-C coax Cable Assembly). | 1 | Amazon |
Tools
- 5/32 Allen Key
- Plastic Scraper
- Cloth & Isopropyl Alcohol
Resources
- Diamond Antenna K9000 Installation Instructions (DiamondAntenna.net)
- WeBoost Installation Guides (WeBoost.com)
- Roof Rack Installation (FarOutRide.com)
- EcoFlow Power Kit Installation (FarOutRide.com)
Good To Know
About Roof Racks
We didn’t opt for a roof rack on our 2016 Transit and we installed the solar panels with VHB tape (still holding strong since 2016!). As such we have to say that a roof rack is not mandatory, but it’s definitely a nice upgrade and provides a more secure and easy way to attach accessories such as solar panels, antenna, LED lights, storage box, etc. We went with a Flatline Van Co Low Pro roof rack on our 2021 Transit and we have a detailed write-up about it:


Back Torque Limiter Mechanism
The K9000 motorized mount features a “back torque limiter”. This internal mechanism acts as a spring and allows the antenna to fold down to absorb any impact (roof, branches, etc). Be aware that the spring only works in one direction:


Installation
Install the mounting plate to the K9000
NOTE: The K9000 comes with universal mounting brackets. These can do the job, but we wanted a cleaner and simpler installation. So we made an Aluminum mounting plate that’s compatible with roof racks that utilize 10-Series or 15-Series extrusion crossbars (such as FlatLine Van Co Low Pro Roof Rack):
The K9000 Motorized Antenna Tilt comes with a universal base fitment bracket. Remove the four screws and discard the old bracket:

Install the new mounting plate to the K9000 Motorized Mount (reuse the screws from previous step):

Mount your antenna to the K9000
Route the antenna through the antenna mount and fasten with the hardware provided with the WeBoost:

Install to your roof rack
Loosely install the t-nut(s) and the screws (provided with our mounting plate) so it’s ready to load into the crossbar:

Remove the crossbar, load the t-nut(s) from the crossbar end, reinstall the crossbar:

Fasten the screws to secure the mounting plate to the desired position into the crossbar:

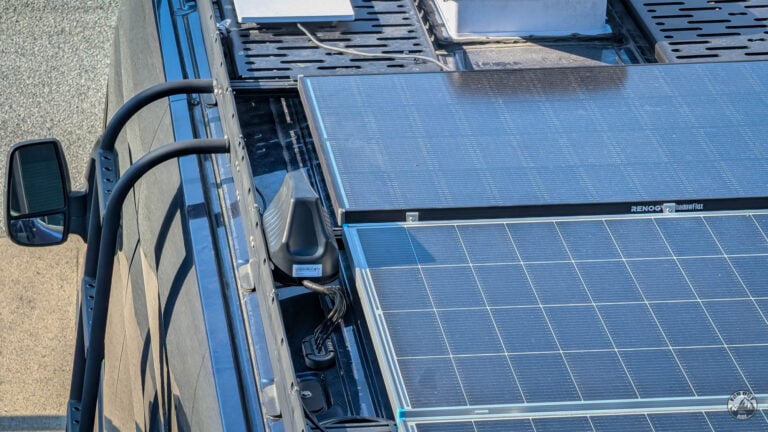
Update from the future: we added 500W of solar panels:

Adjust the tilt motion operating angle
Power the K9000 into a cigar plug. Set the antenna to be fully raised by pressing and holding “UP” on the remote:

If the antenna is not vertical, loosen the nut and adjust the antenna’s angle to your liking:

Then, adjust the tilt lower limit (0-45°) to your liking (e.g. to clear a solar panel or such) by rotating the grey knob on the body of the K9000:


Pass the Cables Through The Roof
Most cable entry glands and cable seals require either drilling or screwing into the roof. That’s OK, but we try to avoid it when we can. So we came up with our very own No-Drill/No-Screw Cable Entry Pad that takes advantage of the factory pass-through holes that are hidden under some of the roof plugs (#2 in the image below):

* NOTE: We don’t recommend using the last row of pass-through holes located at the very back of the Transit with our Cable Entry Pad, because there is not enough space to install the lock nut from inside the van (see On Second Thought).

(choose 6.5mm – 10.2mm PG11 gland for WeBoost)
Remove the roof plug. You can start with a plastic scraper, it’s a bit easier to get the plug to go at first:

Pull slowly to remove the plug completely, then clean the sealant left behind with isopropyl alcohol:

All clean! The Cable Entry Pad will cover the primed surface:

Unscrew the lock nut from underneath the pad and put aside:

Peel off the release film from the VHB tape:

Make sure the surface is still clean and apply pressure for 5-10 seconds:

Install the lock nut inside the van, hand-tight firmly with your fingers then use a 24mm or 15/16″ socket to add about one extra turn (do not use tools and overtorque, this will damage the plastic threads) :

Unscrew the sealing nut from the gland (without removing it) and route the K9000’s power cord through the gland (one connector at a time):

Route the weBoost antenna extension cable through the gland and connect it to the weBoost outside antenna (the connector is about 9.15mm, so it fits through the 6.5-10.2mm PG11 gland):

Glands are waterproof when using a single round cable. Here we cheated a bit and routed two cables, which may compromise the waterproofness. To mitigate that, we added Silicone inside the gland (between and around the two cables) and then we screwed the sealing nut:

Connect the K9000 Power Cord
The K9000 motorized tilt can be powered via the provided 12V cigar plug, or it can be hardwired to your electrical system via a 0.8A fuse (e.g. 0.8A GMA fuse + Inline Fuse Holder).
Our van conversion is still a work-in-progress at the time of writing, so we’re temporarily powering the K9000 via the factory 12V socket at the back of the van. We’ll update this page when we hardwire it to our EcoFlow Power Kit electrical system!

Complete the WeBoost Signal Booster Installation
Remember that it is crucial to maximize the distance between the outside antenna and inside antenna. If the antennas are located too close together they will pick up each other’s signals and create a feedback loop – you won’t get any boost… That’s why we installed the outside antenna far back on the roof of our van.
More info: What is Antenna Separation and Why it’s Important | weBoost
8.1. Connect the Outside Antenna to the Booster
8.2. Connect the Inside Antenna to the Booster
8.3. Connect the Power Supply to the Booster

Our van conversion is still a work-in-progress at the time of writing, so we’re temporarily powering the booster via the factory 120V outlet on the side of the passenger seat. We’ll update this page when we hardwire it to our electrical system!
On Second Thought…
Lesson Learned
We initially used the pass-through hole located at the very back end of the van. Turns out the interior is “hollow” at this location (two layers of sheet metal) and making a nice installation was very difficult (no room to tighten the lock nut). We decided to plug the hole (we 3D printed a plug that holds with VHB tape and a bead of Silicone) and use the one a few inches forward.

First Impressions
After a short while we decided to add the Spring Base that’s provided with the weBoost, just for our peace of mind. We also removed the mast extension to reduce the total height of the antenna. With this setup, there is much less freeplay when the antenna is down (less leverage). We can always put the mast extension back if we feel we would benefit from it:

Long Term Review
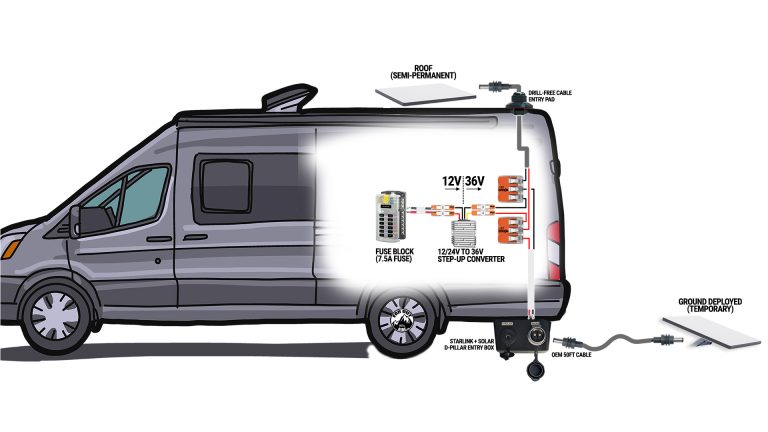
We ran this setup for about three years and removed it in July 2026 — booster, tilt antenna, and all. It worked well the whole time; our needs changed, not the hardware. We replaced it with a Starlink Mini as primary internet and a roof-mounted MIMO antenna feeding a GL.iNet router as cellular backup. A booster amplifies one signal path and re-radiates it inside the van, which shines for phone calls on fringe signal; for data through a router, we expected more from four antenna elements working in parallel. Since we don’t make phone calls, the WeBoost wasn’t earning its keep on the roof. The replacement setup:


Did you end up wiring the antenna to the ecoflow? Just wanted to confirm if this page need an update for that. Thanks for the great info.
Pretty much everything else (fridge, fan, water pump, lights, etc, etc) is now connected to our EcoFlow Power Kit, except the motorized antenna…
I still have to figure out how I will incorporate the UP/DOWN button to my control panel, so it’s currently on hold. But coming very soon!
Do you feel like the k9000 is sturdy enough to drive around with a spring and one extension mast? My problem would be it would be mounted to where the “front\back” of the K9000 would be 90 degrees off. Basically the sides (lower tilt limiter adjustment) would be towards the front while driving.
Hi guys, just wanna first thank you for your website helped me a lot. I’m still building but almost there
questions for you about the weboost, short version antenna (spring only without the mast). Does it make a difference in the boosting?
It does, but there is no magic here. I will boost a weak signal, but it won’t find signal in a zone where there is no signal… It’s all about expectations!
Looks like you have two sizes of the glands available. Which one is the right size for the weboost antenna cable? Will the threaded connector fit through the gland or does it have to be removed to fish it through? Thanks for the help!
The WeBoost connector is about 9.15mm, so you’ll be able to fish it in the PG11 (bigger) gland; that’s what we did!
The weboost cable is only 5mm though, so it appears too small for the larger gland to seal according specs at min 6.5mm. I saw you ran an additional wire through the gland and added silicone to get a seal on your install with the PG11. I think I will have enough slack to run the smaller male end of the weboost cable from the antenna itself through the gland and be able to use the smaller gland and get a seal.
Antoine, as usual, very thorough and detailed instructions–thank you! My 2016 Transit was modeled after yours. As such, my solar panels are glued/taped to the roof per your original instructions so I don’t have anything to mount the WeBoost onto. In your research, did you come across a mount that might support the K9000 without drilling into the roof?
Hi!
Maybe you could install one of these Junction Box with 3M VHB Tape onto your roof, then screw the K9000 on top of the box? There may be more elegant ways of doing this, but the junction box thing would be pretty straightforward I think!
Have you considered making a splittable gland for passing cables such as USB, starlink, etc or other connectors that won’t fit through the opening? I’ve seen a few of these on the market, but not specifically for the transit hole.
Another issue – I opened up the next-to-last hole (just in front of D pillar) on my 2018 transit van (as recommended) but the opening is oblong rather than round – easily fits a USB cable end through – but doesn’t match photos here.
Thanks for your help making these parts!
Would your “Cable Entry Pad”
be good to use on some of the lighting wires into the van? We want to mount a 50″ light bar, side and rear light pods onto our roof rack.
Hi!
The Entry Pads work for single round cable with outside diameter between 4.0mm and 10.2mm.
Like shown in the antenna cable we installed in the description (scroll down): https://faroutride.com/product/cable-entry-pad/
Cheers, antoine
I also don’t have a roof rack and am mounting the overland antenna on a 1/4″ thick piece of plate aluminum 6″ x 6″ bolted to two 2″ x 2″ pieces of square tubular steel secured to the van roof with VHB tape.
And this a comment more on the WeBoost than the motor mount: Be careful to not get a used/older model; many of the older units use 9V not 12V, so you can’t wire easily into a 12V-14V system. Second, the WeBoost uses about 1 A of power; all those cooling fins on it are there for a reason! So, to save your stored power, make sure you have an easy way to see if it’s on and an easy way to turn it off. I powered mine with a lit switch similar to what you used for your propane solenoid, only rated to 5 A.
Hi Isabelle and Antoine,
Nice find!
Did you notice the instructions, do not raise or lower at temperatures near freezing or below? So I guess in the winter you just leave it up?
Also, that WeBoost spring is VERY heavy duty, did you rare to test the motor mount it by pulling the antenna back? My spring is so stiff that I am almost afraid to bend the mounting plate I am using!
Cheers, Don
With our latest arrangement (shortest mast, see “On Second Thoughts”) we can leave the antenna UP most of the time, as it is not that high. So we might leave it up in winter; snow may prevent from raising/lowering the antenna anyway.
Yeah the spring is quite stiff! I did try to bend it a bit (like 15-20 degree) and it was fine, but I didn’t go further… The spring is more like a last-resort solution!
i have the exact up/down switch and had to disconnect it to repair a shelf. Do you have the wiring diagram for the switch
Sorry I don’t.