

Motorized Antenna Mounting Plate for Roof Rack
Price range: $24.95 through $29.95
Use this mounting plate to easily install the K9000 Motorized Antenna Tilt to your roof rack. Compatible with any roof rack that utilizes 10-series or 15-series aluminum extrusion crossbars (80/20 T-Slot profiles), such as Flatline Van Co’s Low Pro.
*Diamond K9000 Motorized Antenna Tilt NOT INCLUDED.
The Diamond K9000 Motorized Antenna Tilt allows to fold an antenna up or down (90 degrees) from the press of a button:
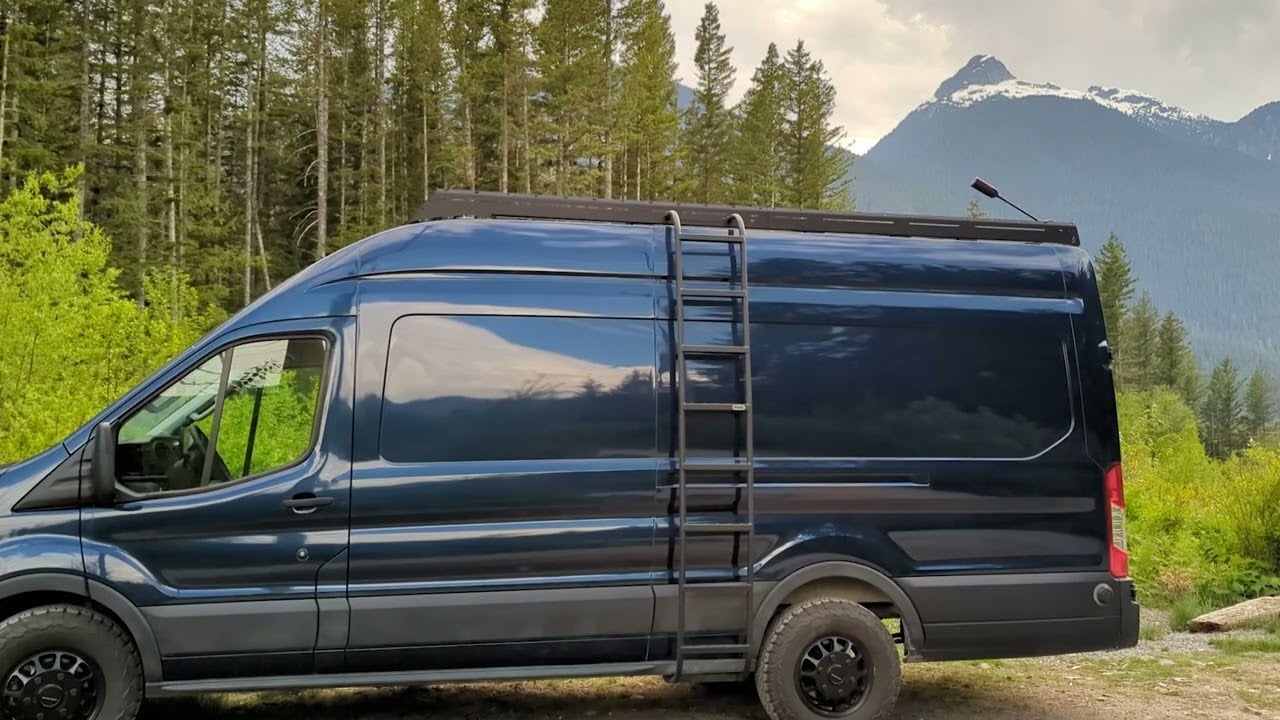
The universal mounting brackets included with it need to be modified in order to work with 80/20 T-Slot’s crossbars. We wanted a clean, simple, and low-profile installation so we designed this mounting plate:

Installation
To complete this DIY project, you also need:
- Diamond K9000 Motorized Antenna Tilt.
- Flatline Van Co Low Pro Roof Rack (or any roof rack with 10-series or 15-series crossbars).
- WeBoost Drive Reach RV Cell Phone Signal Booster (or any antenna with Series-C coax Cable Assembly)
1. Install the mounting plate to the k9000
The K9000 Motorized Antenna Tilt comes with a universal base fitment bracket. Remove the four screws and discard the old bracket:

Install the new mounting plate to the K9000 Motorized Mount (reuse the screws from previous step):

2. Mount your antenna to the k9000
Route the antenna through the antenna mount and fasten with the hardware provided with the WeBoost:

3. Install to your roof rack
Loosely install the t-nut(s) and the screws onto the mounting plate (so it’s ready to load into the crossbar):

Remove the crossbar, load the t-nut(s) from the crossbar end, reinstall the crossbar:

Fastened the screws to secure the mounting plate to the desired position into the crossbar:

4. Adjust the tilt motion operating angle
Power the K9000 into a cigar plug. Set the antenna to be fully raised by pressing and holding “UP” on the remote:

If the antenna is not vertical, loosen the nut and adjust the antenna’s angle to your liking:

Then, adjust the tilt lower limit (0-45°) to your liking (e.g. to clear solar panel or such) by rotating the grey knob on the body of the K9000:


6. cables Routing and Wiring
The rest of the installation varies according to your van model, the antenna type, your electrical system, etc.
You’ll most likely have to pass the antenna cable and K9000 power cord through the roof. This is usually done via a cable seal, junction box, or our Cable Entry Pad for Ford Transit. You can get inspiration from the weBoost antenna we installed on our van:

Compatibility
- Motorized Antenna Tilt: Diamond Antenna K9000
- Aluminum Extrusion Crossbars: 10 or 15 Series.
Specifications
Mounting Plate:
- Dimensions: 3in x 1.75in x 0.15in (76mm x 45mm x 3.8mm).
- Screws Max Size: 1/4″ (M6).
- Material: Aluminum.
- Finish: Powder Coated (Gloss Black).

Shipping
- Ships From: British Columbia, Canada.
- Carrier: Canada Post / USPS.
- Cost: Actual carrier shipping rate calculated at checkout. You can combine other items from our Store to save on shipping.
Warranty, Returns & Refund
Warranty: If there is an issue or manufacturing defect, we’ll be happy to send you another one free of charge! 🙂
Returns & Refund: You are responsible of shipping the product back to us (including the shipping fees associated with it) for the following reasons:
- Ordered by mistake or if you changed your mind.
- Incompatibility (please check “Compatibility” section).
Resources
- Diamond K9000 Motorized Antenna Mount Installation/Operating Instructions (DiamondAntenna.net)
- WeBoost Installation Guides (WeBoost.com)
- Flatline Van Co Low Pro Roof Rack Installation (faroutride.com)
- Motorized Antenna Tilt Installation on Roof Rack | weBoost Fold Up / Down (faroutride.com)
4 reviews for Motorized Antenna Mounting Plate for Roof Rack
| 5 star | 75% | |
| 4 star | 25% | |
| 3 star | 0% | |
| 2 star | 0% | |
| 1 star | 0% |
Customer Images


Great, easy to install a must have.
Very well made product. Only improvement I would recommend would be to include Spring Nuts since this was put on after my rails were up and the included hardware did not work with my setup easily. Had to purchase some spring nuts.
Worked perfectly.
Noted! That totally makes sense, will look into drop-in T-nuts w/spring-ball!
Great quality and well packaged. Ran into some snags being that i have an AVC rig Roof rack that is configured a bit differently than the flatline rack. The top of the 80/20 cross bars are flush with the top of the side rails making the antenna stick up higher than I’d like (eye sore/vulnerable). Also the T nuts that came with the plate did not fit into the 80/20 rails on my AVC rig rack. Not sure which series they are but i have some others to try on the way from amazon along with some other plate to play around with mounting options. Thanks so much! Your content has been massively helpful!!
I needed to drill out holes to 5/16″ which was easy and it works perfectly.