Here’s a fun project to add temperature-controlled fan(s) to a cabinet (fridge, electrical, etc.). We initially made this for our fridge cabinet, but finally opted to parallel the fans to the fridge OEM fan. Still, this thing works as intended (tested), and we’re leaving it out here in case it could be helpful to anyone!


Disclosure: This post contains affiliate links, which means that if you click a product link and buy anything from the merchant (Amazon, eBay, etc.) we will receive a commission fee. The price you pay remains the same, affiliate link or not.

1. Ventilation Options
Ventilation is a two-part process: intake and exhaust. Warm air rises, so it is typically blown out through the exhaust at the top of the cabinet. Cool air enters through the intake at the bottom of the cabinet. The air exchange can be passive or active.
1.1. Passive
Passive ventilation is achieved without any mechanical systems; air is exchanged naturally. That means no fans or devices that require power, maintenance, or generate noise. Neat, that’s the goal! The Electrical Cabinet for our EcoFlow Power Kit utilizes passive ventilation via the MOLLE doors; the pattern is the same as the Rear Door MOLLE Panels we designed and made, so the accessories are interchangeable:

1.2. Active: Fan Synced WIth Fridge
Active ventilation occurs when air exchange is forced through a mechanical device, such as a fan. The fan is typically located at the exhaust, and creates a negative pressure that forces air to enter through the intake(s). A fan can also be added at the intake.
Our NovaKool R5810 12V Fridge features a fan to cool down the compressor—the fan cycles simultaneously with the fridge, which typically runs 30-50% of the time. To expel the hot air, we connected the cabinet fans in parallel with the compressor fan so that all fans would cycle together. It minimizes the components, cost, and since the fans run simultaneously with the fridge, the noise is effectively masked.

1.3. Active: Temperature-Controlled
Another approach is to activate or deactivate the exhaust fan based on the ambient temperature in the cabinet. In other words, the exhaust fan is connected to its own thermostat and operates whenever the ambient temperature in the cabinet exceeds a set point. It doesn’t “know” when the fridge runs or not.
Why even bother? Well, the exhaust fan could continue to expel residual heat after the fridge has turned off. Also, when the sun hits our dark-colored van, it heats up quite a lot, and some of that heat is transferred inside the cabinet. A temperature-controlled fan would therefore operate when heat is generated by a source other than the fridge. At the other end of the spectrum, the exhaust fan might not have to run in winter.
2. Temperature & Speed Controller
2.1. Parts and Wiring
The main components are:
- Inkbird ITC-1000F 12V Temperature Controller.
- Noctua NA-FC1 Speed Controller. (optional*)
- Noctua NF-A9x14 (92mm x 14mm) PWM Cooling Fan.
- Wago 221 Lever Nuts Connectors.
* Speed Controller: The speed controller allows for reducing the fan’s RPM, to mitigate noise. After the cabinet and fridge are installed, we will determine the lowest speed at which the exhaust remains efficient.

We connected the components according to the Inkbird ITC-1000F (12V) Wiring Diagram:

2.2. 3D Printed Case
Now it was time to design a Case for the Inkbird ITC-1000 Temperature Controller and Noctua NA-FC1 Speed Controller. The requirements:
- Compact.
- Surface mounted (wall).
- Built-in cable retainers, to prevent the connectors from disconnecting due to vibration.
- Resist to high temperatures.

The 3D printed case holds the Inkbird ITC-1000 and the Noctua NA-FC1 controllers:
The cable retainer at the back prevents the connector from disconnecting from the speed controller (vibration):

The wiring as shown in the “diagram” above, but cleaner:

The connector (going to the fan) can’t disconnect thanks to the retention feature inside:

3. Installation in Cabinet
3.1. Fan
We chose the Noctua NF-A9x14 Fan specifically because of its thickness of 14mm, which is just a bit more than the cabinet’s panel thickness of 12mm (1/2″ Baltic Birch). We designed and 3D printed a Wall Mount for Noctua NF-A9x14 Fan:
The grill is based on Noctua’s High-Efficiency Grill Design:

The fan snaps into the mount from the back:

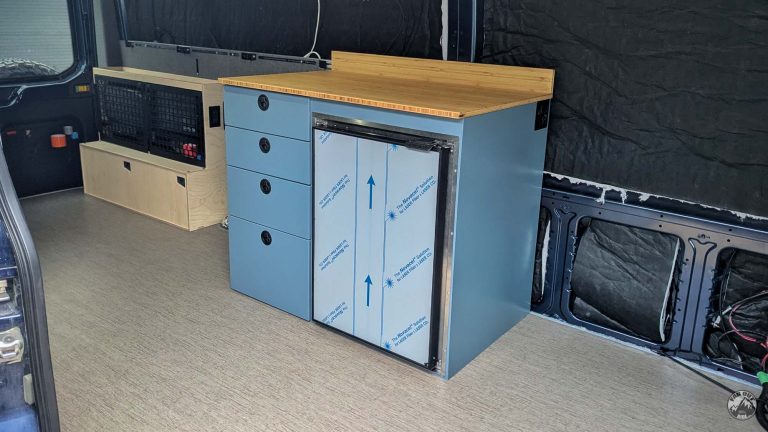
Here’s a photo showing the exhaust fan (top-right), as well as the intake fan (middle), before installing the countertop:

The passive intake cutouts are positioned in line with the coils, and the intake fan blows directly on the compressor:

3.2. Controller
The temperature and speed controller are mounted outside the cabinet, because we wanted easy and quick access to the readout:

4. On Second Thought
The temperature controller works exactly as it should, so that’s cool.
However, that’s one more feature we have to pay attention to (the start/stop temperatures have to be set), and the fans don’t run in sync with the fridge, which creates additional noise (it’s very subtle).
Because of the reasons above, we changed our minds and simply connected the auxiliary fans in parallel with the compressor fan!
You may be interested in…


I may be mistaken but your link directs one to the Amazon page for the Model 1000F which is the 110 volt version of the controller. Ordered one then another because the unit did not light up. But the light bulb inside my head did go on and at looked at the specs.
The 12V version(model 1000 I think) is at https://www.amazon.com/Inkbird-Temperature-Controller-Fahrenheit-Thermostat/dp/B019I3YCFS?ref_=ast_sto_dp.
You’re correct, sorry about that!
I updated the link 🙂
Thanks,
Antoine
How did this end up working for you?
We’re doing the installation some time this week or next week! Will let you know 🙂
Right on, Antoine! We have a very similar build to yours and have been successfully using some of your 3D printed parts. Thank you, keep up the great work, and we look forward to hearing about the results.