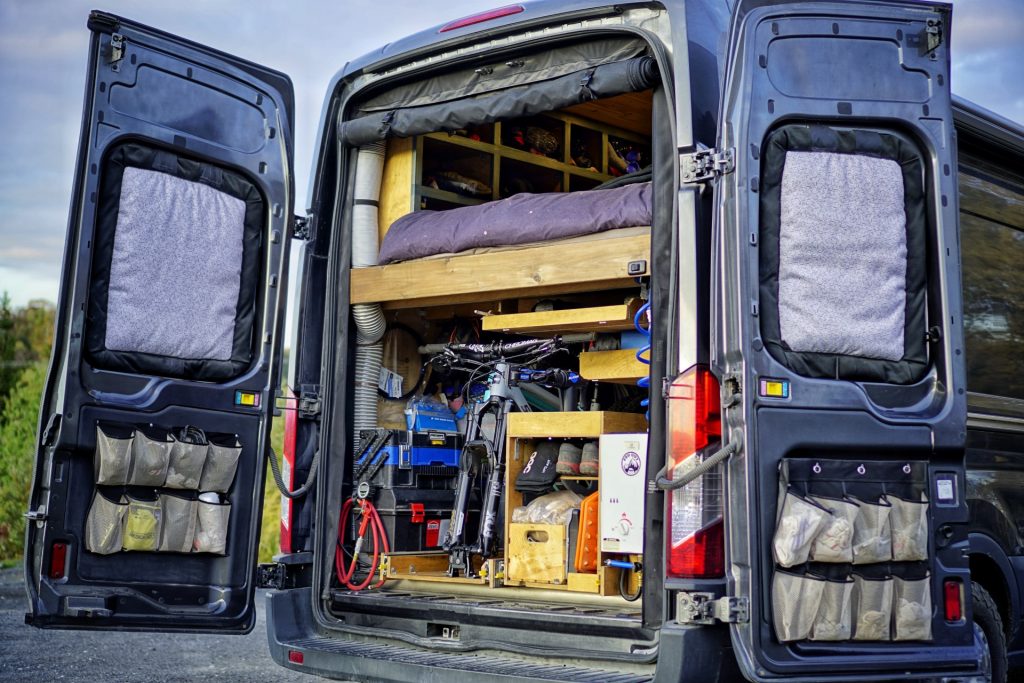
We often say that our Ford Transit DIY camper van conversion is built around the mountain bikes, so a proper bike rack storage is expected! Since the very beginning, we had a few requirements: the mountain bikes must be stored inside the van (for theft and climate protection); the bike rack must be quick and easy to load/unload (for sanity); the storage solution must leave enough space for the bed above (for comfort); and as a bonus catch dirt/dust/crap and easy to clean… Can we achieve all of that?
We looked around and found that Traipsing About’s slide-out bike rack design was exactly what we were looking for! Here is our adaptation of this mountain bike storage to our own Ford Transit adventure mobile.

Material & Resources
Time
8 HOURS
Total Cost
$ 450 USD
Prerequisite
Corequisite
Material
| Item | Description | Qty | Link |
|---|---|---|---|
| Fork Mount | RockyMounts (Fits 12x100mm, 15x100mm, Boost 15x110mm, and 20x110mm thru-axles). | 2 | Amazon |
| Drawer Slides | 48″ full extension, locks when fully in/out. | 1 | Amazon | Vevor |
| Plywood Sheet | Baltic Birch (5’x5′), 15mm (~5/8″) thick. | 1 | Info |
| Corner Braces | 2″ x 2″ (50mm x 50mm). (10 pack). | 1 | Amazon |
| Corner Braces | (20mm x 20mm). | 1 | Amazon |
| Wood Screws | #4 x 1in (100 pack). | 1 | Amazon |
| Wood Screws | #8 x 1¼in (100 pack). | 1 | Amazon |
| Wood Glue | Titebond III Waterproof. | 1 | Amazon |
| Watco Danish Oil | 1 pint. | 1 | Amazon |
| Polyurethane Coating | Minwax. Clear Finish, quart, Satin | 1 | Amazon |
(then click “continue” to add all items to your Amazon cart)
Tools
| Item | Description | Qty | Link |
|---|---|---|---|
| Circular Saw | DEWALT Cordless Lithium-ion 20V, 7¼ with brake. | 1 | Amazon |
| Circular Saw Blade | DEWALT Precision Finish Blade 60 tooth. | 1 | Amazon |
| Drill Driver | DEWALT Cordless Lithium-ion 20V. | 1 | Amazon |
| Screwdriver Bit Set | DEWALT, 45-piece. | 1 | Amazon |
| Drill Bit Set | DEWALT, 14-piece. | 1 | Amazon |
| Orbital Sander | DEWALT, Cordless Lithium-ion 20V, 5″. | 1 | Amazon |
| Sandpaper (Orbit) | DEWALT, 220 grit, 5-pack. | 1 | Amazon |
| Sandpaper (Sheet) | 220 grit, 25-pack. | 1 | Amazon |
(then click “continue” to add all items to your Amazon cart)
Dimensions
The drawer inner dimensions are 19″ x 60″:
60″ is pretty much the minimum length for two bikes, but it’s probably possible to reduce the width depending on how you plan on fitting your wheels…

Van Interior Height Dimensions:
You can adjust the height to your own bikes (measure them!). Maybe just keep a few inches buffer in case you change bike(s) or if you invite a tall friend to join you in your adventures… Note that we have 40″ clearance under the bed, but if we had to start over we’d go for around 36″ instead.

Good to know
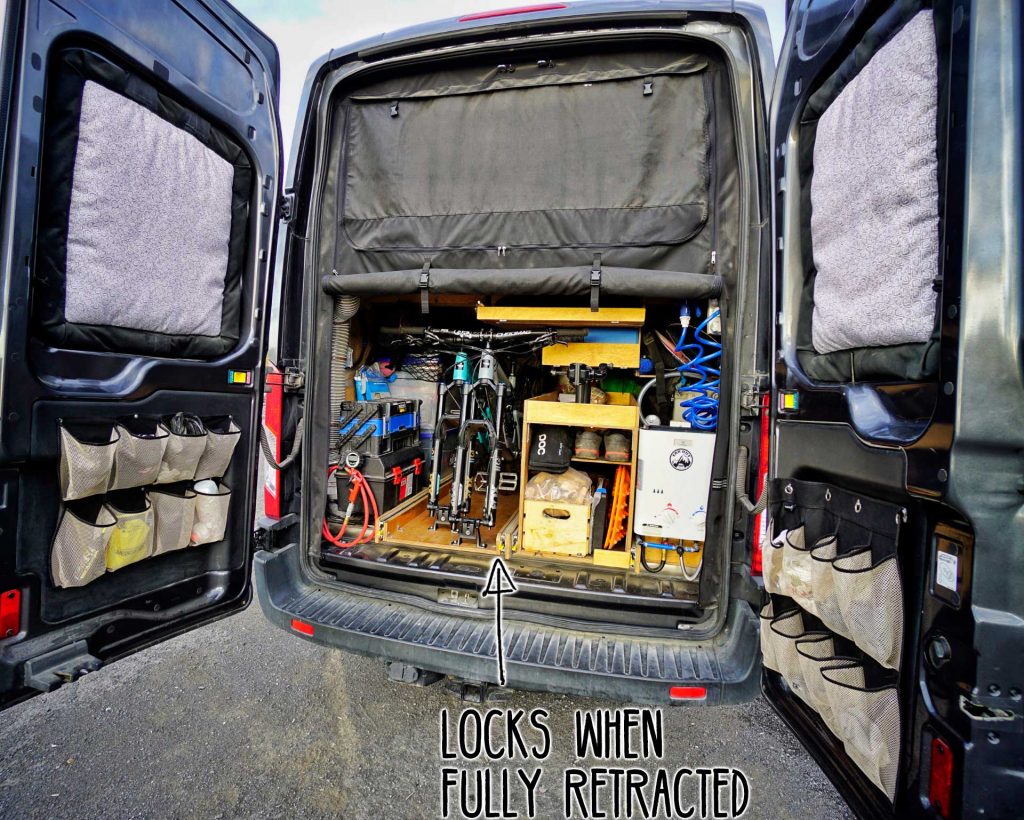
Make sure to get extension slides that lock when fully retracted / extended!
So the drawer stays in place when driving or when parked on incline.

The RockyMounts allows loadING/unloadING the bikes without having to slide the axle from the side, and they have a key lock.
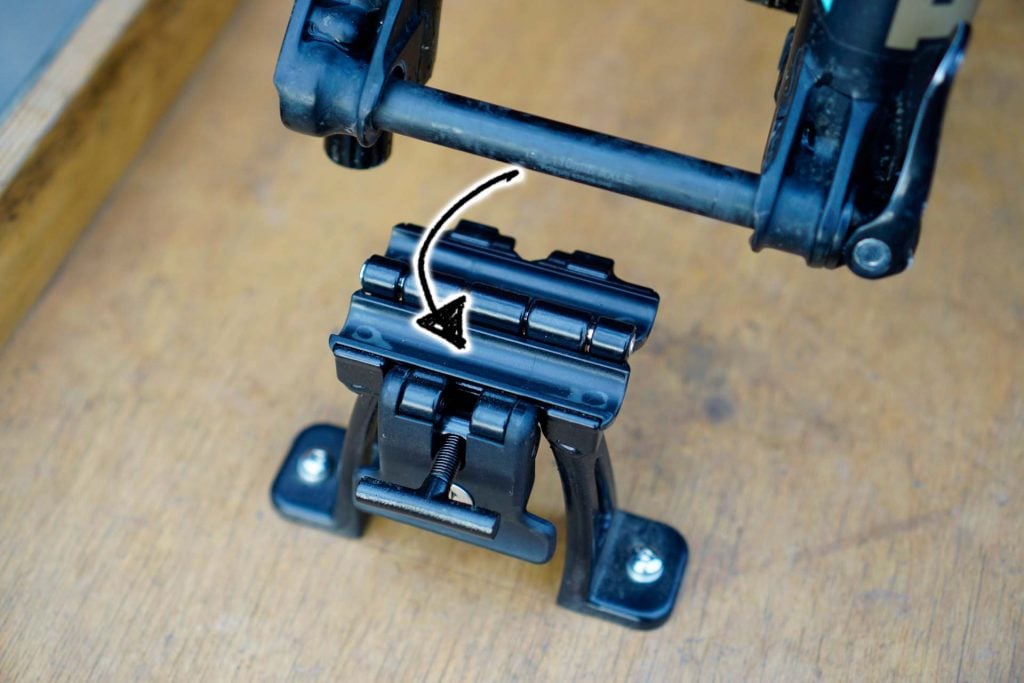

RockyMounts updated their product so it looks a bit different than what you’ll see on this page. But the function remains the same:

Go Pro (An alternative to DIY)
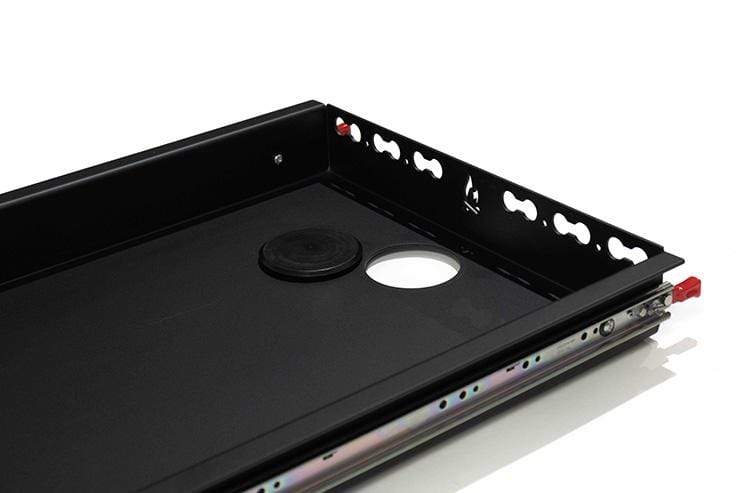
Flatline Van Co Pull Out Tray
In the market for a premium, pro-looking pull out tray? Or maybe you prefer to invest your time assembling rather than building? Then you might want to consider Flatline Van Co’s pull out bike tray: it ships fully assembled, it is rated for 500 pounds, it locks in stowed or fully extended position. They even thought of adding a circular cutout to clean the dirt (trust us that’s a feature you’ll use a lot), neat! The dimensions are as follows:
- Inner tray: 59 7/8″ long, 17 3/4″ wide.
- Outer tray: 61″ long, 19 3/4″ wide, 3″ deep.


For more info (features, specifications, photos, installation, shipping, etc.) click the button below:
Let’s Build The Slide-Out Bike Rack!
The slide-out bike rack was one of our first projects, and we didn’t think of taking photos of the whole build process. That’s why most photos below show the finished product.
Build the Drawer

Cut 4 pieces out of the 5’x5′ baltic birch plywood sheet and assemble together:

-1-
- Dimensions: 19″ x 60″
- Thickness: 15mm (5/8″)
-2 & 3-
- Dimensions: 3″ x 60″
- Thickness: 15mm (5/8″)
-4-
- Dimensions: 3″ x 20″
- Thickness: 15mm (5/8″)
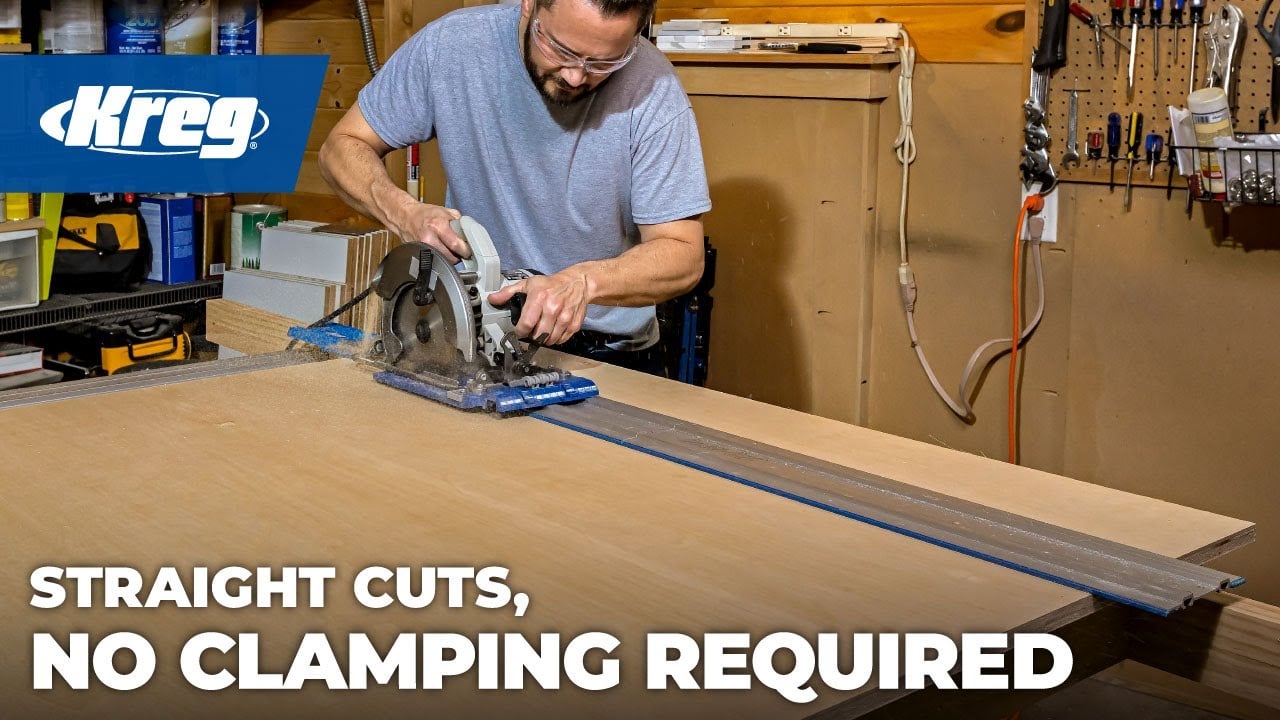
Why Straight Cuts Are Essential
- SOLIDITY: Glue / adhesive won’t work if there are small gaps here and there (that might translate to squeaks in the long run).
- SQUARE EDGE: The stuff you build can’t be more square than your cuts!
- LOOK: Wavy cuts are an eye catcher.
- BUILD REGRETS: It’s possible to build without fancy tools, we did it with our van, but honestly it was a mistake. There’s MUCH more work than we expected; there are literally hundreds and hundreds of cuts to make… using the right tools would have saved us time and frustration (a LOT). If we had to start over, we would get second hand tools and re-sell them afterward:
KREG Circular Saw Track Guide
It allows for precise long straight cuts (50″, or 100″ with the expansion pack) in plywood, quickly and easily. It’s portable and can be used with most circular saws. And it’s not expensive, so we wish we knew that when we built our van!
Miter Saw
It allows for accurate crosscuts (square or angled), quickly and easily. There are HUNDREDS of cuts to make when building a van, so we wish we would have invested in one during our build…

Why Good Wood Joints Are Essential:
- SOLIDITY: Think EXTREME VIBRATION. You van is like an earthquake simulator. It feels good to assemble parts together, it feels even better when parts stays together years later…
- SQUEAKS: Wood rubbing against wood produces squeaks (e.g. in joints), and it gets worse with time. Pro tip: turn up the radio volume, or build strong joints to prevent it…
There are dozens of wood joint types; some are stronger, some look better. But we’re no woodworkers so we want joints that are easy to make (without specialized tools) that are also solid and look good. For the Slide-Out Bike Rack project, we used Titebond III waterproof wood glue and small #4 screws (every 6in of so). The screws provide some strength to the joint, but, more importantly, they apply a uniform pressure along the joint for the glue to cure properly (if done properly, glue is VERY strong and will prevent squeaks).
Measure twice, cut once…
Measure and measure and measure…
We added corner braces as well for more strength…

Build the Structure

Cut 2 pieces out of the 5’x5′ baltic birch plywood sheet (or what’s left of it…).
Don’t assemble anything just yet.
-5 & 6-
- Dimensions: 4″ x 48″
- Thickness: 15mm (5/8″)
Prepare the wood for finish and protective coating
Sand the drawer and the structure using 220 grit sandpaper. Take this opportunity to smooth out the sharp edges!
Oil (finish coating) highlights scratches, so sanding enhanced the appearance of the wood. Smoothing out the sharp edges will prevent cuts when operating the slide-out bike rack…
Apply Finish and Protective Coating To The Wood
We applied 2 layers of Watco Danish Oil:
Bare wood deteriorates with time (dries, swells, gets dirty). The finish enhances the appearance of the wood (color), prevents drying, swelling, and protects against stains.
We also applied 2 layers of Polyurethane coating.
This is an extra precaution because the tray will sometimes be exposed to water, mud, and dirt. As opposed to Danish Oil, Polyurethane does not penetrate wood. It dries on top of the surface and becomes a clear, hard finish that provides an abrasion-resistant seal for the wood.
Install the extension slides to the drawer


Install the extension slides to the structure
Put the drawer on the van’s floor. To create clearance (gap shown in the photo below) between the drawer and the floor, insert a shim (we used a 3/8″ plywood piece) between the van floor and the drawer.
The gap is to ensure a smooth operation of the drawer without rubbing against the van’s floor.

Put the structure on the van’s floor.
Mate it with the drawer, where it belongs.
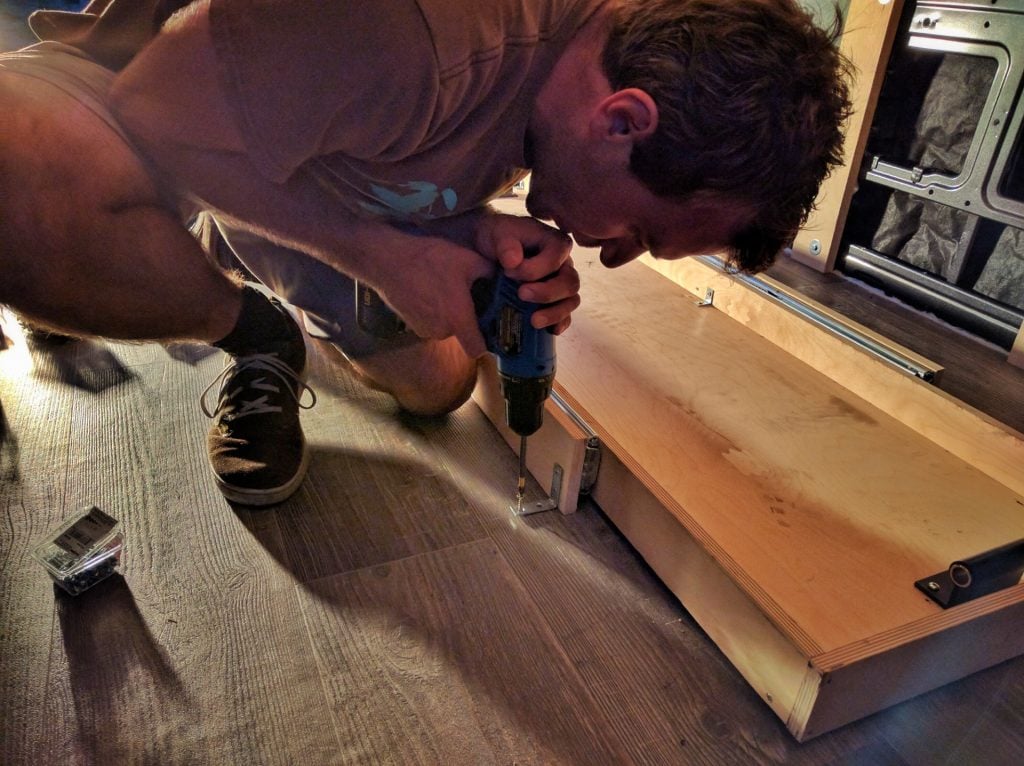
With a pen, mark the location of the extension slides onto the structure.
Using the marks from the previous step, screw the extension slides into the structure.
You can do this outside the van as it will be much easier to work that way (that’s why we marked the location of the slides in the previous step).
Here, we are making a small cutout to the structure so it clears the nose stair:


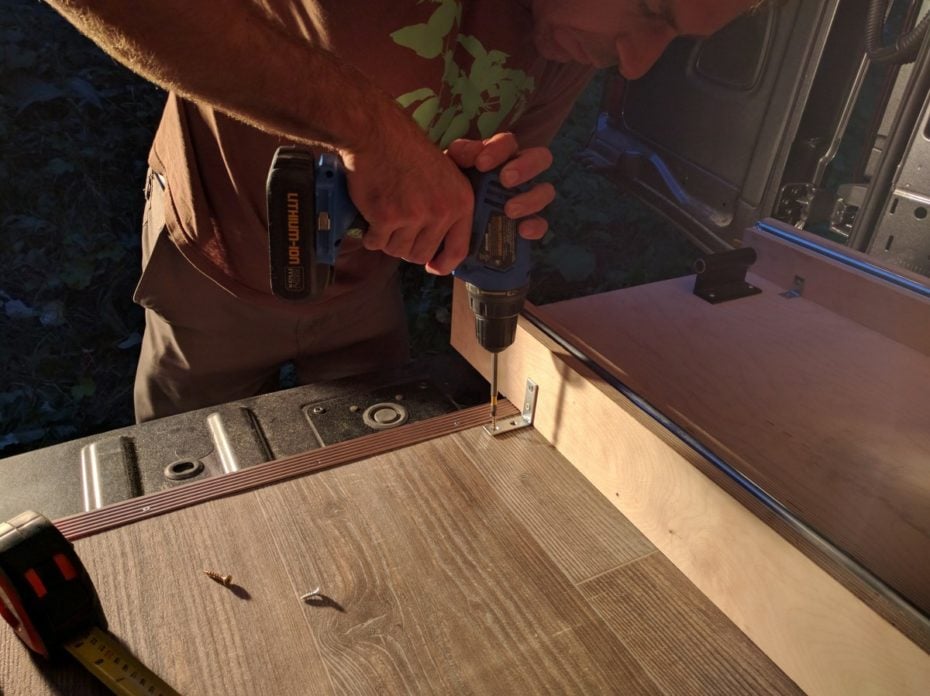
Install the slide-out bike rack to the van’s floor
Along the exterior of the structure, we used 2″ x 2″ corner braces every ~12″ or so:
Like it or not, the slide-out bike rack looks like the perfect seat when it’s fully extended… You won’t do it, but a friend surely will at some point! So don’t cheap out on the corner braces; it has to be able to withstand the weight of a person on it (the bikes are not the worst case)!

Along the interior of the structure, we used 20mm x 20mm corner braces.
The 2″ x 2″ corner braces wouldn’t fit here because it would interfere with the extension slides.


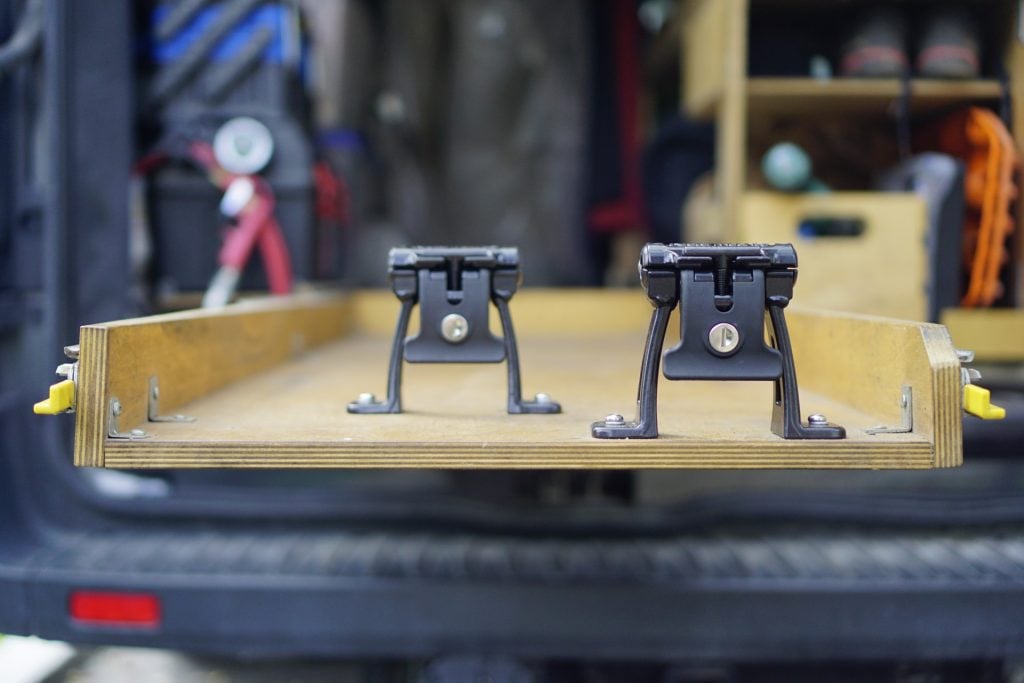
Install the fork mounts
We used #12 x 1″ round-head screws (with lock washers):

Go ride your &/?*”$ bike!!


On Second Thought…
- We should have applied a protective coating as soon as the tray was built. We procrastinated, and now the tray is stained with chain oil and stuff; it’s only aesthetic though, no big deal…
- We initially installed the bikes in opposite directions, but it turned out the handlebars where taking closet space (faroutride.com/garage). We relocated the bikes so that they’re both facing the rear; it doesn’t really take more room this way…
- We initially had fork mounts that required sliding the axle to secure the bike; we just upgraded for the RockyMounts, and we wish we found those from the start!
- After two years on the road (faroutride.com/two-years-vanlife), we’re SO GLAD we went for the slide-out system! It makes loading and unloading the bikes so easy 🙂


Allo,
J’etais intrigue par votre tirroir et en fin du compte c’est exactment ce que je cherchais. Mais… quelle surprise lorsque j’ai entendu l’accent quebecois!!! Je suis un quebecois ex-pat qui vis en Angleterre et c’est pas souvent que j’entends parler le bon vieux quebecois.
Merci pour la bonne idee.
Guy
Hihi impossible de camoufler cet accent 😉
Au plaisir,
Antoine
How did you attach the slides to the actual structure?
Maybe this was already written, but if you live stateside and you buy your plywood from Lowe’s or Home Depot, they will cut the board to all of the dimensions as a complementary service.
How did you all compensate for the slider width to get the tray so tightly installed?
Can you explain how you mounted the second tray. You said you mounted the first tray with the 2” L bracket but then put another slider on that side. Did you have to switch to a smaller L bracket so the slider could mount? And it looks like the other side is mounted to a box under your water heater. Is that box also screwed down? Thanks.
Hello! Your website has been a great resource for us. Thanks!
We were considering attaching the slides flat on the floor, rather than on their sides. Any reason you can think this wouldn’t work?
Thanks much!
I think you need to buy slides designed for that purpose. Otherwise they might not be able to withstand the weight if installed flat on the floor.
Awesome build! Do you have measurements for bar width for both bikes together? Trying to build this setup into 37″ door.
Thanks!
Hello I have built a bike tray. I have bought a e-bike it weighs 50 pounds I am having trouble loading and unloading and taking the front tire off any suggestions would be great
Great write-up! I’m curious to see what your thoughts are of mounting the side rails to L-track instead of directly to the floor. I’m installing two tracks parallel to the rear doors. I’ll likely bolt it through entire floor to make it extra secure. Have you seen it done this way before?
Thanks,
Steve
I believe it’s not unusual to do this; I’ve seen this quite often, when modularity is a criteria. No reason it shouldn’t work!
cheers
The L-track works very well for mounting slide out trays, it is definitely worth through bolting. One thing to account for is the type of L-track lug you are using as some will lift the tray up a bit further and some studs are quite long which can interfere with the bottom of your tray if you don’t modify them.
Hi,
Very nice bike rack. In the US, we cannot (at least I can’t) get 15 mm baltic birch. In your opinion, would 12 mm be adequate or should I go with 18?
Thanks!
PS your postings from the Yukon are amazing.
12mm should be strong enough, but a bit harder to assemble. 18mm will be easier to assemble (better grip for screws, more surface for glue, etc).
Cheers!
In dry fitting and measuring our mountain bikes it seems they fit nicer (and more compact) when they are facing opposite directions. I noticed your original “dry fit” photos showed your bikes in that configuration. Is there a reason, other than access to locking mount, that you decided to switch so that both of your bikes face aft? I have seen both methods and I’m leaning towards opposite as I don’t have much room to work with considering our bed platform is side to side.
Thanks for sharing your build theory and knowledge. I don’t think I’d jump into this project without such great resources such as yours!
With both bikes facing aft, it leaves more space for the closet (which is located fwd of the mountain bikes). That’s why we changed the config!
antoine
Should I polyurethane after gluing or before gluing the drawer together?
I’d do the polyurethane after personally.
I have a question regarding the adjacent storage slide-out. You used 2in corner brackets to attach the structure to the van floor, did you have to change those out when adding the storage slide? It looks like the storage slide has it’s slider attached to the same structure piece as the bike tray, but you mentioned the 2in bracket would interfere with the slide if used on the interior of the structure.
Thanks for the awesome guide!
You used the 48 inch sliders, but it looks like they only carry 44 inch and 50 inch now which do you think would be the better of two to use since they don’t carry the 48 inch.
Thanks
Option “B” (https://amzn.to/3vBt7gw) still has 48″ in stock at the moment!
Hello! I see you used the #4 screws for assembling the drawer/platform. What did you use the #8 screws for? Apologies if I missed it. Thanks both of you for sharing all your knowledge and adventures!
The #8 screws are used to connect the sides and back of the drawer together while the wood glue bonds
In the post above, they say they used the #4 screws for that. There’s no reference to the use of the #8s that I see.
I’m curious about this as well.
on your materials list you call for 48″ slides.
In the pictures it appears that the slides run the entire length of your 60″ trays.
are you using 60″ slides? I bought the 48″ slides and figured that the last 12″ of the tray didn’t need to extend out of the back of the van to easily unload my bikes. Just curious.
Also, thanks for this awesome resource! Van on!
We have the 48″ slide. The fixed structure (attached to the floor) of our tray is actually 48″, not 60″.
Isabelle & Antoine, You guys absolutely ROCK ! Spectacular storage space management and well thought out realistic plans to help others do same.
In no way do I want to imply any downside to the Slide-Out Tray feature, however if a person was handy with tools and wood projects enough to build the sleeper section & sections underneath but wanted to make the bike section so that you Back the bikes into the box (front wheel already removed) and mount the forks to RockyMounts and avoided making the entire Slide-Out Tray section at first but left proper clearance so it could be built, is there any reason to avoid making the Slide Tray now ? Of course it will be more cumbersome getting bikes in/out but in short, If I’m building it myself without help dont want to get that involved with the Slide Tray for now.
So, maybe there a reason(s) to definitely build the Slide Out Tray first that I haven’t thought about ?
Many vans are built as you described (no tray), it works. We just wanted to make it VERY easy to load/unload the bikes, because we ride almost every day in the summer 🙂