Battery-powered air conditioners have gone a long way. The tech has matured, brands are competing, and real-world data backs up the efficiency claims. That said, it’s still a significant investment — and not the right call for everyone. This guide covers everything you need to decide if it makes sense for your build, choose the right unit, and set up your electrical system to support it.
Do You Actually Need One?
A battery-powered A/C is expensive, power-hungry, and often overkill depending on how you travel. Do you really need one?
✅ It makes sense if…
- You’re a full-timer who can’t always follow the seasons
- You travel in hot climates (desert Southwest, deep South, etc.)
- You have pets that stay in the van while you’re out
- You sleep hot and can’t rest well above 75°F
- You have a solid electrical system (over 400Ah of battery)
❌ It probably doesn’t if…
- You’re a weekend warrior or part-time vanlifer
- You can easily relocate to cooler areas in summer
- Your budget is tight — the unit is just the start (wiring, battery upgrades add up)
How Battery-Powered A/C Works
The cooling cycle of any air conditioner — battery-powered or not — is the same. A refrigerant absorbs heat from inside the van and dumps it outside. What’s different with a DC unit is the compressor: it runs directly on power from your battery bank, no inverter needed.
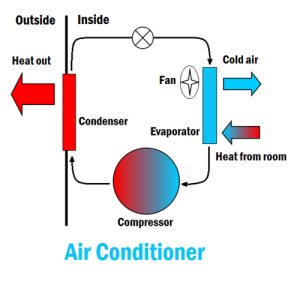
Running a traditional 120V A/C off-grid means converting DC battery power → 120V AC through an inverter, with a 10–15% energy loss in the process. A DC unit skips that conversion entirely. More importantly, modern units use variable-speed inverter compressors — the same technology in high-efficiency home heat pumps. Instead of cycling hard on/off, the compressor ramps up and down to match demand, which is both more efficient and quieter.
Duty Cycle
An A/C doesn’t run at full power continuously. It cycles on and off (or ramps up and down) to maintain a set temperature. This is the duty cycle:
Duty cycle (%) = (ON duration ÷ Total duration) × 100
In simple terms: It’s the % of the time it’s running
If it’s 95°F outside and you’re trying to keep the van at 70°F, the duty cycle might be 80–90% (It’s ON 80-90% of the time). On a mild night at 75°F, it might be 20–30% (it’s ON 20-30% of the time). This is why energy estimates vary so much — the spec sheet amp draw is the maximum, not the average. Real consumption depends heavily on outside temperature, insulation quality, van size, and your target temperature.
Types of Units
Not all battery-powered A/C units are the same. There are a few different form factors, each suited to a different use case.
Rooftop Self-Contained

Everything in one housing mounted on the roof. Fits the same 14″×14″ cutout as a Maxxfan for most models. Clean install, no interior space used, ideal for full-timers. Most popular option and main focus of this guide.
DC Mini-Split

Separate indoor air handler and outdoor condenser. Can be more powerful, but complex to install.
We’ve seen a growing number of build updates with the condenser installed beneath the van’s floor. We get the idea:
- Keeps the condenser in the shade, which actually helps efficiency — a rooftop condenser in direct sun is fighting extra heat load
- Lowers the center of gravity, which matters on tall high-roof builds
- Frees up roof space for solar panels
- Keeps the install completely stealthy from the outside
That said, there are real tradeoffs:
- Fin fouling from road grime is inevitable. The condenser rejects heat by passing ambient air through the fins. Pack those fins with road grime, mud, and insect debris and airflow drops, refrigerant pressure climbs, and the compressor works harder to do the same job. A dirty condenser can easily drop efficiency by 20–30%. It’s the same reason HVAC techs tell you to clean your outdoor home unit every year, except your home unit isn’t driving through mud.
- Refrigerant lines and fittings are fully exposed to road spray, mud, and debris — a stone chip or bad speed bump in the wrong spot means a refrigerant leak requiring a professional recharge
- Airflow when parked is close to zero — exactly when you’re running the A/C — so the condenser ends up working against stagnant hot air rather than fresh ambient air
While we get the idea of the undermount A/C, we still prefer a rooftop A/C for the long run.
Portable Units
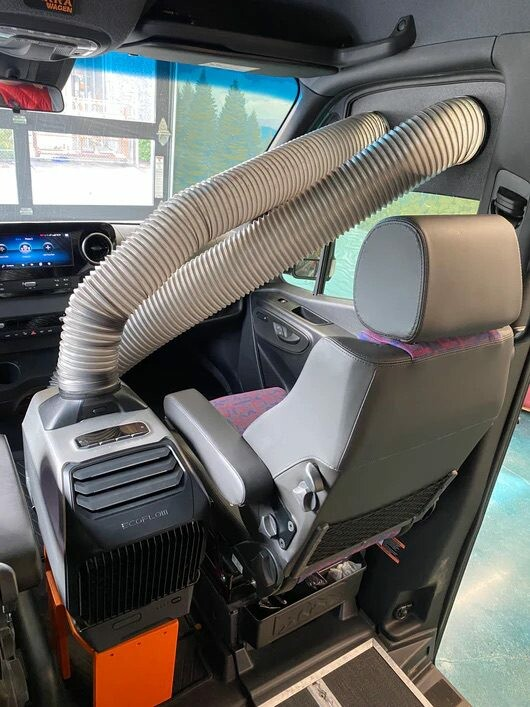
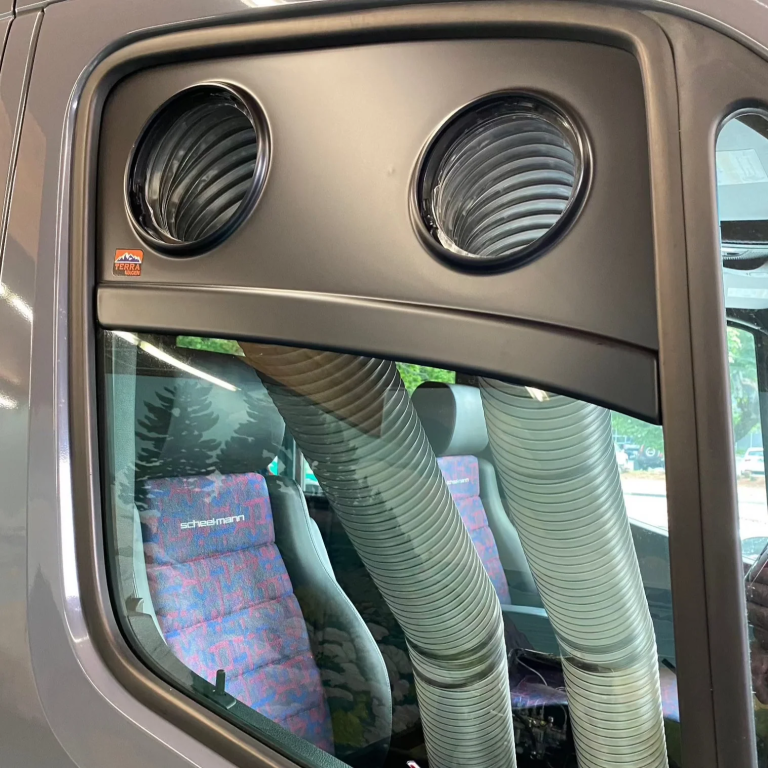
Battery-powered portables like the EcoFlow Wave 3 or Zero Breeze Mark 3. No roof cut needed. Good for occasional use or if you can’t modify the vehicle. Lower cooling power and shorter runtime than rooftop units.
120V Rooftop Units
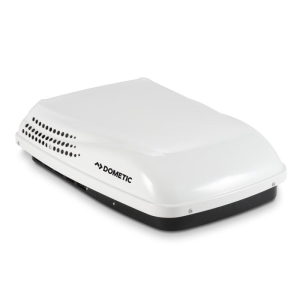
Traditional 120V RV A/C (Dometic Penguin, Coleman Mach, etc.). Massive cooling power at a low price, but dependent on shore power or a generator.
Rooftop Unit Comparison
The market has grown a lot in recent years. Here are the units worth considering:
Comparison Table
| Unit w/ Buy Link | BTU | Eco Draw | 12V | 24V | 48V | Heat Pump | Cutout | Price (USD) |
|---|---|---|---|---|---|---|---|---|
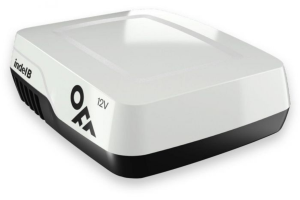
| Indel B Plein-Aircon | 4,100 | ~16A | ✅ | ❌ | ❌ | ❌ | 14″ × 14″ | ~$1,500+ |
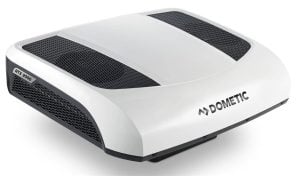
| Dometic RTX 2000 | 6,824 | ~19A | ✅ | ❌ | ❌ | ❌ | 14.5″ × 14″ | ~$3,100 |
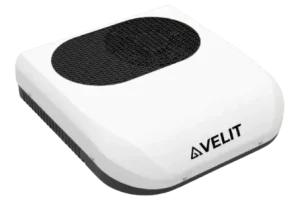
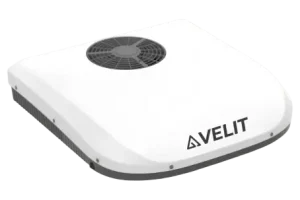
| Velit 2000R Mini | 7,500 | ~20A (12V) / ~5A (48V) | ✅ | ❌ | ✅ | ❌ | 14″ × 14″ | ~$1,679 |
| Velit 2000R | 8,000 | ~20A (12V) | ✅ | ✅ | ✅ | ❌ | 14″ × 14″ | ~$1,679 |
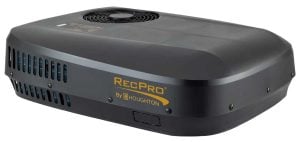
| RecPro 48V 9,500 | 9,500 | ~6.3A (48V) | ❌ | ❌ | ✅ | ✅ | 14″ × 14″ | ~$1,849 |
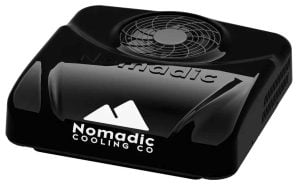
| Nomadic Helix X2 | 9,484 | ~35A (12V) / ~9A (48V) | ✅ | ❌ | ✅ | ❌ | 14″ × 14″ | ~$3,425 |
| RecPro 48V 13,500 | 13,500 | — | ❌ | ❌ | ✅ | ✅ | 14″ × 14″ | ~$1,999 |
| Velit 3000R | 12,000 | ~6A (48V) | ❌ | ✅ | ✅ | ❌ | 14″ × 14″ | ~$2,449 |
| Nomadic Helix X3 | 12,893 | ~35–55A (12V) / ~10A (48V) | ✅ | ❌ | ✅ | ❌ | 14″ × 14″ | ~$3,750 |
Indel B Plein-Aircon
The Italian-made Plein-Aircon plays a different game — it prioritizes minimal power draw above all else. At ~16A in eco mode it’s the most efficient 12V-only unit in the category. The tradeoff is cooling power: 4,100 BTU won’t keep up in extreme heat, but it’s a strong option for mild overnight use or taking the edge off in a small, well-insulated van with a modest battery bank.
✅ Pros
- Lowest power draw of any unit (~16A eco mode)
- Compact and low-profile
- Fits the standard 14″ × 14″ cutout
- Great fit for smaller, well-insulated vans with modest battery banks
- Includes fan-only mode
❌ Cons
- Lowest BTU (4,100) — won’t keep up in serious heat
- 12V only — no 24V or 48V option
- Not well suited to larger vans or extreme summer temperatures
- Limited availability in North America
Dometic RTX 2000
Originally designed for long-haul truck cabs, the third-generation RTX 2000 has become one of the most popular DC rooftop A/C units in van builds. Its inverter compressor is exceptionally efficient — 19A in eco mode is the lowest draw per BTU in the category — and Dometic’s track record in the European truck market spans over a decade. One important gotcha: it’s 12V only, and it requires a slightly wider 14.5″ × 14″ roof opening instead of the standard 14″ × 14″. If you’re replacing a Maxxfan, you’ll need to trim the opening slightly. Dometic includes a cardboard template to mark the cut.
✅ Pros
- Best efficiency per BTU — ~19A eco mode draw
- Proven tech — 10+ years in the European truck market
- Very quiet thanks to variable-speed inverter compressor
- Works with a smaller battery bank (180Ah minimum recommended)
❌ Cons
- 12V only — no 24V or 48V option
- Requires a 14.5″ × 14″ cutout — not the standard 14″ × 14″
- No fan-only mode
- Lower BTU (6,824) — may fall short in extreme heat or large vans
- Higher price at CVHQ (~$3,100) — shop around for better deals
Velit 2000R Mini
The 2000R Mini is Velit’s smallest rooftop unit — and despite the compact 6.5″ profile, it uses the same full-size twin-rotor compressor as the standard 2000R. At 7,500 BTU and a minimum 20A draw at 12V (just 5A at 48V), it’s one of the most efficient units in the lineup for its cooling capacity. The slim profile is a real advantage if roof clearance is tight, and it fits directly in the standard 14″ × 14″ cutout.
✅ Pros
- Ultra-low profile (6.5″) — great for tight roof clearance
- Available in 12V and 48V
- Very efficient at 48V (~5A eco mode)
- Fits the standard 14″ × 14″ cutout
- Includes fan-only mode
- Can run directly off most vehicle alternators
❌ Cons
- No 24V option
- Lower BTU than the standard 2000R (7,500 vs 8,000)
- Newer product — less long-term real-world data than Dometic or Nomadic
Velit 2000R
The standard 2000R is Velit’s most versatile unit — available in 12V, 24V, and 48V, it covers more build configurations than any other rooftop A/C in this category. At 8,000 BTU with a ~20A eco draw at 12V, it delivers solid efficiency at a price that undercuts the Nomadic significantly. The 7″ profile fits the standard 14″ × 14″ cutout and includes fan-only mode. A strong all-around pick if the Dometic’s 12V-only limitation doesn’t work for your system.
✅ Pros
- Available in 12V, 24V, and 48V — most voltage options in the category
- Good price-to-BTU ratio (~$1,679 for 8,000 BTU)
- Fits the standard 14″ × 14″ cutout
- Includes fan-only mode
- TÜV certified
❌ Cons
- Less real-world long-term data compared to Dometic or Nomadic
- Fewer US dealers and support options
- Not carried by Campervan HQ — buy direct from Velit
RecPro 48V 9,500 BTU
RecPro’s entry-level 48V unit punches above its price point. At 9,500 BTU with a maximum draw of just 6.3A at 48V, it’s one of the most power-efficient options in the lineup — and the built-in heat pump means it doubles as a heater, which is a genuine bonus for shoulder-season travel. It’s 48V only, so it requires a higher-voltage system, but if you’re already running 48V (EcoFlow Power Kit, etc.) it’s hard to beat the value.
✅ Pros
- Built-in heat pump — cools and heats
- Excellent efficiency at 48V (~6.3A max draw)
- Strong value (~$1,849 for 9,500 BTU)
- Fits the standard 14″ × 14″ cutout
- Fan-only and dry modes included
- Touchscreen plenum with remote
❌ Cons
- 48V only — requires a higher-voltage system
- Performance may drop at highway speeds (manufacturer note)
- Less vanlife-specific community support than Nomadic or Velit
Nomadic Helix X2
The X2 Helix is the sweet spot in Nomadic’s lineup — compact enough to fit the standard 14″ × 14″ cutout, capable enough to handle serious heat at 9,484 BTU, and now paired with the Helix control system for full remote access via phone or smartwatch. The PWM compressor holds temperatures steadier than traditional on/off cycling, and the sealed back plate with automotive-grade connectors is genuinely road-tough construction. Available in 12V and 48V.

✅ Pros
- Helix app control — remote access from phone, tablet, or smartwatch
- PWM compressor holds temps steadier than on/off cycling
- Fits the standard 14″ × 14″ cutout
- Available in 12V and 48V
- Fan-only and high humidity modes
- US-based support (Elkhart, Indiana)
❌ Cons
- Premium price (~$3,425)
- No 24V option
- Eco draw still significant at 12V (~35A)
- Needs a solid 300Ah+ battery bank for meaningful runtime
RecPro 48V 13,500 BTU
The larger of RecPro’s two 48V units steps up to 13,500 BTU — enough to cool a large high-roof extended van even in serious heat. Like the 9,500 BTU model it includes a heat pump, four air outlets for even distribution, and a touchscreen plenum with remote. At ~$1,999 for 13,500 BTU it’s the highest BTU-per-dollar in the entire category, making it a compelling option if you’re already running a 48V system and need serious cooling power.
✅ Pros
- Highest BTU-per-dollar in the category (13,500 BTU for ~$1,999)
- Built-in heat pump — cools and heats
- Four air outlets for even airflow distribution
- Fits the standard 14″ × 14″ cutout
- Fan-only and dry modes included
❌ Cons
- 48V only — requires a higher-voltage system
- High BTU means high power demand — needs a large battery bank
- Performance may drop at highway speeds (manufacturer note)
- Eco mode draw not published — harder to plan runtime accurately
Velit 3000R
Velit’s flagship rooftop unit steps up to 12,000 BTU at 48V (10,000 BTU at 24V) while drawing just 6A in eco mode at 48V — an impressive efficiency number at this power level. The flush-mount motorized air distribution box is a nice touch for even airflow, and the 7″ profile still fits the standard 14″ × 14″ cutout. Available in 24V and 48V only — there’s no 12V version, so it’s designed for higher-voltage builds from the start.
✅ Pros
- Excellent efficiency for its output (~6A eco at 48V)
- 12,000 BTU handles large vans and extreme heat
- Flush-mount motorized air distribution box
- Fits the standard 14″ × 14″ cutout
- Available in 24V and 48V
- Compatible with EcoFlow Power Kits (48V)
❌ Cons
- No 12V option — 24V minimum
- Less real-world long-term data than Nomadic or Dometic
- Fewer US dealers and support options
Nomadic Helix X3
Nomadic’s flagship unit — the X3 Helix is the most powerful rooftop DC A/C in this guide at ~12,893 BTU, built for full-timers in extreme climates who need reliable heavy-duty cooling. Like the X2, it comes with the full Helix control ecosystem (app, scenes, schedules, smartwatch), PWM compressor for steady temperature hold, and the same sealed, road-tough construction. Available in 12V and 48V, with a 24V option available through Nomadic directly. The premium price reflects the premium spec.
✅ Pros
- Most powerful rooftop DC unit in the guide (~12,893 BTU)
- Full Helix app control — scenes, schedules, remote access
- Available in 12V, 24V, and 48V
- PWM compressor for steady, quiet temperature hold
- Fan-only and high humidity modes
- Fits the standard 14″ × 14″ cutout
- US-based support (Elkhart, Indiana)
❌ Cons
- Most expensive unit in the guide (~$3,750)
- Eco draw still significant at 12V (~35–55A)
- Needs a 400Ah+ battery bank for reliable runtime
- Provisional specs — final certified numbers pending lab testing
Which One Should You Buy?
Best Efficiency on a 12V System
Dometic RTX 2000. The lowest eco mode draw per BTU of any 12V unit. Best choice if you’re running a standard 12V system and want to maximize runtime on a moderate battery bank (180–300Ah).
Best All-Around Value
Velit 2000R. Available in 12V, 24V, and 48V, solid BTUs, standard cutout, and a price that significantly undercuts Nomadic. The most flexible option in the lineup for different build configurations.
Best for 48V Systems
RecPro 48V 13,500 BTU. The highest BTU-per-dollar in the entire category, with a heat pump built in. If you’re already running a 48V system and want maximum cooling power without breaking the bank, nothing else comes close.
Best for Minimal Power Draw
Indel B Plein-Aircon. Small van, modest battery bank, well-insulated, and you just need to take the edge off overnight — this is the most battery-friendly option in the group at ~16A.
Best Smart Features
Nomadic Helix X2. Full app control, scenes, schedules, PWM compressor, and road-tough construction. If you want the best-engineered vanlife-specific unit with proper remote access and don’t want to go full X3, this is it.
Best for Extreme Heat
Nomadic Helix X3. Full-timers in the desert Southwest or other brutal climates who need maximum cooling power and don’t want to compromise — the most capable rooftop DC unit in the guide.
Electrical System
Battery Bank Sizing
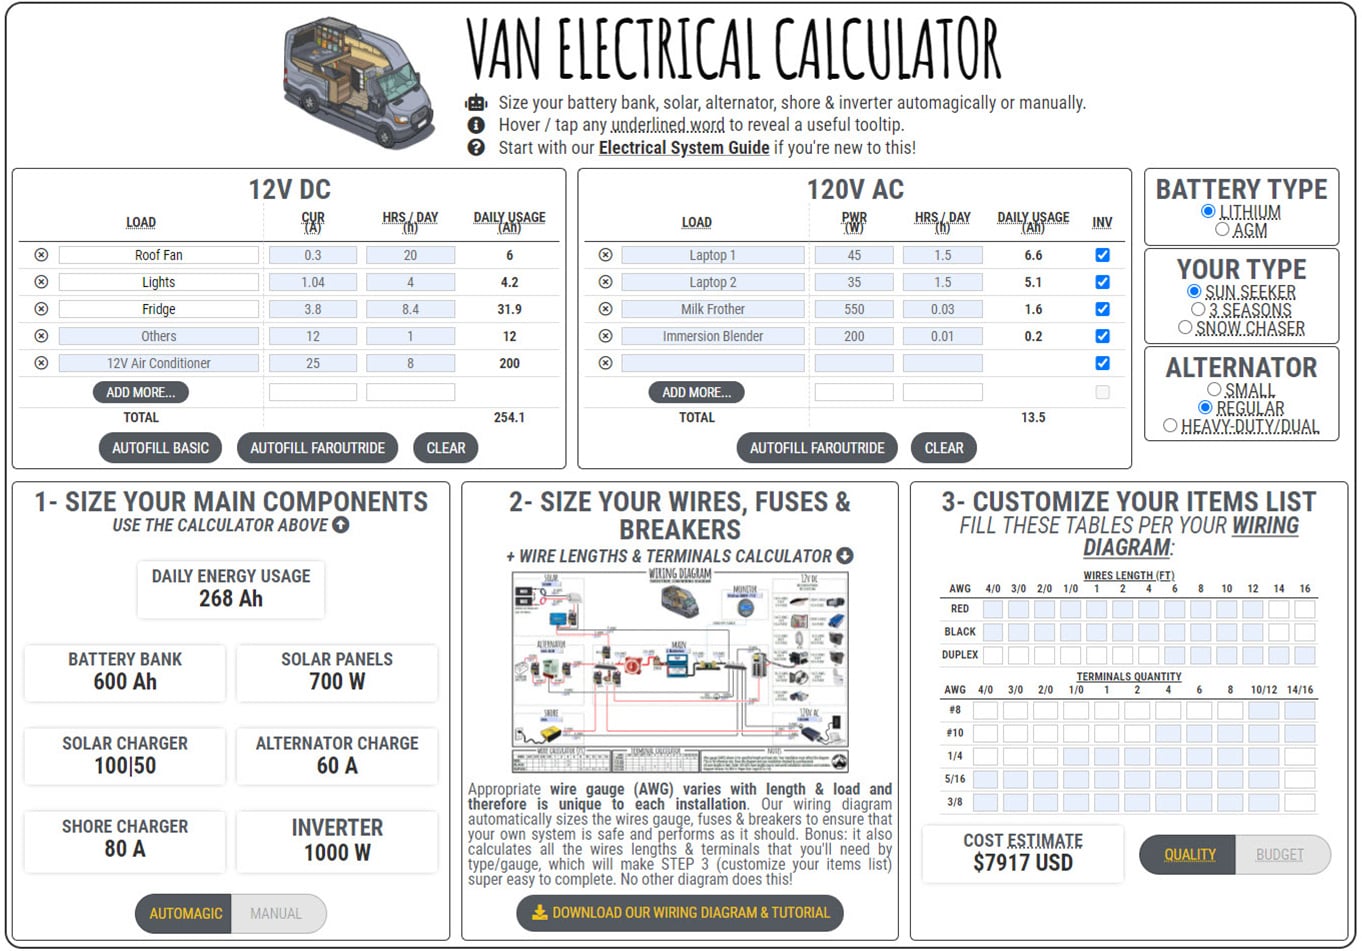
A/C is the most power-hungry thing you’ll add to your van. To size your battery bank properly, use our Van Electrical Calculator. Use the average current draw — not the max — and be realistic about daily usage hours. In typical conditions, 25–30A is a reasonable average to plug in.
Don’t bother with AGM for A/C use — you can only use 50% of capacity before damage, which effectively cuts your usable bank in half. LiFePO4 only.
| Usage Scenario | Minimum LiFePO4 Bank |
|---|---|
| Occasional overnight use, mild temps | 200Ah |
| Regular overnight use, warm temps | 300-400Ah |
| Full-day off-grid cooling in hot climates | 400Ah+ |
Keep in mind these numbers are for A/C only and don’t include induction cooking or other high-draw appliances running simultaneously. If you’re going all-electric, size up accordingly.
A Note on Voltage (12V / 24V / 48V)
Most units now come in multiple voltage variants. If your system runs at 24V or 48V (like our EcoFlow Power Kit), running the A/C at that voltage means the amp draw halves (24V) or quarters (48V) — even though wattage stays the same. That means smaller wire gauges, less stress on your busbars, and a more capable system overall.
Wiring
Download our High-Power wiring diagram and use the addendum below to connect the A/C. A few key points:
- Use a 400A fuse with 4/0 AWG cable at the main connection
- Nomadic X2: connect via a 100A breaker — use the Wire Gauge Calculator for the correct AWG (1 AWG works for any run under 30 feet total)
- Dometic RTX 2000: connect via an 80A breaker — a 24ft wiring harness is included with the unit
- Stick with a 2000W inverter/charger — going to 3000W risks overloading the system when the inverter and A/C both peak simultaneously

A few clarifications:
- Use the dropdown menus and input all the wire length, in order to get all the correct wire gauge (e.g. youtu.be/9MEGls0qLZY)
- Because the air conditioner increases power demand on the electrical system, we’d recommend selecting a 2000W inverter/charger. It’s possible to go with a 3000W inverter/charger, but be aware that this might overload the system during peak power (e.g. when the inverter and the air conditioner are both running simultaneously at max power).
- NOMADIC 2000: The 12V air conditioner is connected to the bus bars via a 100A breaker. The correct wire gauge varies with the length and can be determined with this calculator: WIRE GAUGE CALCULATOR. Or simply put, 1 AWG gauge will work for any length under 30 feet total (15 feet red + 15 feet black).
- Dometic RTX2000: The 12V air conditioner is connected to the bus bars via a 80A breaker. 24ft of electrical harness is included with the RTX2000.
You can use our Van Electrical Calculator (faroutride.com/calc) to customize your own system. We’d recommend sticking with a 2000W inverter/charger (you can force the calculator to do so by switching to “manual” mode). For the Nomadic Air Conditioner, use 25Ah current (that’s the average current draw, per manufacturer claim) and something like 8 hours for daily usage. For example:
Solar Charge
Can solar run the A/C? Partially — and it matters a lot for daytime use. A 600–800W array producing 40–50A on a sunny day can roughly offset eco-mode consumption, meaning your battery barely drains during peak sun hours. Don’t count on it for overnight cooling — that’s all battery. But solar significantly extends daytime runtime and makes the whole system much more viable over a multi-day trip.

Alternator Charge
Driving is one of the most reliable ways to recharge after a night of A/C use. A properly sized DC-DC charger (also called a B2B charger) pulls from your alternator while the engine runs and pushes a controlled charge into your lithium battery bank. A 40A DC-DC charger puts back roughly 40Ah per hour of driving — so a 2–3 hour drive after a hot night goes a long way toward recovering what you spent. Our EcoFlow Power Kit features a 100A DC-DC charger, that’s quite impressive.
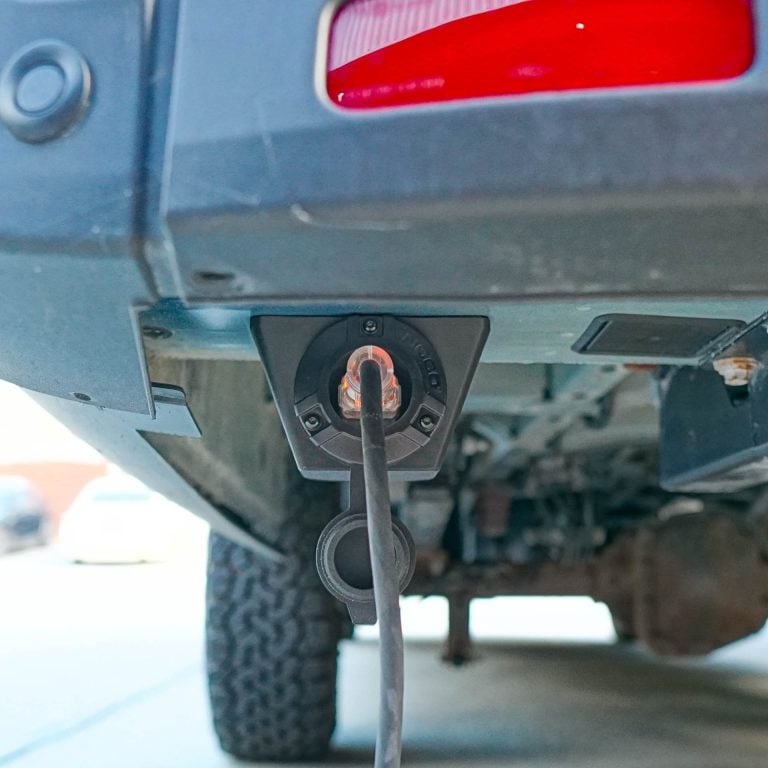
Shore Charge
When you have access to a campground hookup or a power outlet, shore power is the fastest and easiest way to fully recharge your battery bank. Your inverter/charger handles this automatically — plug into 120V shore power and it switches into charge mode, pushing amps back into your batteries at whatever rate your charger is rated for (typically 50–100A depending on the unit). If you’re doing back-to-back hot nights at campgrounds, plugging in even for a few hours between sites can make a big difference. It’s also worth knowing that at a 30A or 50A campground pedestal, you can run the A/C directly off shore power rather than draining your batteries at all — just make sure your inverter/charger is set up to pass shore power through to your loads.
Managing Expectations
A battery-powered A/C is not a home central air system. It won’t hold 68°F when it’s 105°F outside and you’re parked in direct sun with no insulation. What it will do — realistically — is drop the interior temperature by 10–20°F and control humidity, which is often the difference between sleeping well and not sleeping at all.
Variables That Affect Performance
Outside Temperature
The single biggest factor. Duty cycle can swing from 20% on a mild night to 90%+ in extreme heat. Your energy consumption changes dramatically with the weather — don’t size your system around the worst-case scenario or you’ll overbuild everything.
Insulation
A well-insulated van holds cool air much longer between compressor cycles. If you haven’t insulated properly, fix that first — it will have a bigger impact on comfort than the A/C unit itself. See our insulation guide.
Window Covers
Windows are the biggest weak point for heat transfer. Insulated window covers make a noticeable difference and take significant load off the A/C — probably the best passive upgrade you can pair with it.
Van Size
A standard Transit cargo van is ~250 cu. ft. A high-roof extended is closer to 500 cu. ft. A single unit rated at 6,800 BTU will work harder — and run longer duty cycles — in a big van than a small one.
Sun Exposure
Parking in direct sun — especially in a dark-colored vehicle — dramatically increases heat load. Shade, even a windshield sunshade or a reflective roof cover, makes a real measurable difference to how hard the A/C has to work.
Opening Doors
Every time you open the van, a volume of hot air replaces the cool air you worked to create. It adds up more than you’d think, especially when it’s 95°F+ outside.
Tips to Maximize Runtime
- Pre-cool the van while driving or during peak solar hours — it’s much easier to maintain a cool temperature than to drop it from 100°F
- Use eco mode as much as possible — the power savings between eco and full blast are significant
- Set a realistic target temp — cooling to 72°F costs meaningfully more than 78°F
- Park in shade whenever possible, especially during the afternoon heat peak
- Use insulated window covers — an good passive upgrade for A/C efficiency
- Run a fan on cool-enough nights — save the A/C for when you actually need it
Installation
Roof Cutout
Most units (Nomadic, Velit, Indel B) use the standard 14″ × 14″ opening — same as a Maxxfan. If you already have that cutout, installation is straightforward. The Dometic RTX 2000 requires a 14.5″ × 14″ opening. It’s a small difference but it means trimming an existing cutout if you’re replacing a fan. Dometic includes a cardboard template to mark the cut accurately.
Adapter Kit
Most van roofs are corrugated, so you can’t bolt an A/C unit flat against the roof without creating gaps. An adapter kit solves this — it creates a perfectly flat sealing surface and includes framing strips to add structural support for the extra weight of the A/C unit compared to a fan. Make sure to get the correct kit for your specific van model (Transit, Sprinter, ProMaster). The framing strips are installed inside the van when beam spacing is 18″ or more.
Resources
- Roof fan installation guide — same process for cutting and sealing the roof opening
- High-Power wiring diagram — use with the A/C wiring addendum above
- Wire gauge calculator — get the right AWG for your run length
- Van electrical calculator — size your full battery bank with A/C factored in


great article thank you
Would it be ill-advised to run a 12v AC off of an AGM battery bank? We have 640Ah of Victron AGM batteries. Since AGM batteries should not be drained below 50% SOC, we effectively have 320Ah of battery capacity. How much AC runtime could we realistically get if no other devices are drawing from the batteries? Thanks
So, I have the Ecoflow wave 2. I believe it is 5,000BTU. It is just ok—-as you describe the rooftop—it will cool the van 10-15 degrees. I keep looking at these units, but by the time I invest in the unit, the installation, and the upgrade to my battery bank—just ok cooling would be a bust.
Hello there! I’m reading all the information and I’ve a question about the AC unit. I’m planning in have a 24v system just because this, seeing that having a 24v AC unit will use half of AH than one that is 12v, so the autonomy of the battery bank it will much longer, I’m wrong? Thanks!
Hey guys! I really appreciate your work here. I’m new to vanlife and trying to figure it all out.
Is it possible to connect the dometic rtx 2000 12V to the bluetti AC200P?
I thought that it was possible to run the dometic on eco mode (only 19A) through the DC aviation port (up to 25A) but I can’t figure out how I would wire that large 4awg aviation plug to the aviation plug.
please help! thank you so much.