The time has come to build the sink/induction/oven cabinet in our van. We are also adding “secret drawers”, where our laptops will live… This is a frameless construction made out of 12mm (1/2″) Baltic birch and 19mm (3/4″) bamboo ply for the countertop. Let’s go!
This is still a work in progress, we’ll update this page as soon as we move on!
Material & Resources
Time
TBD
Cost
TBD
Weight
TBD
Material
| ITEM | DESCRIPTION | QTY | BUY |
|---|---|---|---|
| 6mm (1/4″) Plywood | Only used for the bottom of the “secret” drawers. | Source Locally | |
| 12mm (1/2″) Plywood | All cabinet, except countertop and bottom of secret drawers. | Source Locally | |
| 19mm (3/4″) Bamboo Ply | Countertop and backsplash | Source Locally | |
| #4 x 1in Flat Head Screws | To clamp panels together. | Amazon | |
| Wood Glue | Titebond III Ultimate Wood Glue. | 1 | Amazon |
| Pull Latch | Fits into a 51mm round cutout. | 4 | Amazon |
| 16″ Soft-Close Drawer Slides | For secret drawers. | 2 | Amazon |
| 18″ Soft-Close Drawer Slides | For main drawer. | 1 | Amazon |
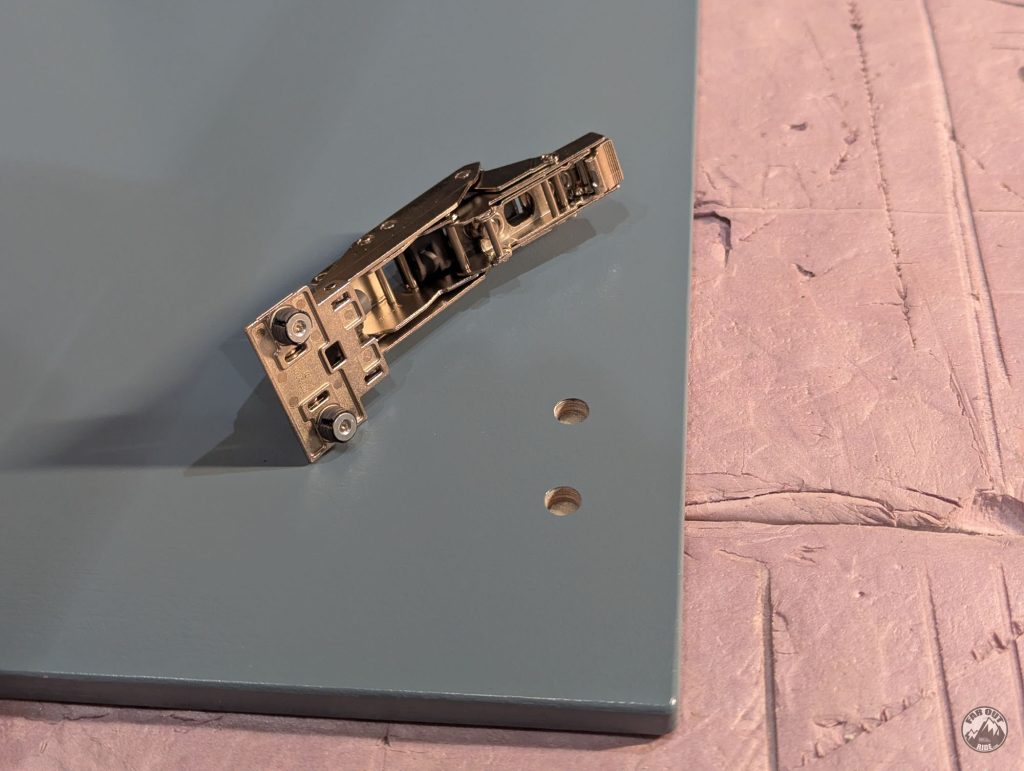
| Door Hinge | 110° Blumotion Hinge for Thin Door (Expando T). Mounting plate must be purchased separately. | 2 2 | Hinge Mount Plate |
| Handle for Secret Drawers | We designed and 3D printed those to fit our specific needs. | 2 | FarOutRide |
| Wood Grain Filler Gel | Optional: To get a smooth surface before applying primer and paint. | 1 | Amazon |
| Polyurethane Sealant | For the cabinet interior surfaces. | 1 | Amazon |
| Primer and Paint | |||
| Tung Oil | To seal and protect the Bamboo countertop. | 1 | Amazon |
| 1/16″ x 3/8″ Butyl Tape | To mount the sink and induction cooktop into the cabinet. | 1 | Amazon |
| Black RTV Silicone | To fill the gap around the sink and induction. | 1 | Amazon |
| ITEM | DESCRIPTION | QTY | BUY |
|---|---|---|---|
| M6 Rivet Nuts | For a strong and reusable fastening point. | 8 | Amazon |
| Rivet Nut Setter Tool | Many types of tools are available, but we use this one personally. | 1 | Amazon |
| M6 x 30mm Flange Button Head Screws (Stainless) | To fasten the upper cabinet into the rivet nuts. | 1 | Amazon |
| Spacers | To add space between the wall and the cabinet, and to account for the van recessed surfaces. (Amazon Kit | Parametric 3D Print Model) | 1 3 4 | 6mm 8mm 10mm |
The water system installation is documented in this page:
Resources
- True Induction Mini Duo Manual (PDF).
- Breville Smart Oven Pro Manual (PDF).
- Repon Soft-Close Slides (PDF).


For reference, this is how we built the sink/stove cabinet in FarOutVan 1. We used basic tools and materials, so it’s a bit more DIY-friendly 🙂
A few differences on the new build:
- Frameless construction (instead of using 2×3’s to build the frame);
- Bamboo countertop (instead of Ikea);
- FarOutVan 1 featured a propane oven (instead of electric).

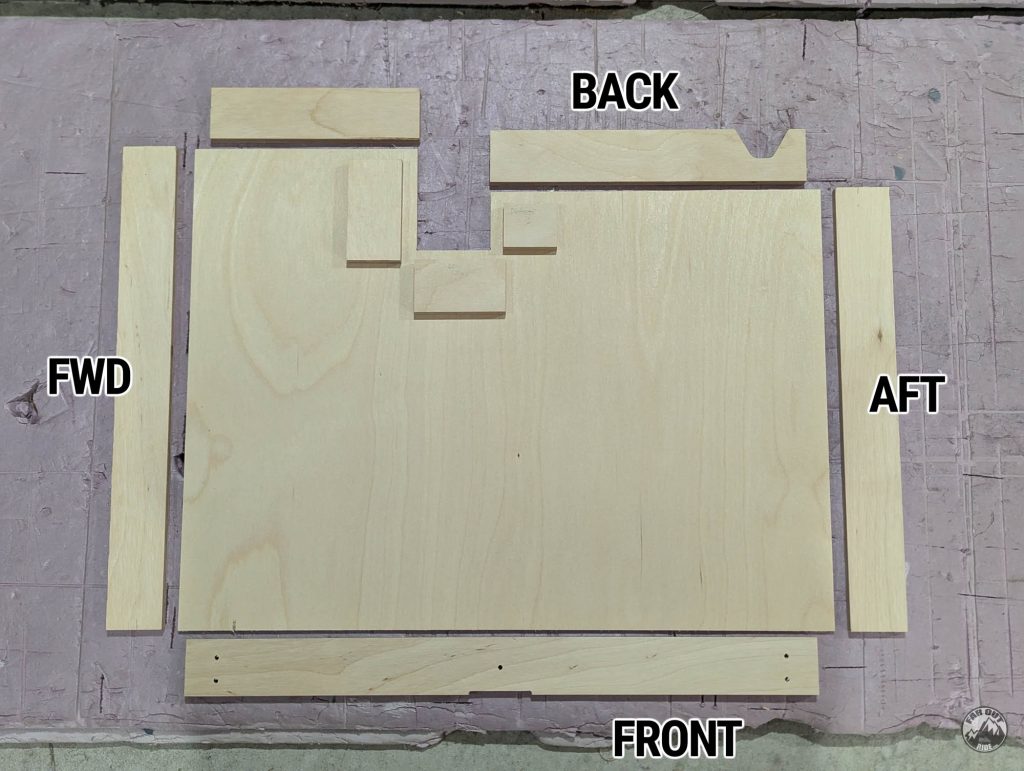
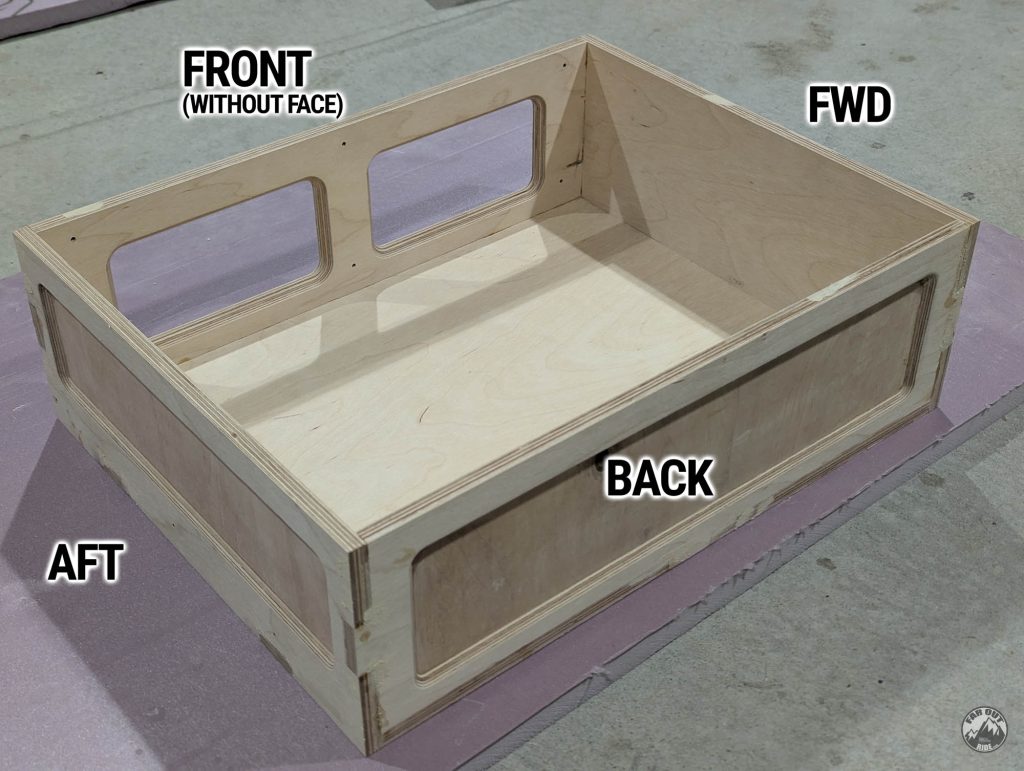
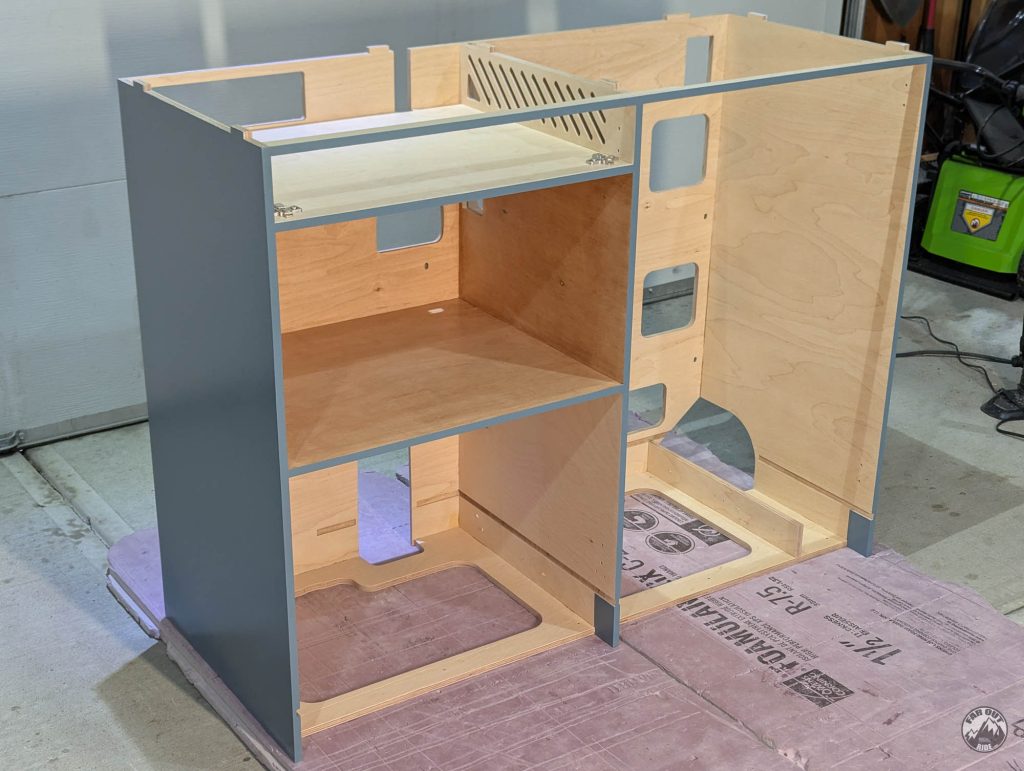
Box
All the parts were cut per our CNC files.
I’ve got the parts, I’ve got the tools, I’ve got this!

I first start by assembling the MID Panel to the Wall Panel. As usual, I apply glue to every mating surface, no exception:

The finger joints are a bit tight, but they’ll take their place if threatened with a hammer:

There goes the floor panel:

I then install the FWD Panel:

And the AFT Panel:

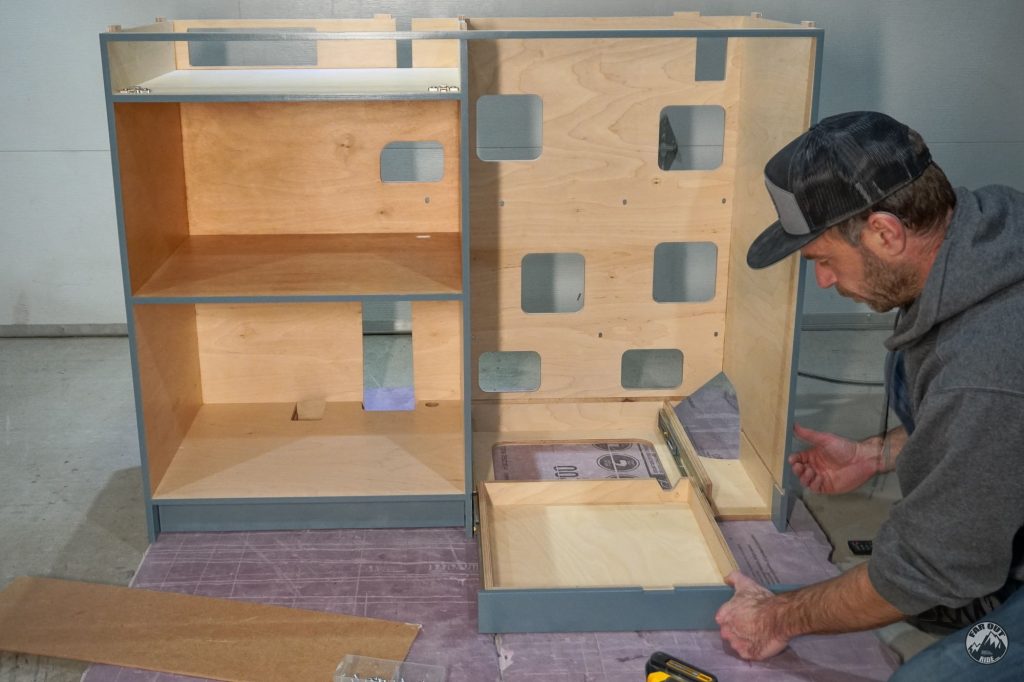
At this point, I ensure that all joints will remain clamped during the curing. Brad nails are great to “freeze” parts during alignment, and clamps maintain the joints under pressure. For large assemblies like this one, #4 x 1″ screws (on non-visible surfaces) do a good job at clamping, and minimize the use of large clamps (which are not cheap):
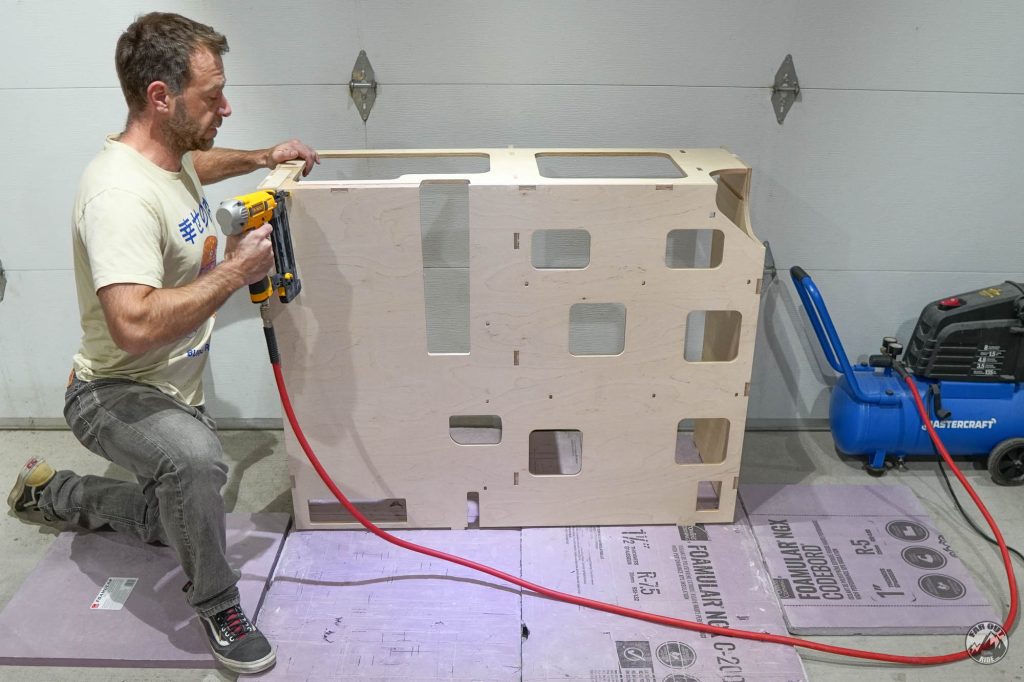
#4 screws maintain clamping force for most parts, except I tried to avoid screws on visible surfaces:

#4 screws maintain clamping force for most parts, except I tried to avoid To complete the box assembly, I added the induction & oven shelves (they slide in from the front, and are glued as well), and the “countertop support” as well:on visible surfaces:

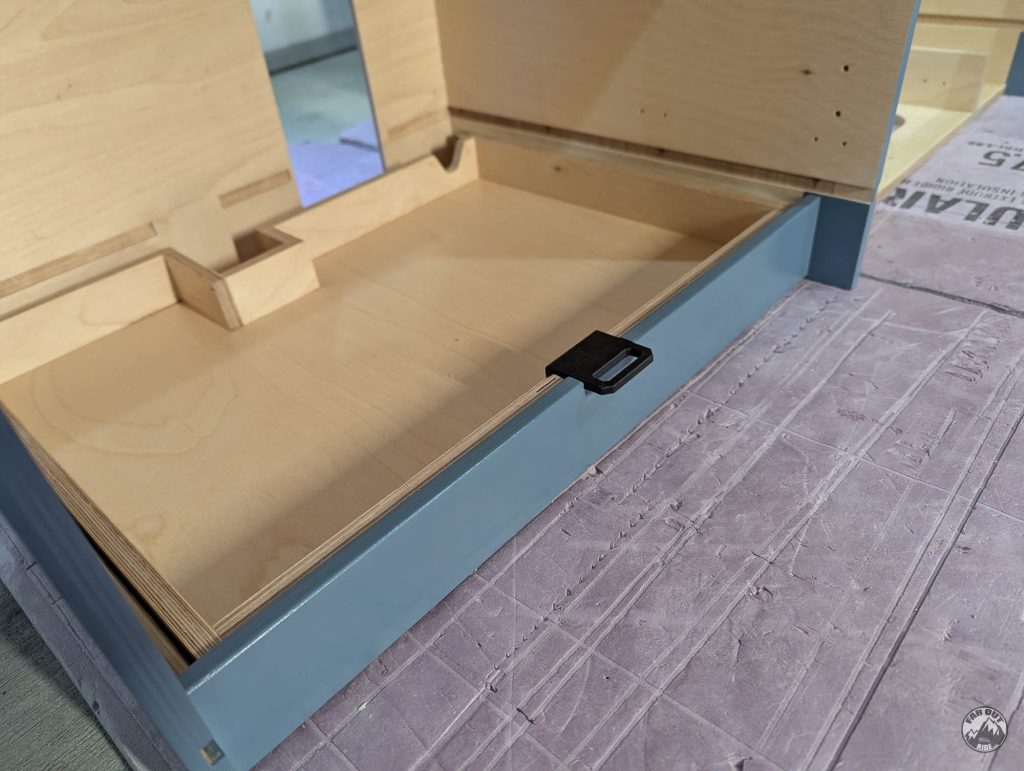
Secret Drawers
The “secret drawers” are toe kicks in disguise, and this is where the laptops will live. Don’t get us wrong, they’re not a safe box, they’re just harder to find and access…
Because they’re light-duty, we used 1/4″ plywood for the base, and we didn’t add any finger joints.
FWD secret drawer, before:
FWD secret drawer, after gluing it together:

AFT secret drawer, before:

AFT secret drawer, after gluing it together:

Main Drawer
Here is the “main” drawer, which will eventually house the trash can (and more).
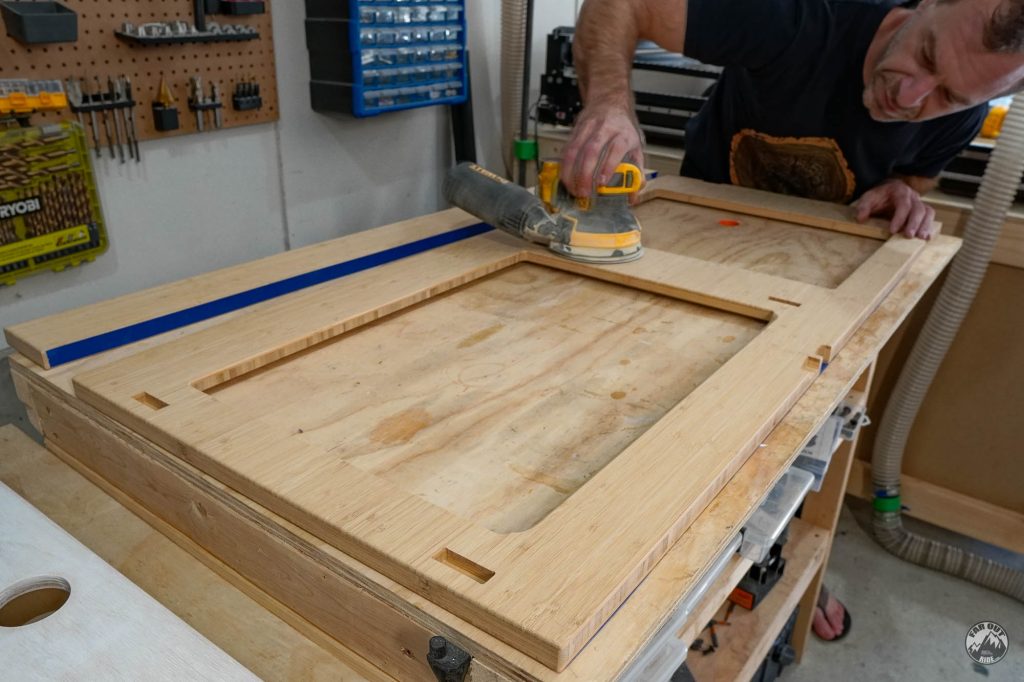
To shave some weight, I experimented with removing half the thickness on all panels. I went through the entire thickness of the Front panel, because a Face will be added later. Happy with the result!

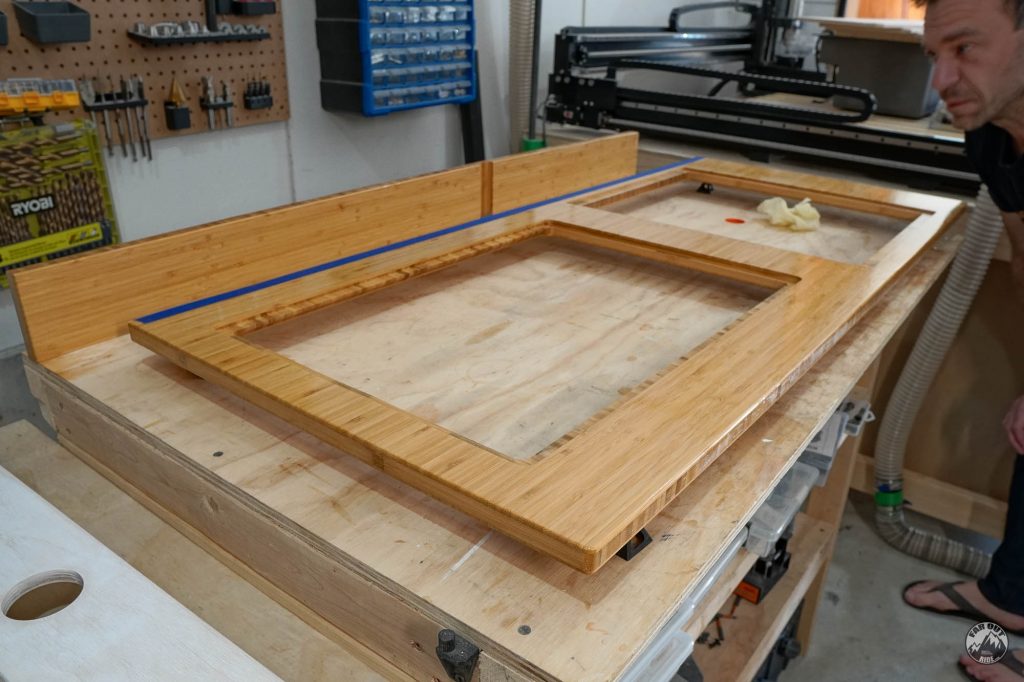
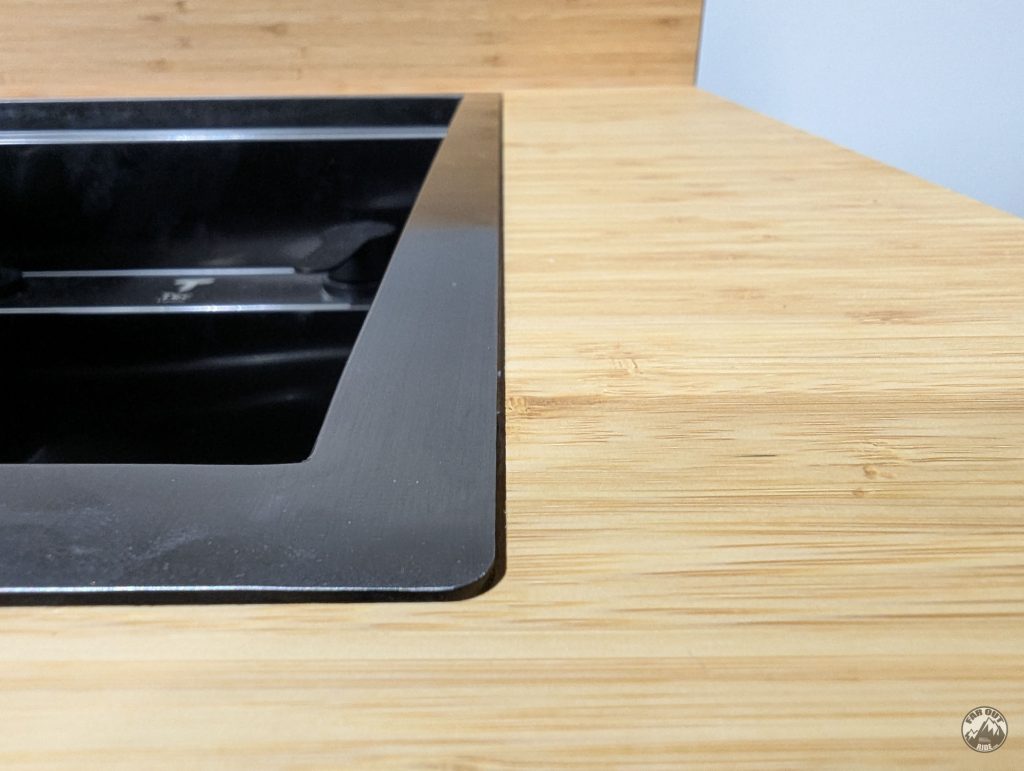
Countertop
The bamboo countertop and backsplash are cut, then sanded with an orbital sander (220 grit sandpaper):
Here I’m applying tung oil with a lint-free cloth. The tung oil adds a warm, rich color to the bamboo. Super satisfying!

Tung oil requires 3-5 coats, with 24h to 48h between each coat. No rush.
Finish
Here is how we finished the fridge cabinet:
Visible Surfaces
To get a smooth aesthetic finish
- Sand to 220 grit with an orbital sander.
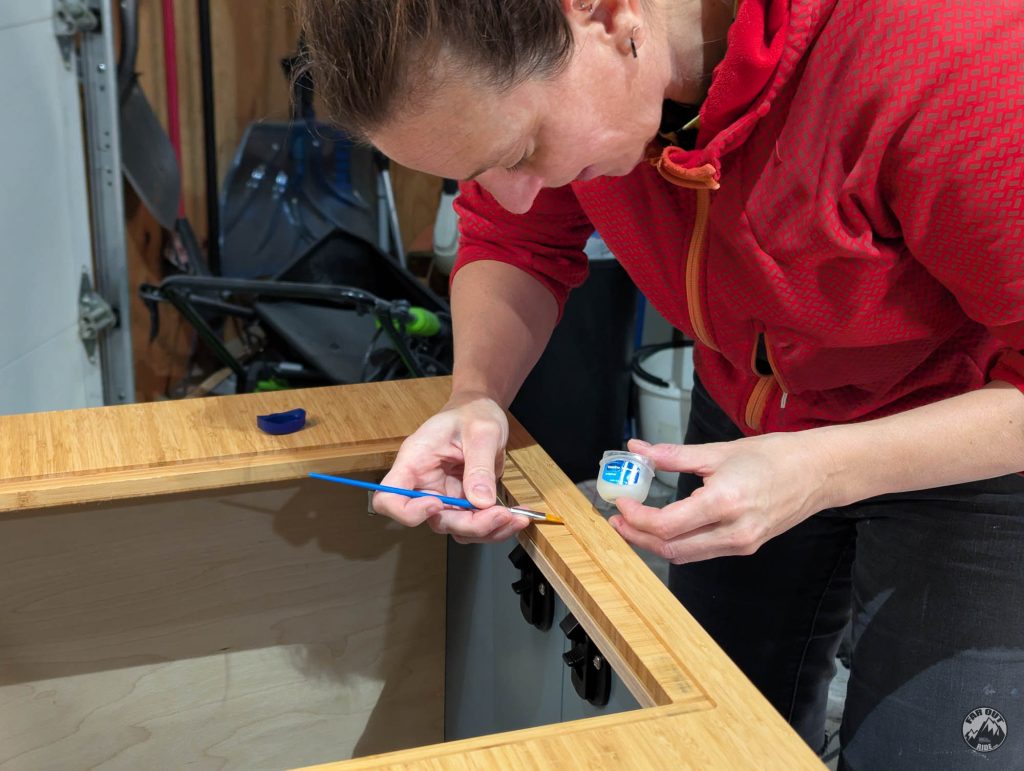
- Apply Grain Filler Gel. Optional to get a very smooth surface, because it’s difficult to completely sand the grains away on Baltic birch.
- Apply 2 coats of primer.
- Apply 3 coats of paint.
Other Surfaces
To seal and protect against moisture and stains
- We sanded the interior of the drawers to get a smooth surface, but didn’t sand hidden surfaces.
- Apply 2 coats of water-based polyurethane (Everywhere, even in the back of the cabinet and where the fridge lives).
Final Assembly
And with all the parts glued and finished, we can finally go on with the final assembly!
Adding the slides to the first drawer:

And then to the box:

Adding the 3D Printed Handle:

Yes!
The divider slides in the box’s slots. It’ll have to be removed when we install the cabinet in the van, so I’m not fastening it at the moment:
Drawer 2:
Drawer 3:

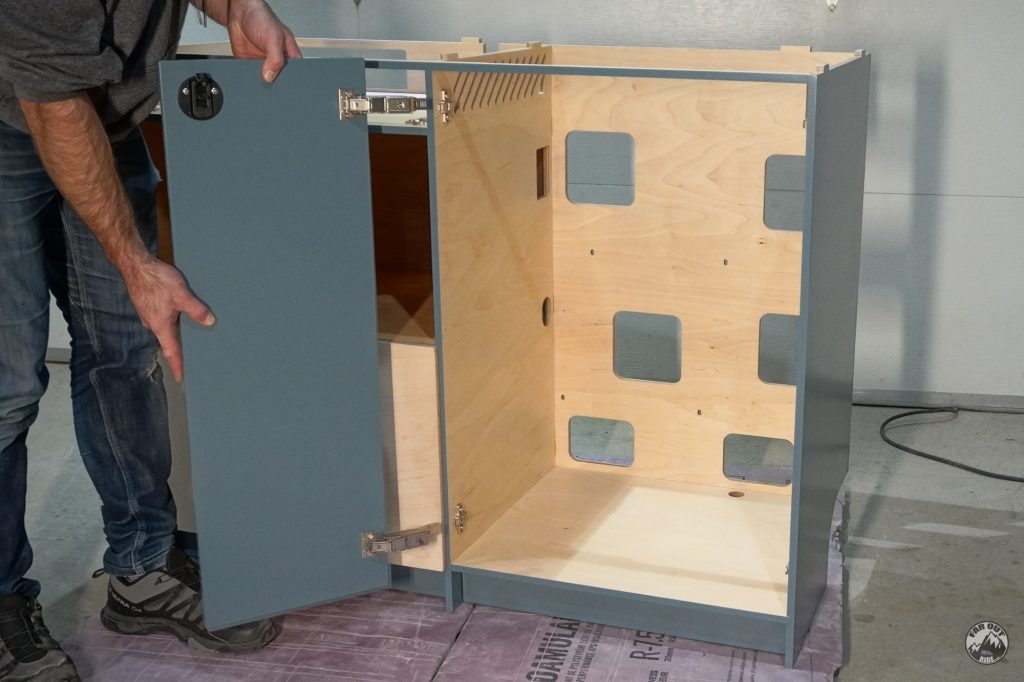
Next, I’m fastening the door hinge clips to the box of the cabinet:

These clips are made specifically for “thin” doors. The mechanism expands into the holes and secures it in place:
The doors can now be clipped in place:
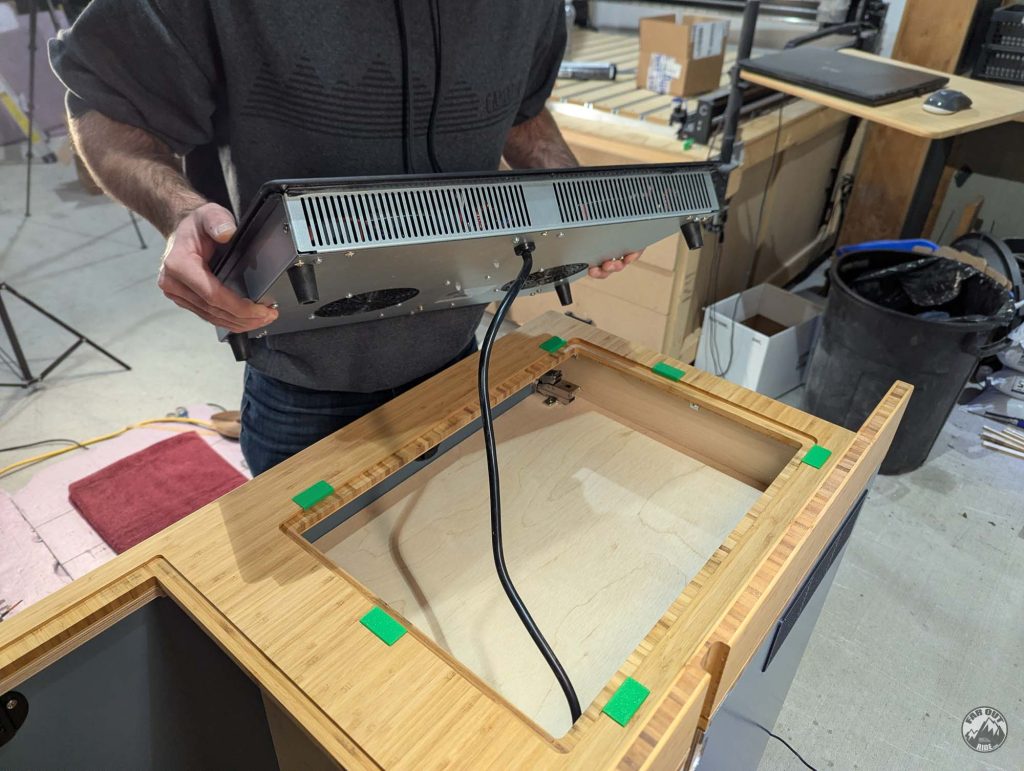
That’s the induction shelf door:

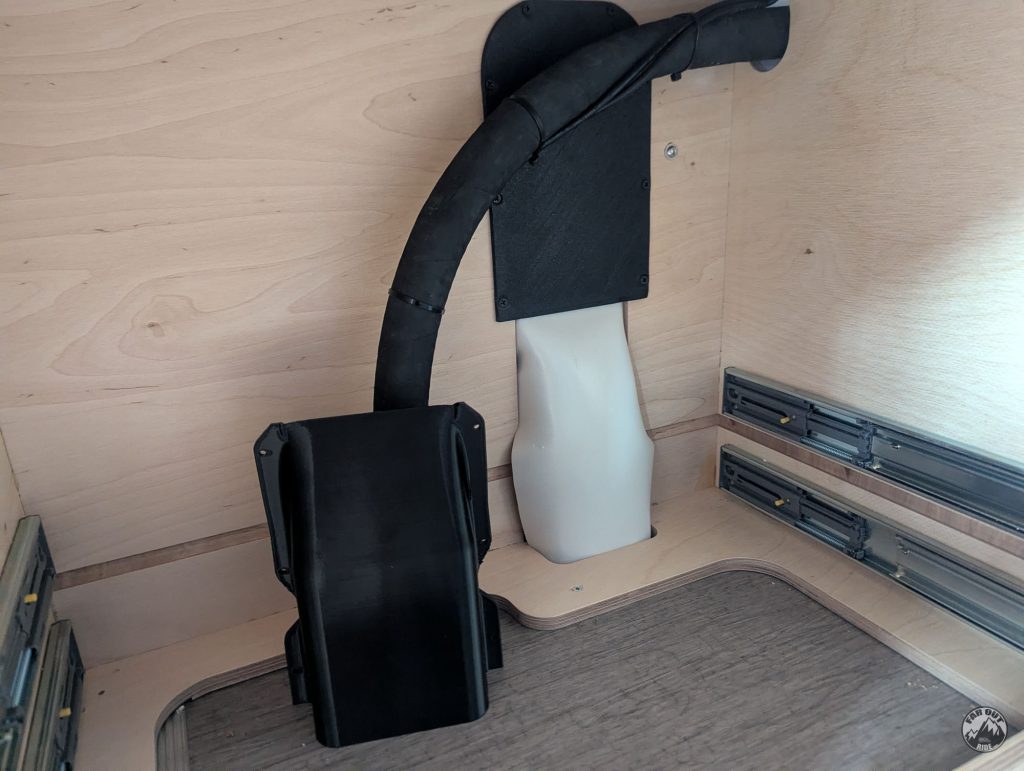
The induction cooktop requires some venting, so I made a 3D printed grille:

It’s not going anywhere:

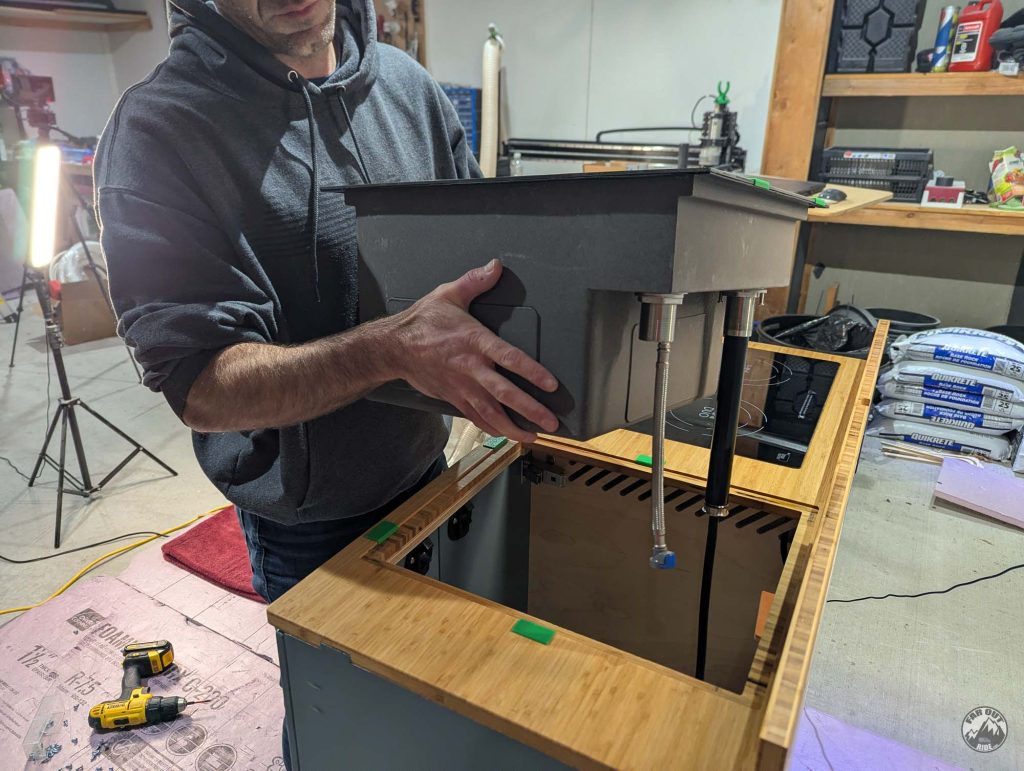
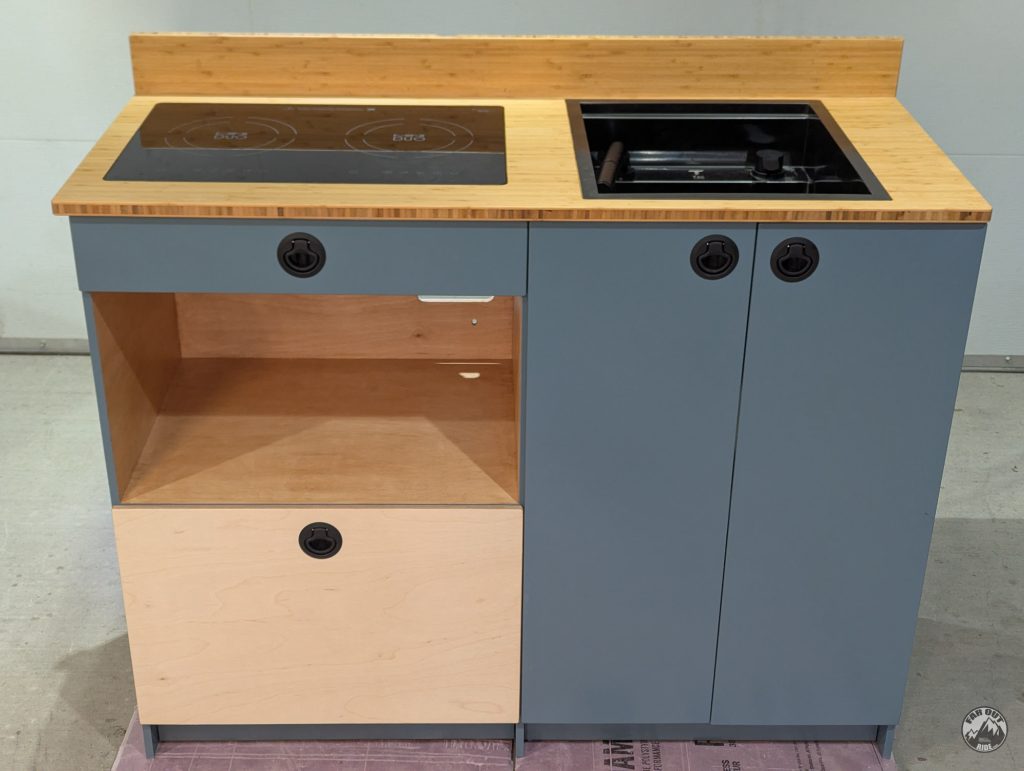
At last:
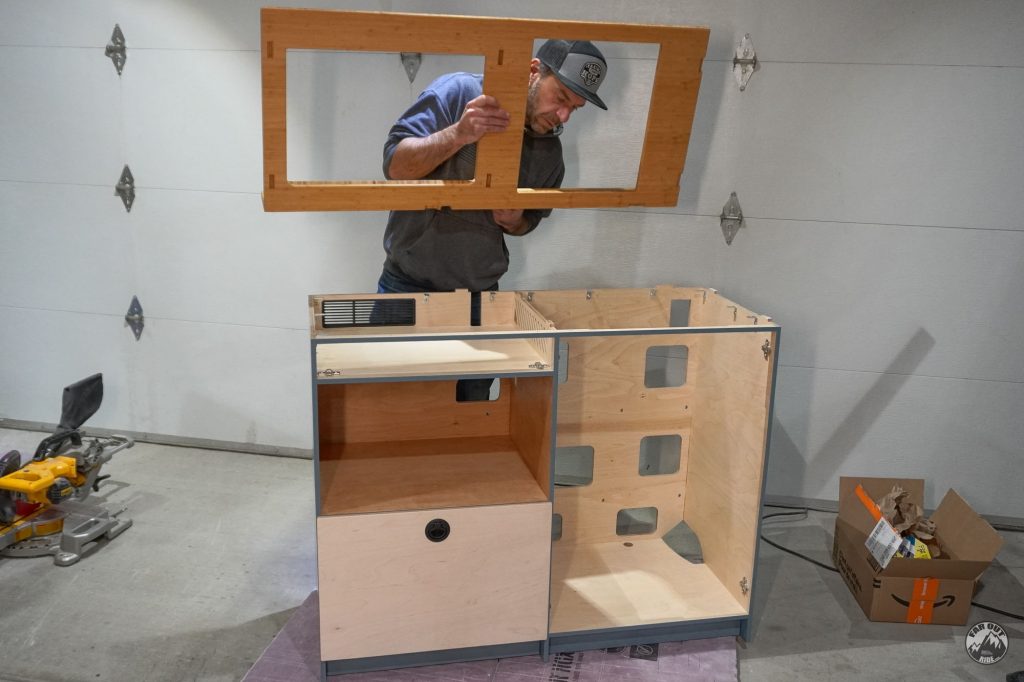
The bamboo countertop is secured with a combination of brackets and screws (this Right Angle Drill Adapter has been a lifesaver during the build!):
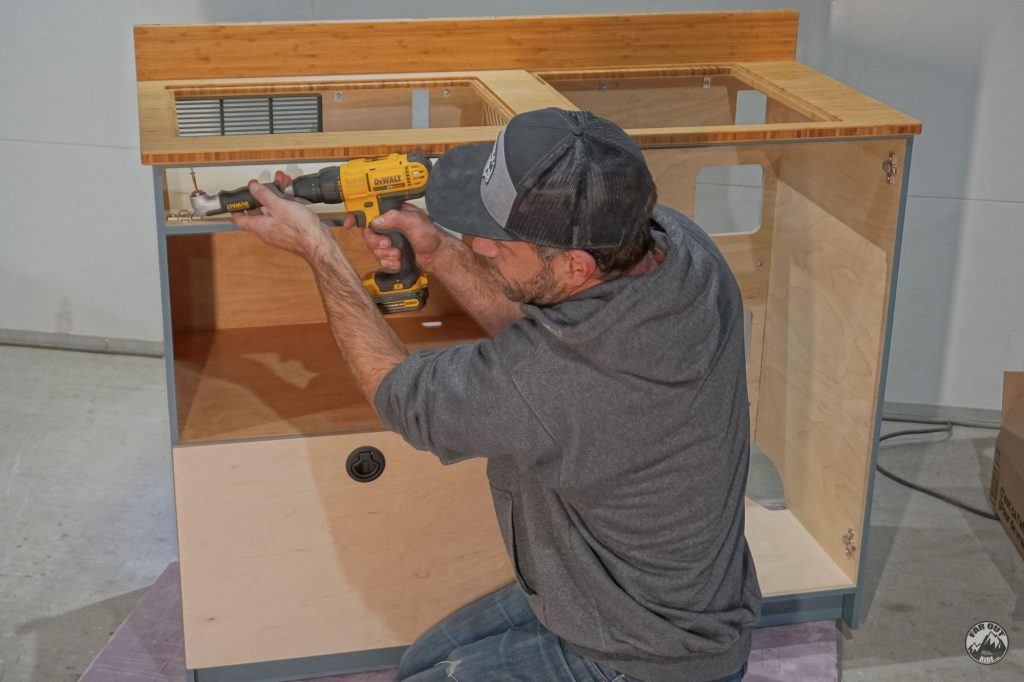
Oh boy, it’s getting real!
(We didn’t finish the face of drawer 3, because we might do it in bamboo, just to add contrast… TBD)

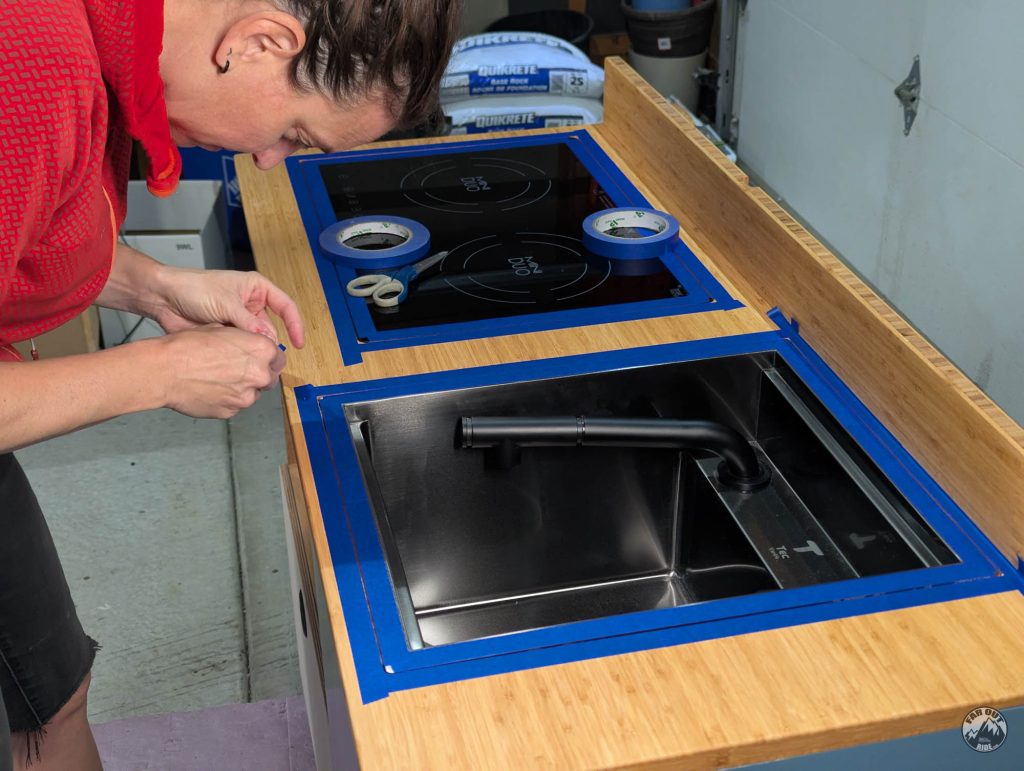
Sink & Induction Mounting
We start by applying 1/16″ x 3/8″ butyl tape around the induction cooktop:
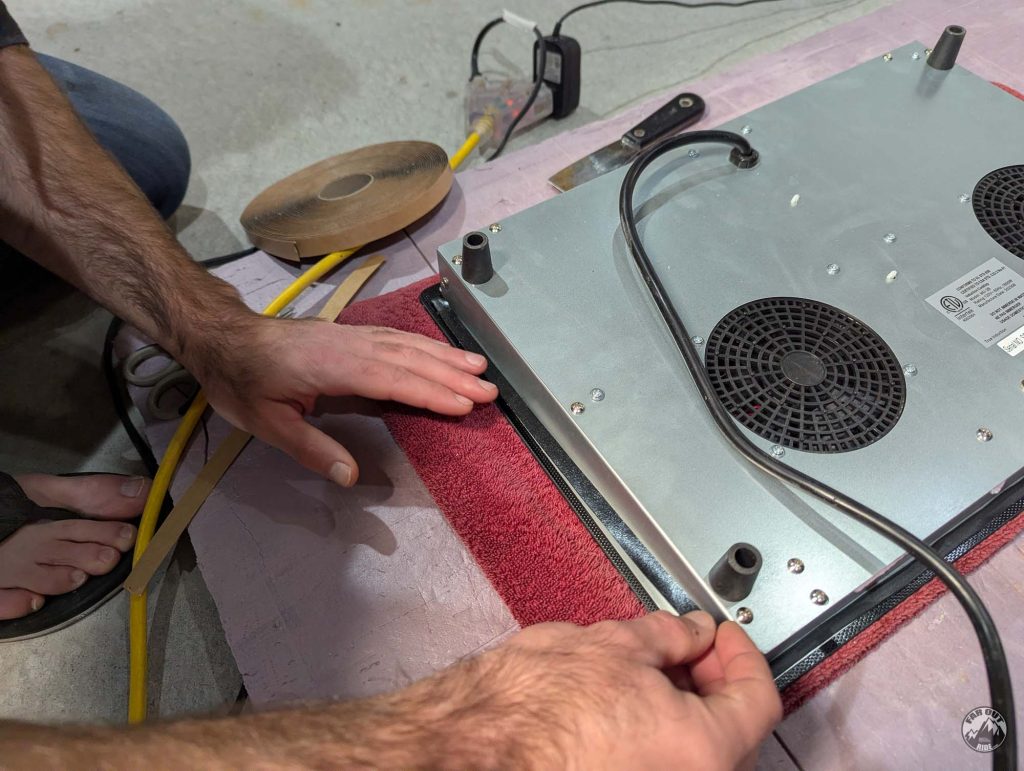
And around the sink (note that butyl tape is more sticky, flexible, and durable than putty tape; not the same thing):
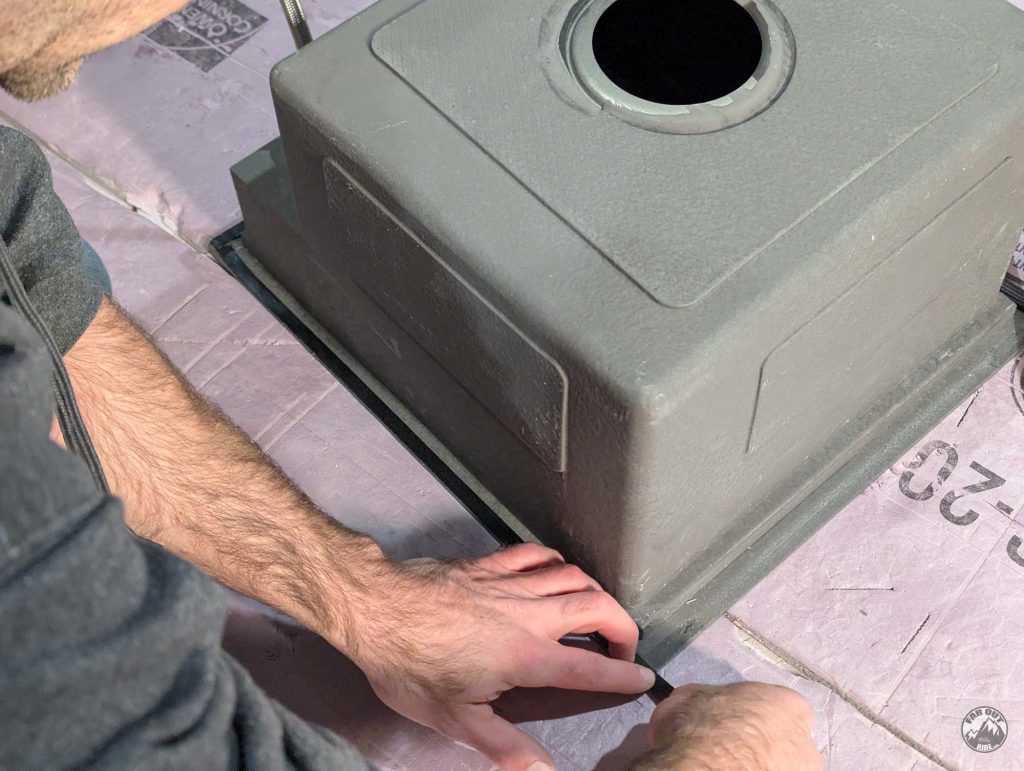
Isabelle preps the vertical edges with Vaseline to prevent Silicone from adhering permanently to the countertop. That’s in case we need to remove the induction cooktop or sink:
We placed 3D printed shims (1.4mm thick) around the periphery to distribute the 1.5mm gap evenly all around, then dropped the induction cooktop in the cutout:
Same story with the sink:
While the shims are still in place:
We made this ☺️ But we’re not done! Moving on.
We now have to caulk the 1.5mm gap:
We placed masking tape to the countertop and the sink/induction. That requires precision and patience, so Isabelle is taking over ☺️
We are using Black RTV Silicone to fill the gaps:
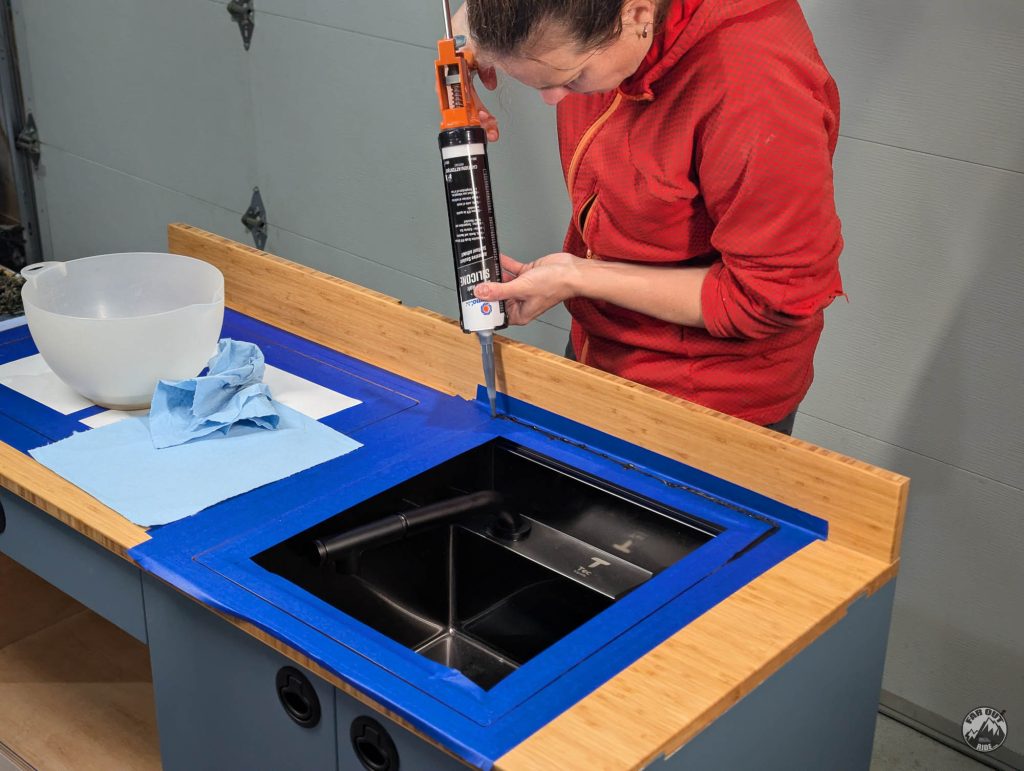
To get a smooth and even bead, Isabelle wet her finger (soapy water) and drag it slowly while applying gentle pressure:

Remove the tape immediately, before the Silicone cures:

There we have it!
And just like that, we’re ready to install the cabinet in the van!
Installation in Van
Resources


Prerequisite
Before installing the sink cabinet in the van, we had to install the Bug Wall mosquito screen to the sliding door:
For thermal break, we add a layer of 1/8″ Landau closed-cell foam on surfaces mating with the van. It’s bonded to the cabinet with 3M 90 for convenience:
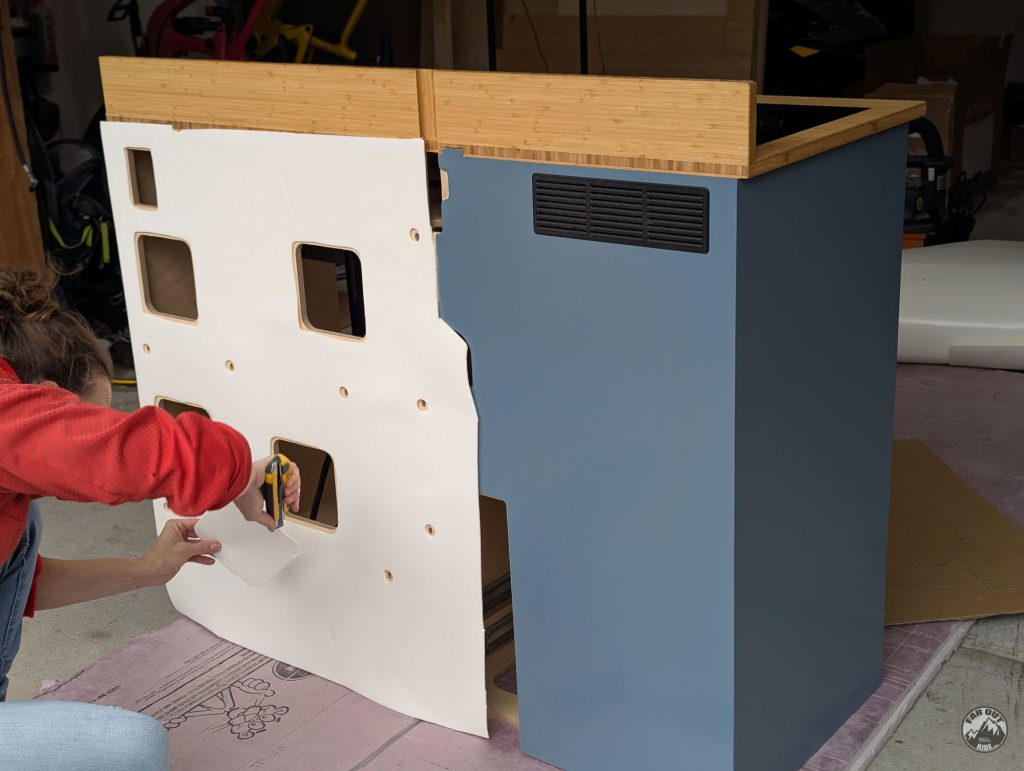
As usual, we add these 3D-printed spacers over the rivet nuts to fill the gap between the cabinet and the wall. This is to prevent putting the rivet nuts under tension when the screws are fastened:
Bon voyage, cabinet!
The cabinet is fastened to the wall with M6 x 30mm flanged button head screws, and to the floor with #8×1″ flat head screws:

The C-Pillar frame is still exposed…

… but we cover it with a 3D Printed C-Pillar Cover (and some Landau foam, why not):
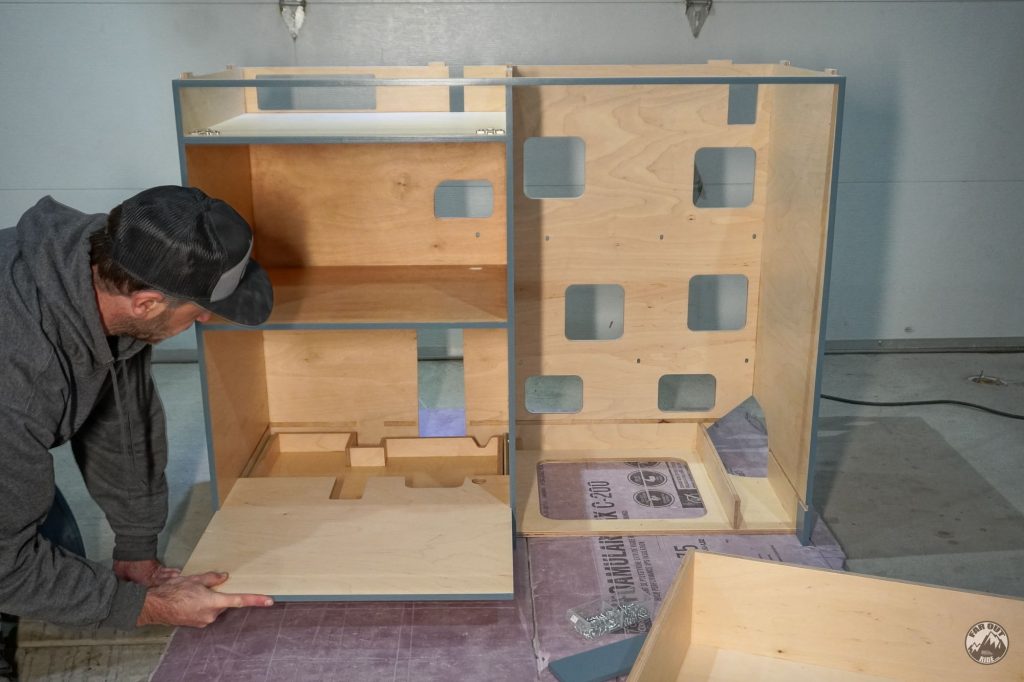
Time to add the FWD secret drawer…

… and the shelf over it:

Here’s the AFT secret drawer…
… and the shelf over it:
Electrical Outlets
The 120V outlets for the induction cooktop and the oven are wired per:

Plumbing
Access Cutout Covers
Oven Installation
Final Result
On Second Thought…
Too soon!


Love your cabinet. What are the dimensions of it (HxWxL) and also the oven cavity? Have been leery about operating an oven like this in a cabinet, as they warn that these get hot.
Thanks!
Are you using the same slides as the fridge cabinet? The link takes me to another slider. In your picture it looks like the same one you used for the fridge cabinet. Just want to make sure before I buy it! Thanks!
Yes!!!! The only mod I’m going have to make is the induction area. I’m not doing Induction so need to find an alternative. Might just cover the hole and use the drawer below it to store a portable stove.
Are you going to be updating your 3d part files? Like the green shims, and the handle?
The cabinet is assembled and mounted in the van as I’m writing this!
But there’s still some modifications I need to include to the files (findings during assembly), and I need to prepare everything for sharing.
Should be ready in a few days or a week!
I’ll post everything then (CNC files, 3D print files)
You are a Gods send!