Now that the electrical system is up and running in our van, it’s time to install the solar panels!
Disclosure: This post contains affiliate links, which means that if you click a product link and buy anything from the merchant (Amazon, eBay, etc.) we will receive a commission fee. The price you pay remains the same, affiliate link or not.

Prerequisite
Roof Rack
We didn’t use a roof rack on FarOutVan 1 and mounted the solar panels with VHB tape. That was way back in 2016, and the panels are still holding strong:
That being said, a roof rack makes it easier to mount accessories (solar panels, antenna, MaxTrax, etc.) and went that route (glad we did) for FarOutVan 2:
Electrical System
FarOutVan 1 had modest electrical needs (to complement propane), so we went with a smaller DIY electrical system (200Ah battery bank, 1000W inverter). Small, low cost, but very robust and efficient:
FarOutVan 2 is more power hungry, and therefore we went all in (800Ah battery bank, 5000W inverter). Also, it’s 2025, and there is now a plug-and-play system available. Huge time saver and minimizes human error:
Material & Resources
Time
6 hours
Cost
$ 575 USD
($500 panels + $75 hardware)
Weight
60 lbs
Material
| Item | Description | QTY | Buy Link |
|---|---|---|---|
| 200W Panel | Renogy 200W N-Type Solar Panel 24V 49.75″ x 30″ | 2 | Amazon |
| 100W Panel | Rich Solar Mega 100W Slim Solar Panel 12V 51.2″ x 15.7″ | 1 | Rich Solar |
| Corner Brackets | 10-Series 2-Hole Corner Brackets | 16 | Amazon |
| 1/4″-20 Stainless Steel Button Head Screws 0.5″ Length | To attach solar panels to roof rack | 32 | Amazon |
| 1/4″-20 10-Series Stainless Steel T-Nuts | Fasten to roof rack | 16 | Amazon |
| 1/4″ Stainless Steel Washers | Fasten to solar panels | 16 | Amazon |
| 1/4″-20 Stainless Steel Nyloc Nuts | Fasten to solar panels | 16 | Amazon |
| Solar Panel Mounting Brackets | Alternative to corner brackets (4-PCS) | 3 | Flatline Van Co |
| Solar Cable Clips | Cable management and to prevent rattling and chafing | 1 | Amazon |
| Solar Branch Connector (Parallel) | To connect our 2 x 200W solar panels in parallel | 1 | Amazon |
| Drill-Free Cable Entry Pads | To enter the roof through the Ford Transit existing factory holes | 4 | FarOutRide |
Wiring
Let’s start by routing the solar cables from the electrical system (interior) to the roof (exterior).
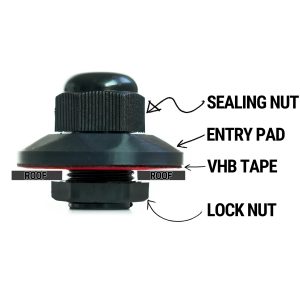
Universal Solar Entry Gland works for any van (Sprinter, Transit, ProMaster), but requires drilling the roof. The Ford Transit comes with several predrilled pass-through holes, so we designed and made a Cable Entry Pad that requires no drilling. That’s what we’ll use to pass the solar cable through our roof:

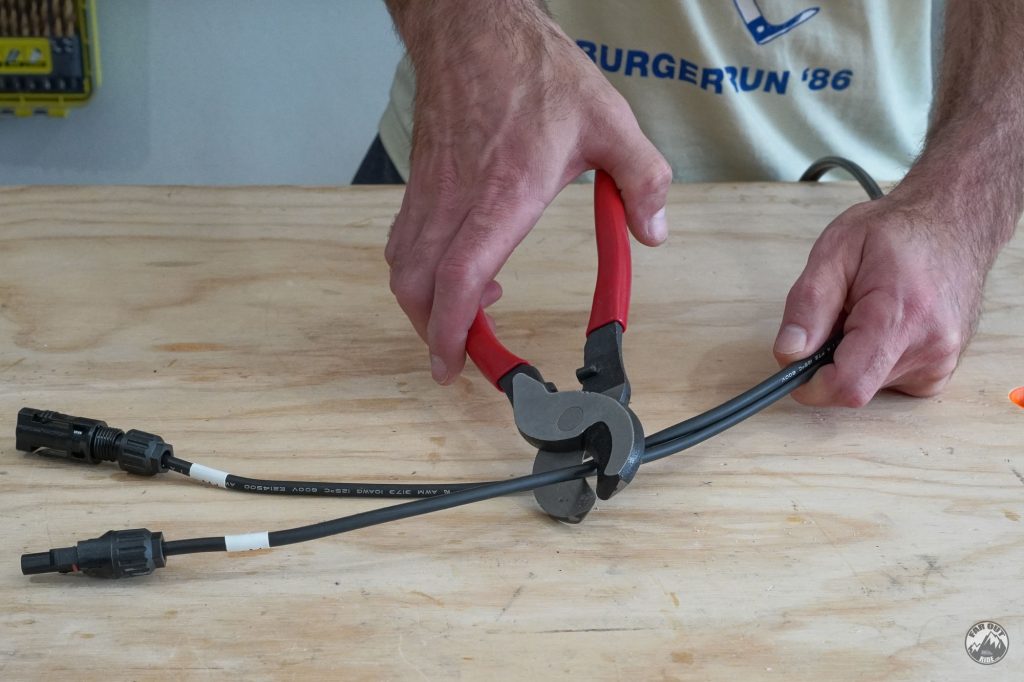
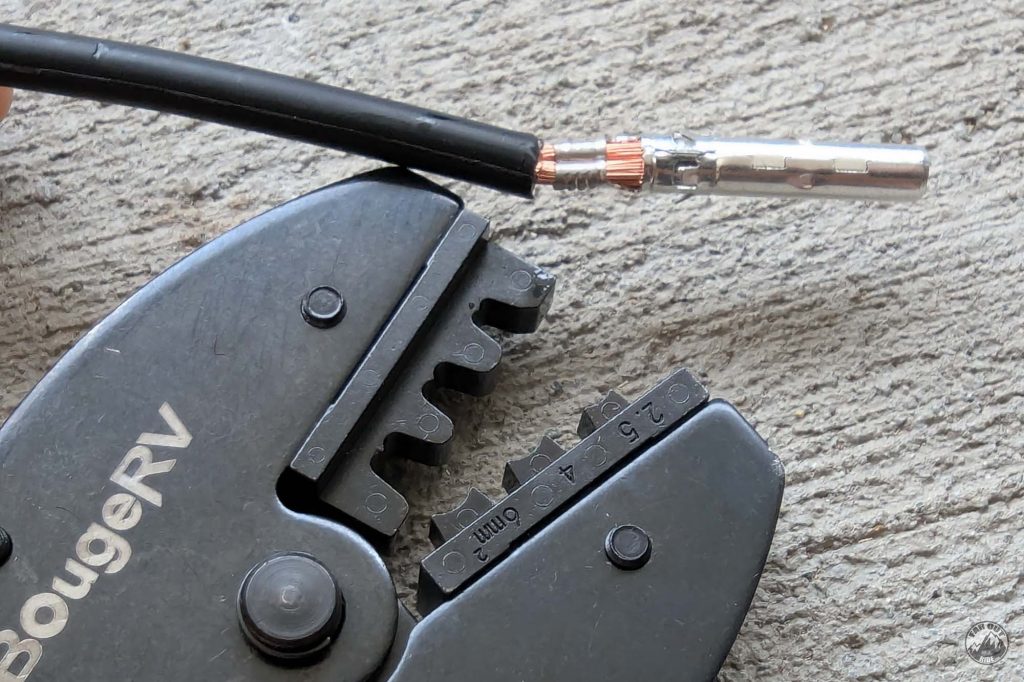
1. The MC4 connectors from the EcoFlow Power Kit cables need to be removed to pass through the cable entry pad. Do not attempt to disassemble MC4 connectors! They have to be replaced. First, trim the MC4 connector from the EcoFlow PV cable:
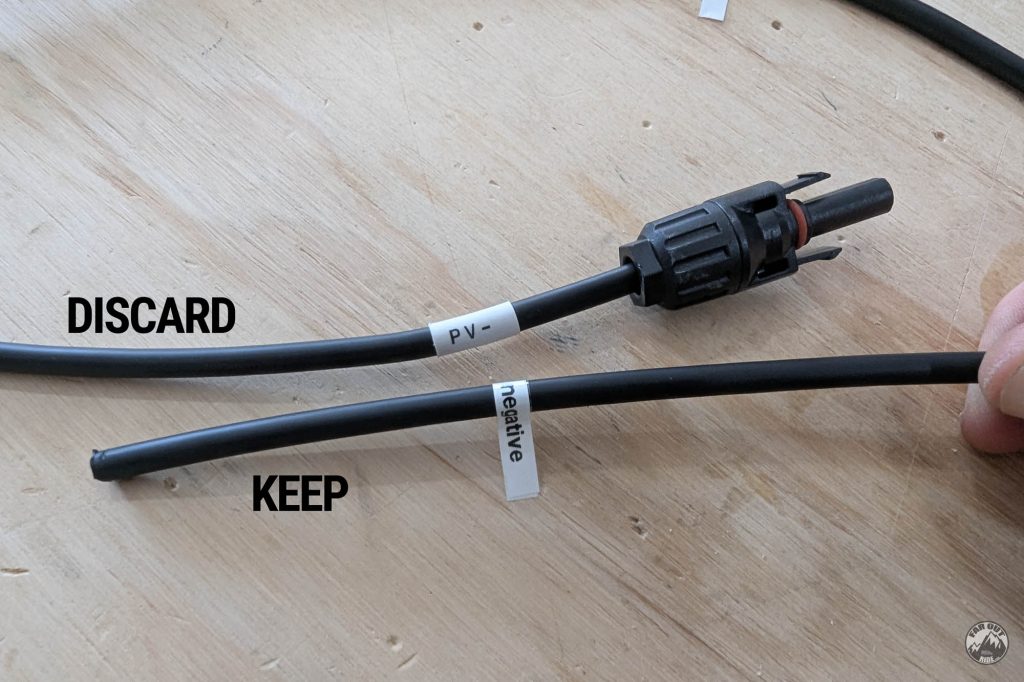
2. Before trimming both connectors, label the wires! If not, you will need a multimeter to tell the positive from the negative…
3. Strip the insulation from the cable:
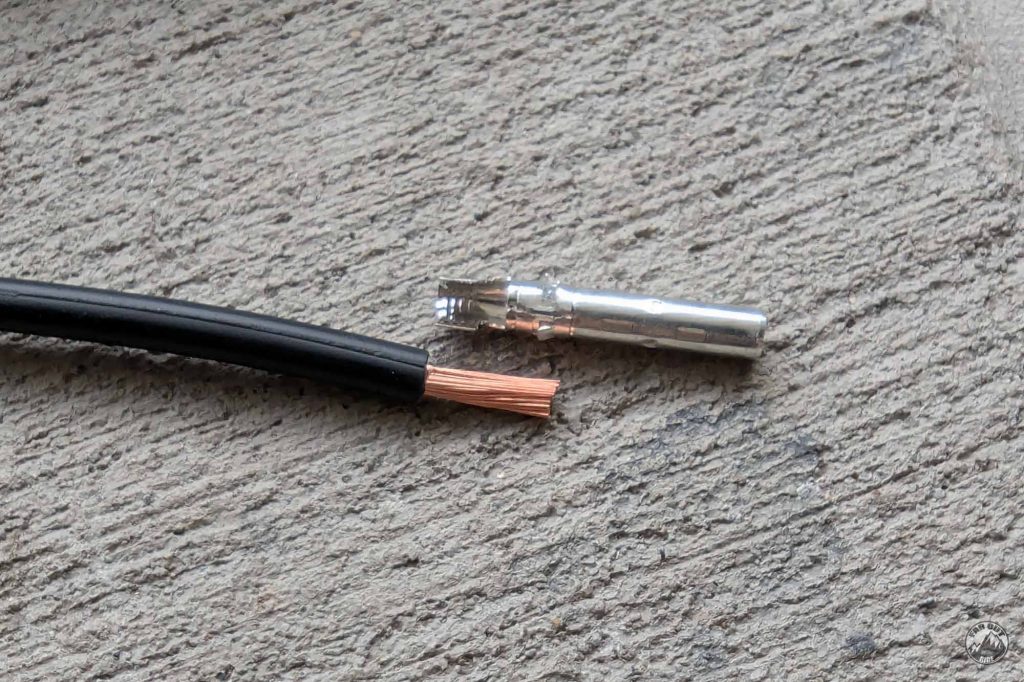
4. Using an MC4 Crimp Tool Kit, crimp the pin to the cable. The female pin (large) goes on the negative wire, the male pin (small) goes on the positive wire:
5. Label the wires and they’re ready to go through the cable entry pad!
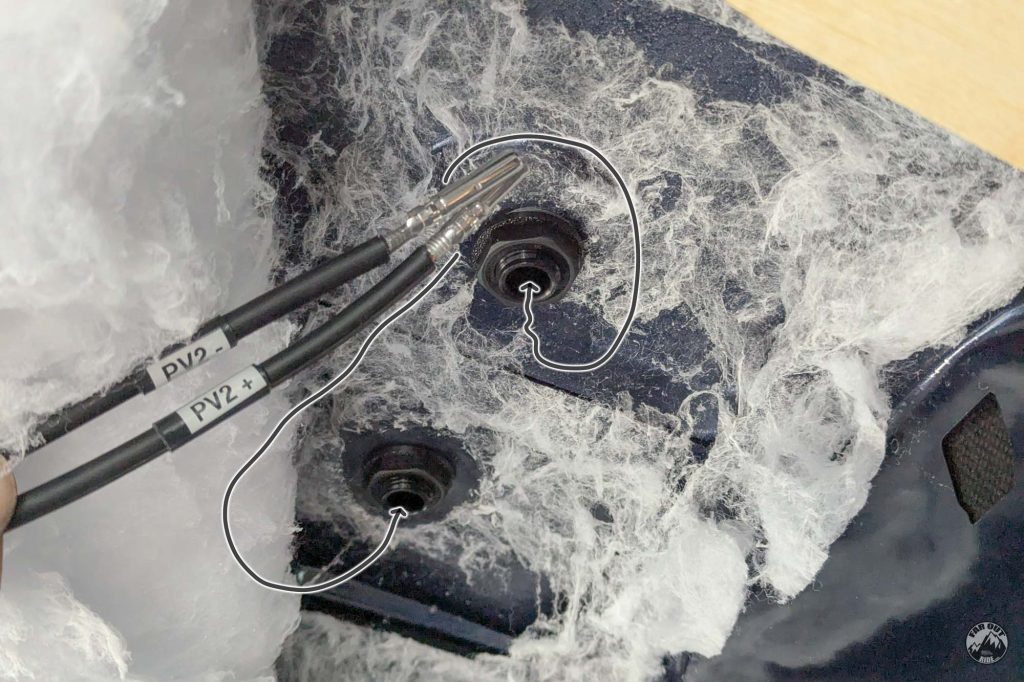
6. An MC4 connector is comprised of an end cap, strain relief, compression sleeve, pin, and coupler body. Assemble them as follows:

7. We made it! Note that the EcoFlow PV cables are quite long (20ft), you can pull them out almost all the way to the front of the van (so you may not require extension cables!).

Solar Panel Install
And now let’s install the solar panels on the roof rack!
Our Requirements
- We don’t want the panels to be too high above the rack (to prevent damage, better aerodynamics).
- Nor do we want them too low under (to prevent partial shading from the roof rack side rails).
- Ideally, they should be easy to remove in case we need to replace them, add more, or modify the roof layout
(hey, we’re engineers and insecure; we always plan for the worst case 😛 ).
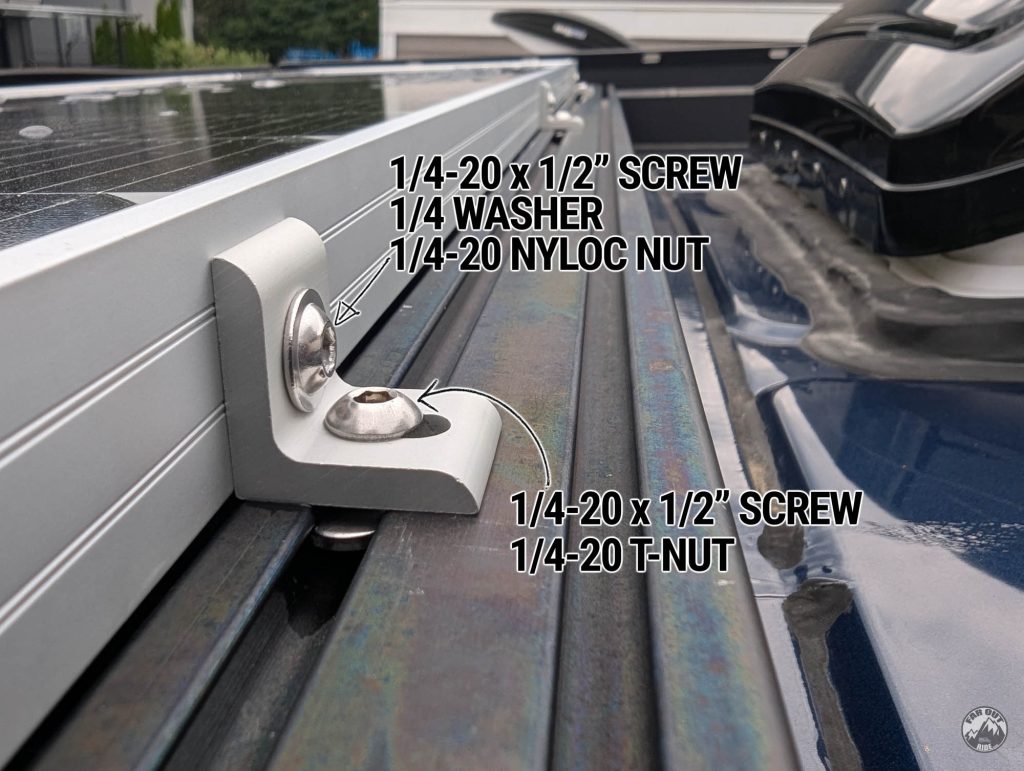
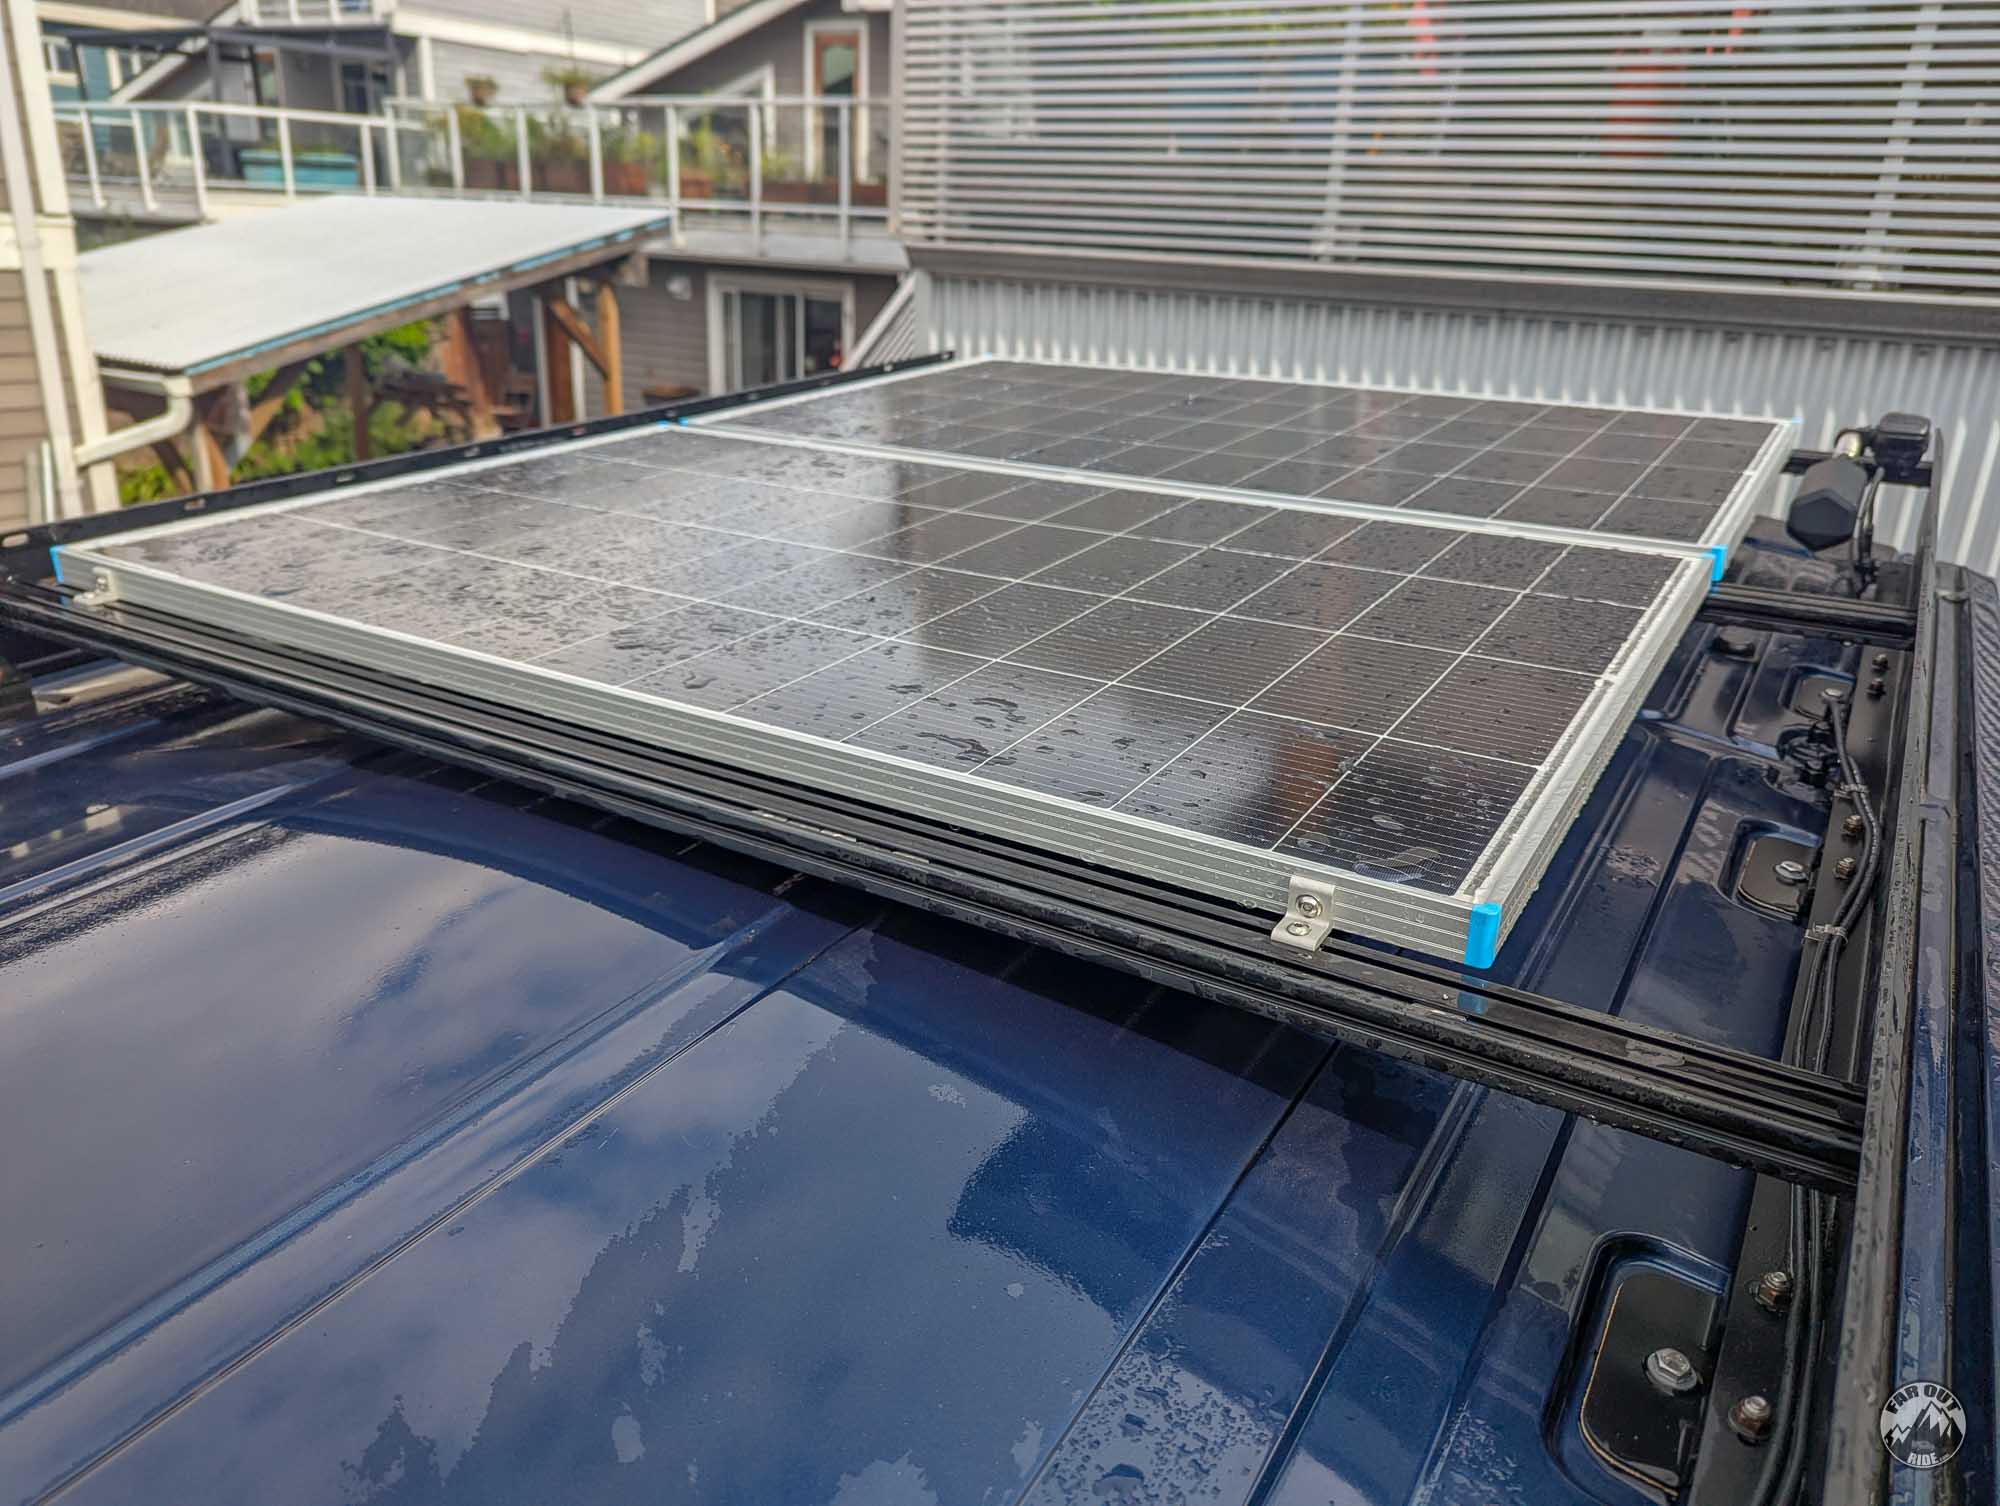
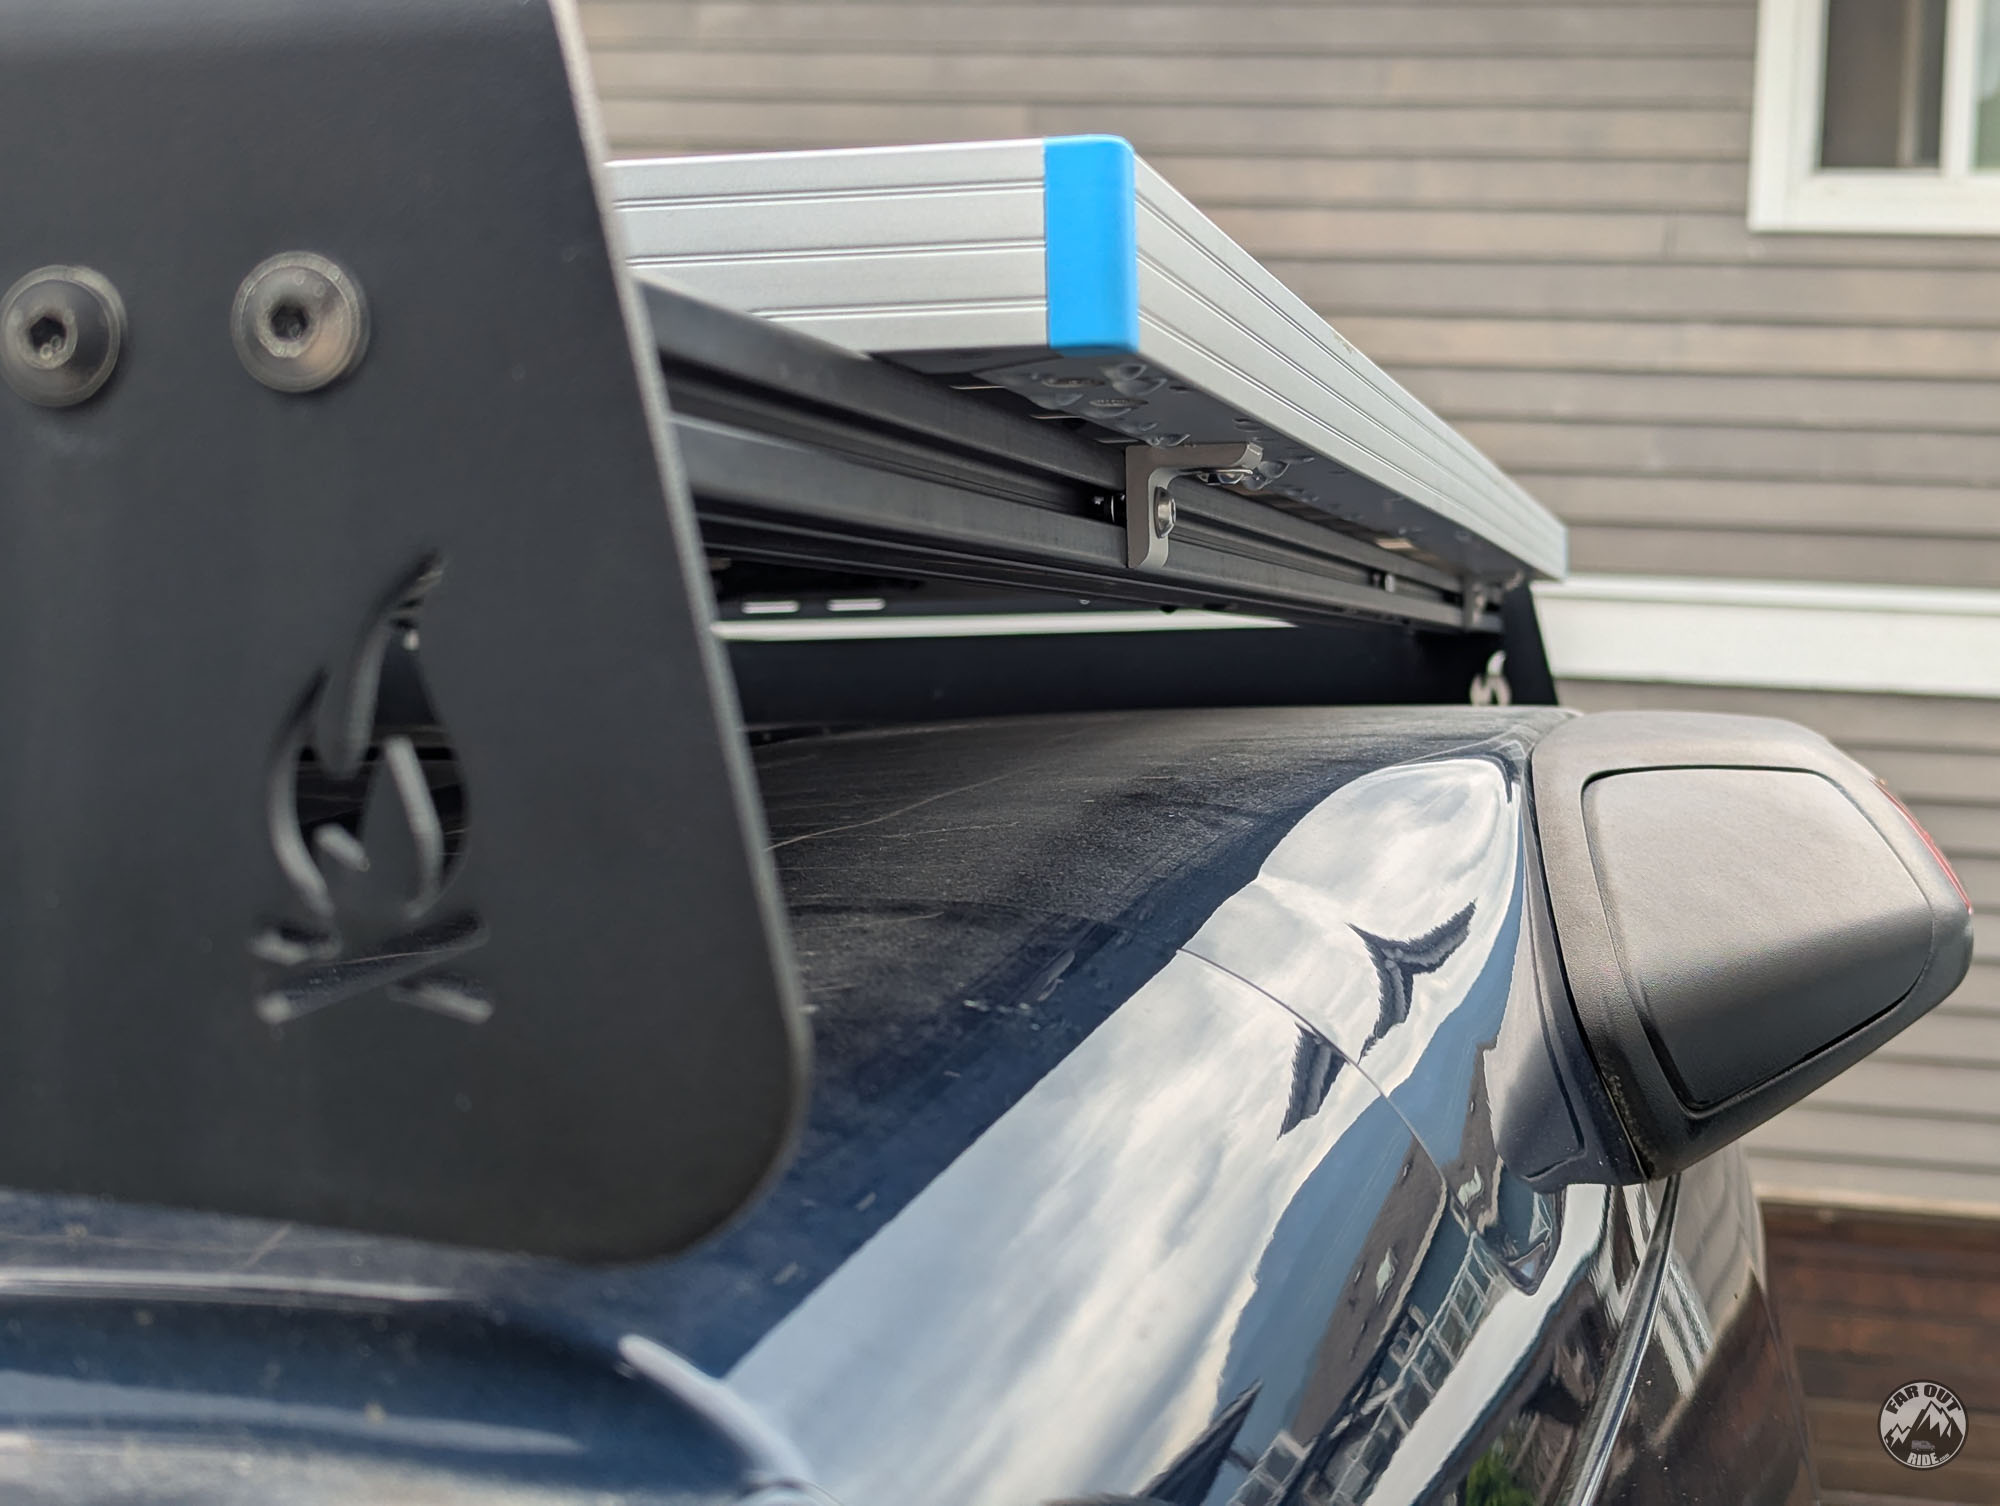
After trying out a few different solar panel Z-brackets, we realized that the perfect height is achieved by simply laying them flat against the roof rack crossbars. The panels are then secured with corner brackets for easy install/removal. Drilling the sides of solar panels most likely removes the warranty (instead of using the holes at the bottom), but we did it anyway (do it at your own risk!). To prevent drilling the sides of the panel, Z-brackets can be used instead (but will increase height).
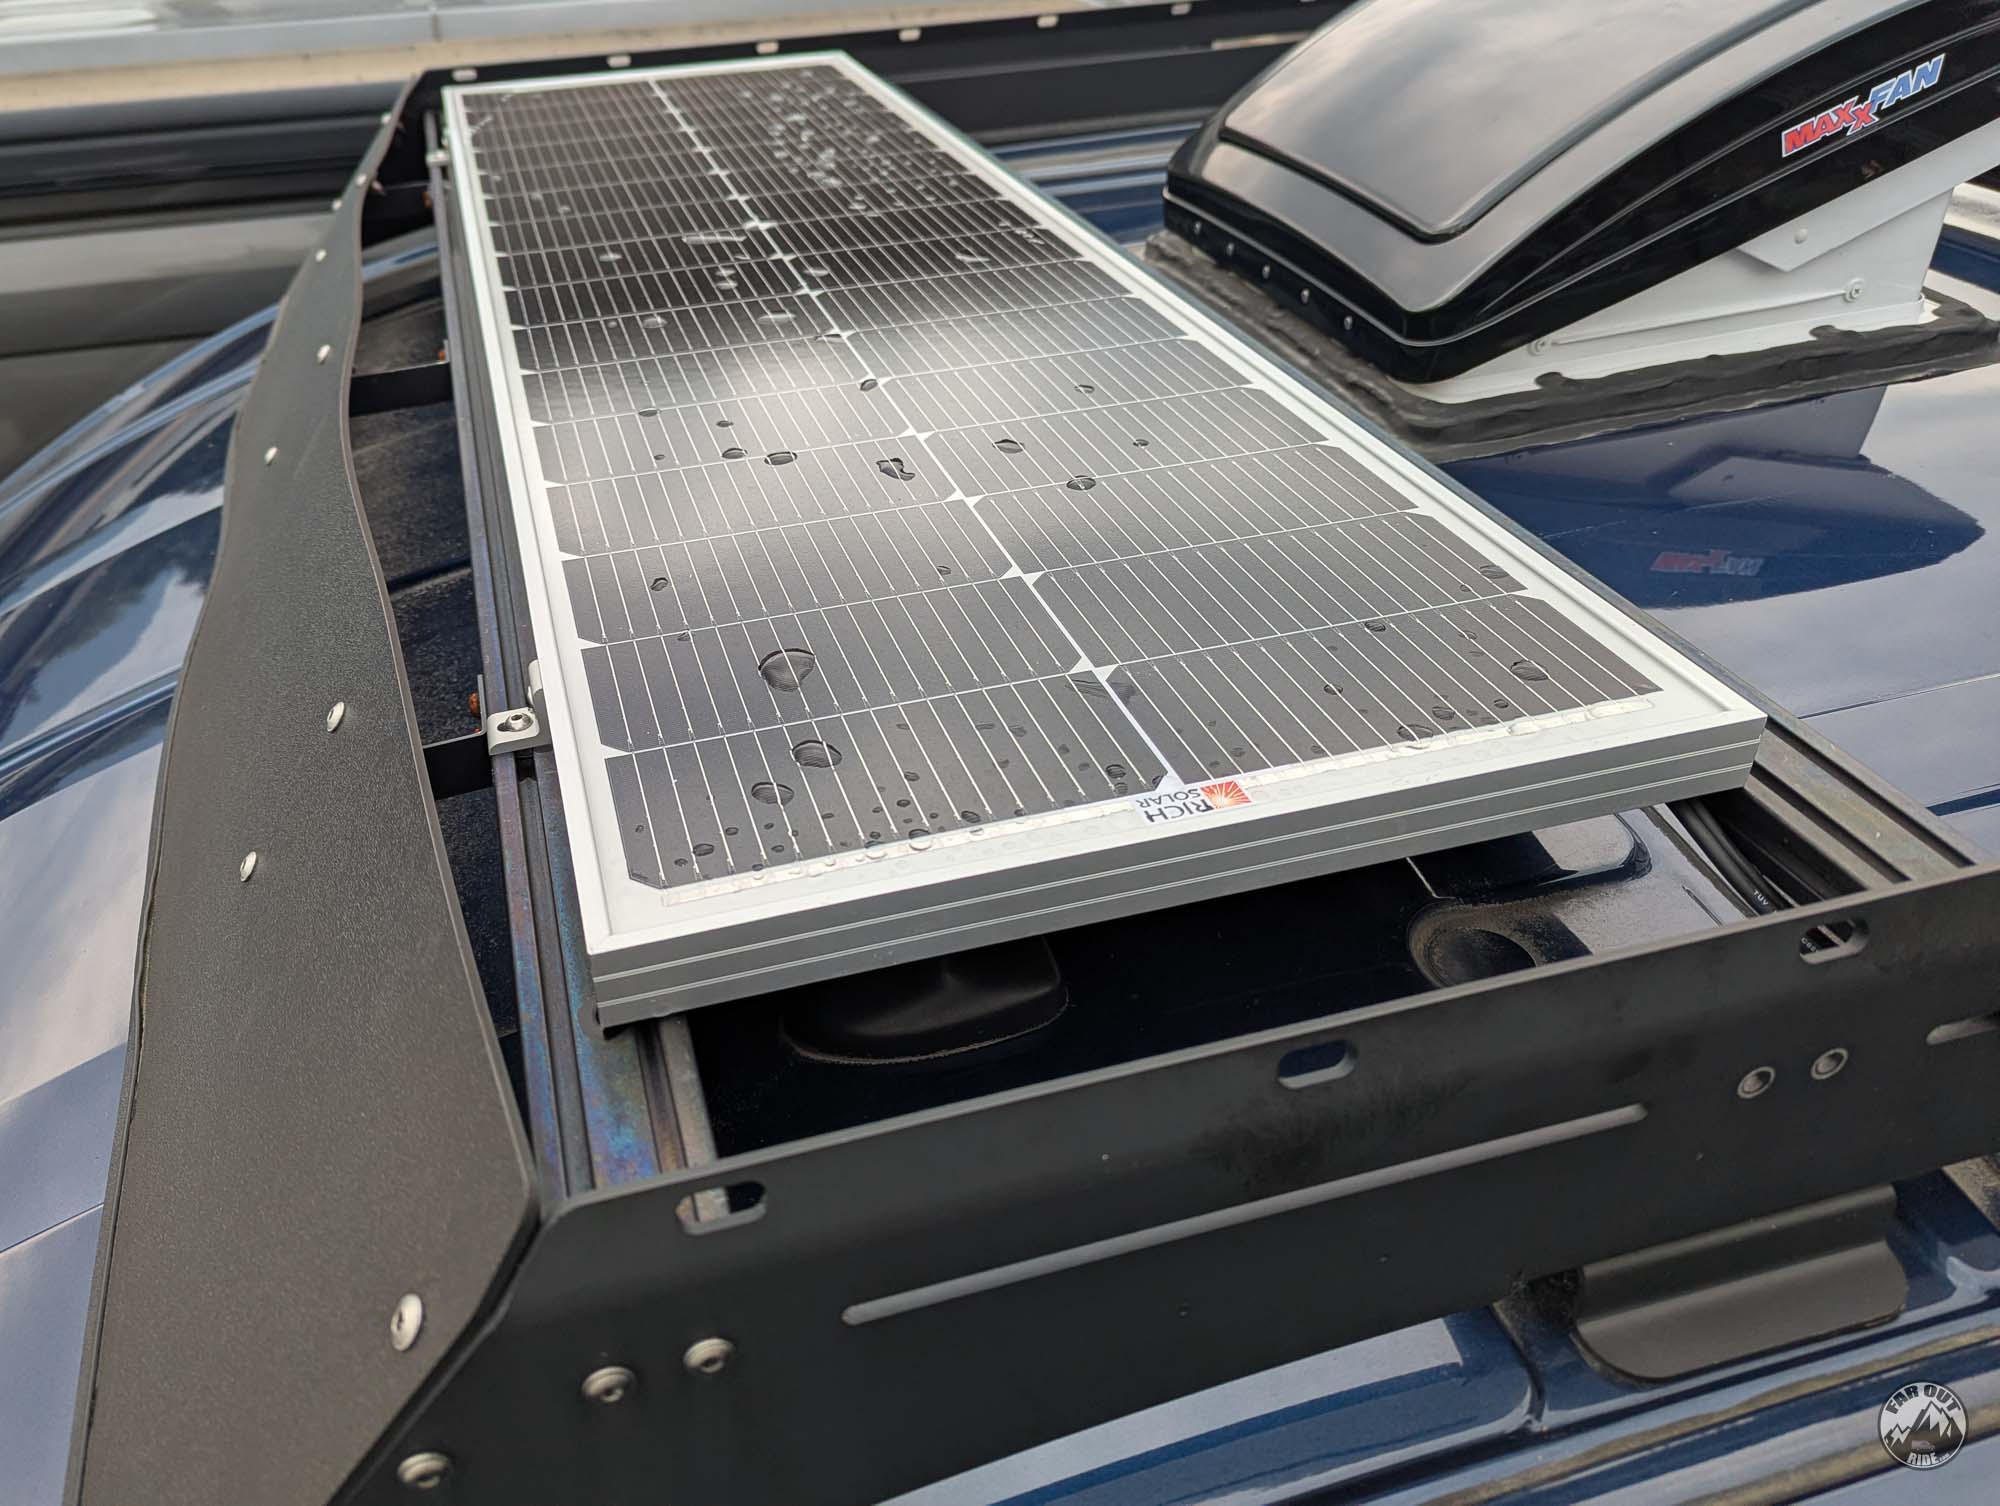
100W Solar Panel (Front)
We installed our Maxxfan at the front of the van, and managed to fit a 100W Rich Solar SLIM solar panel in there:

200W Solar Panel (x2) (Rear)

Cable Management
The 100W panel at the front connects to the EcoFlow PV cables on the driver side. We used stainless steel solar cable clips every 8-in or so to prevent the cables from rattling and chafing:
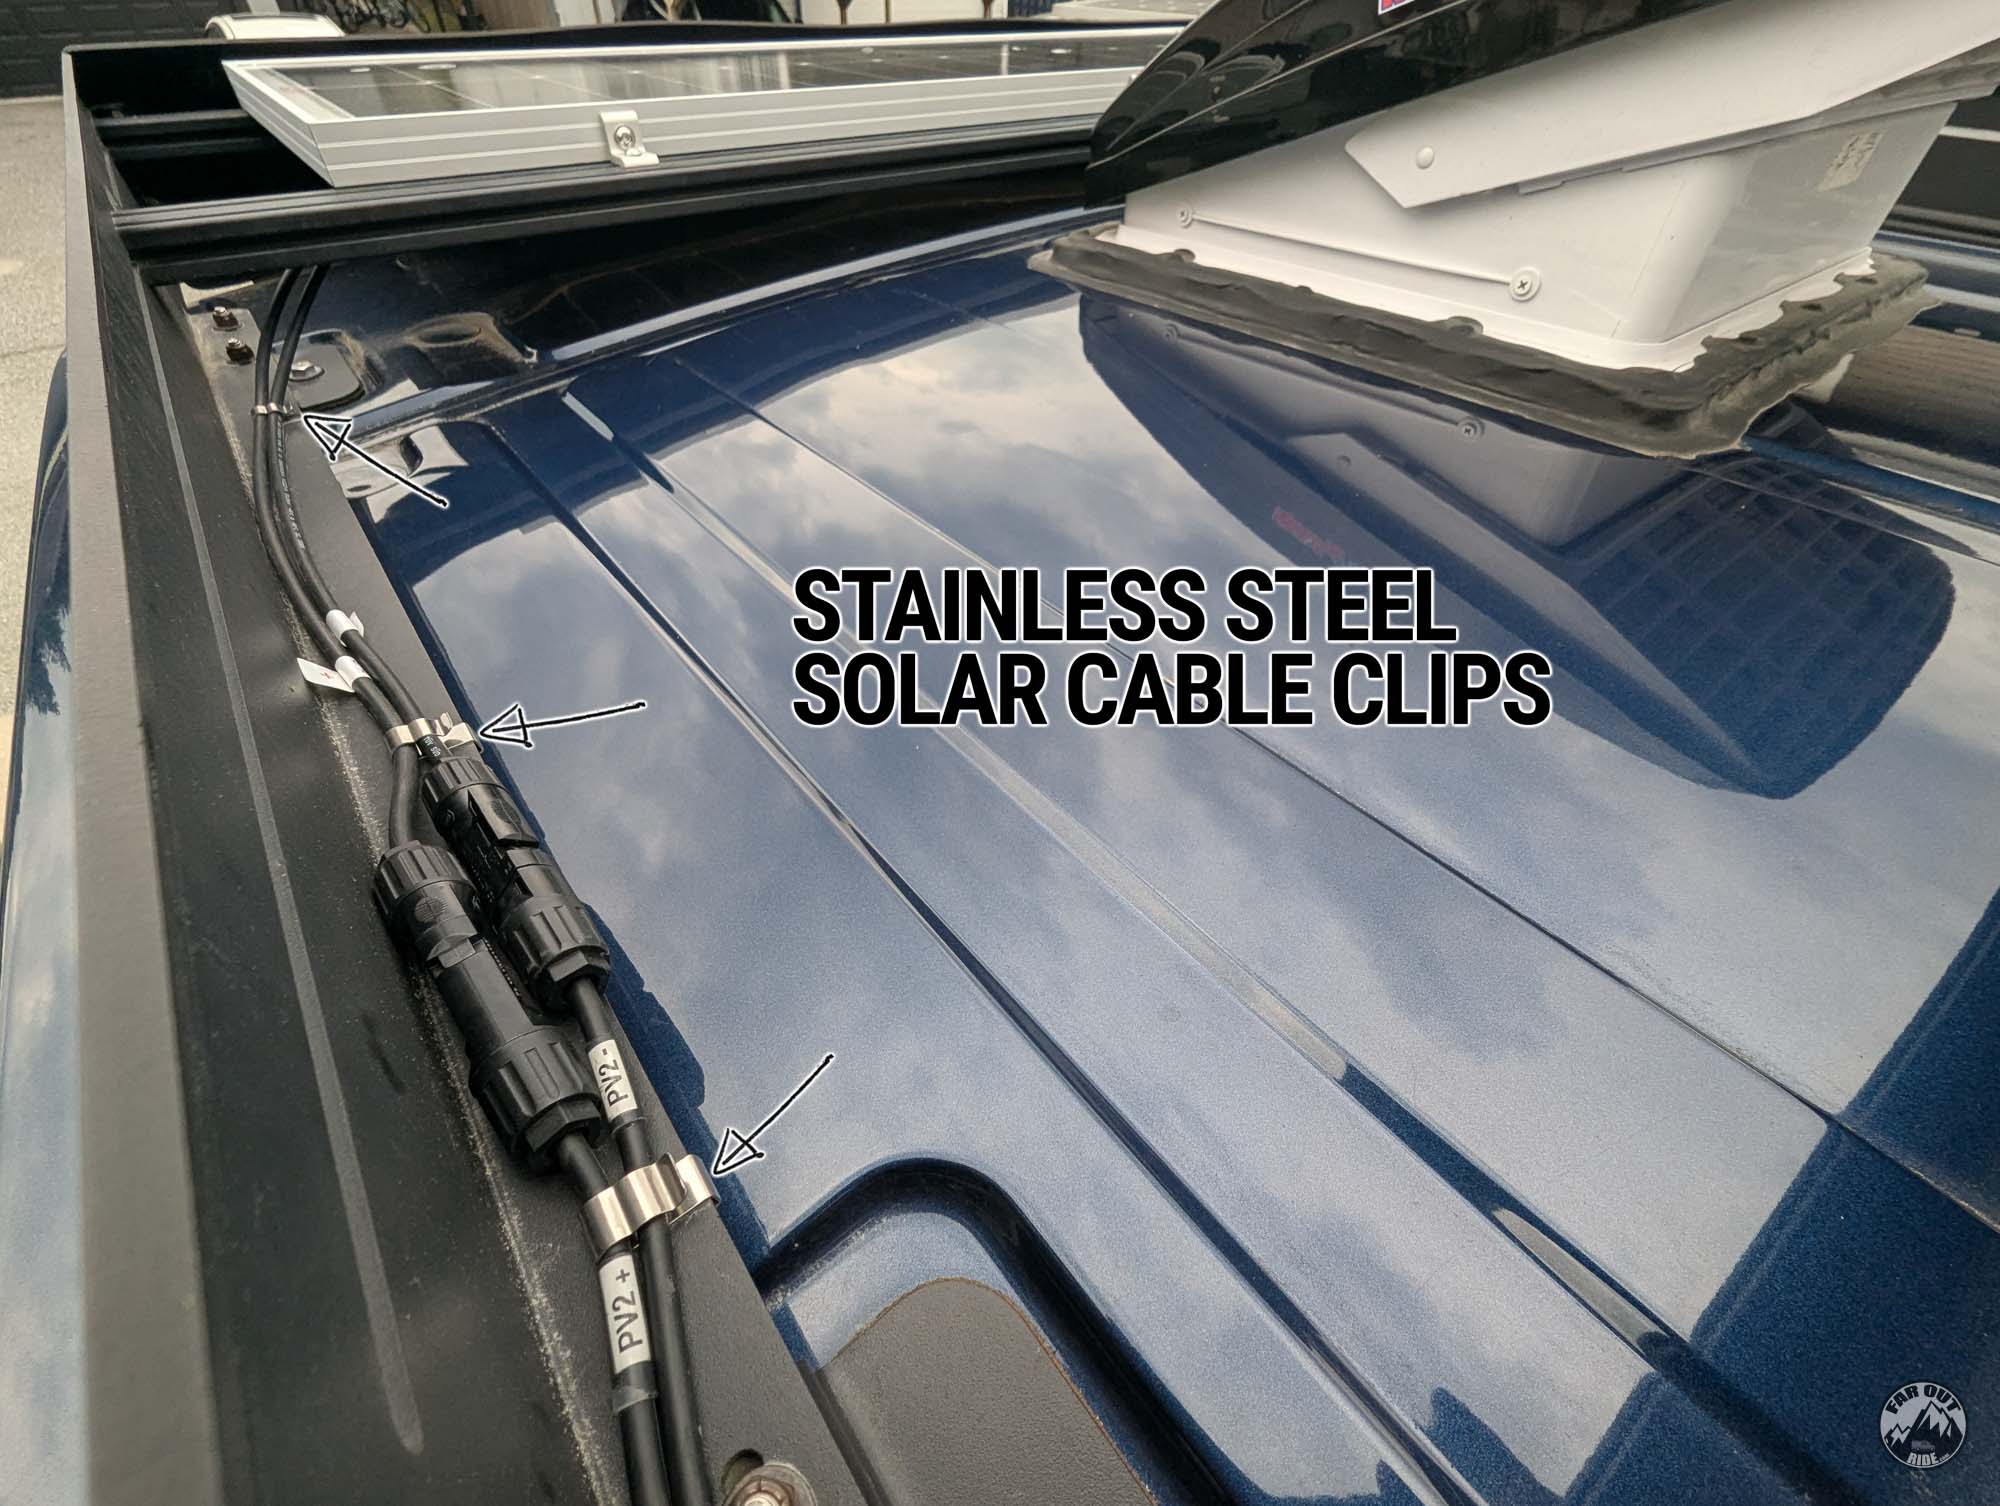
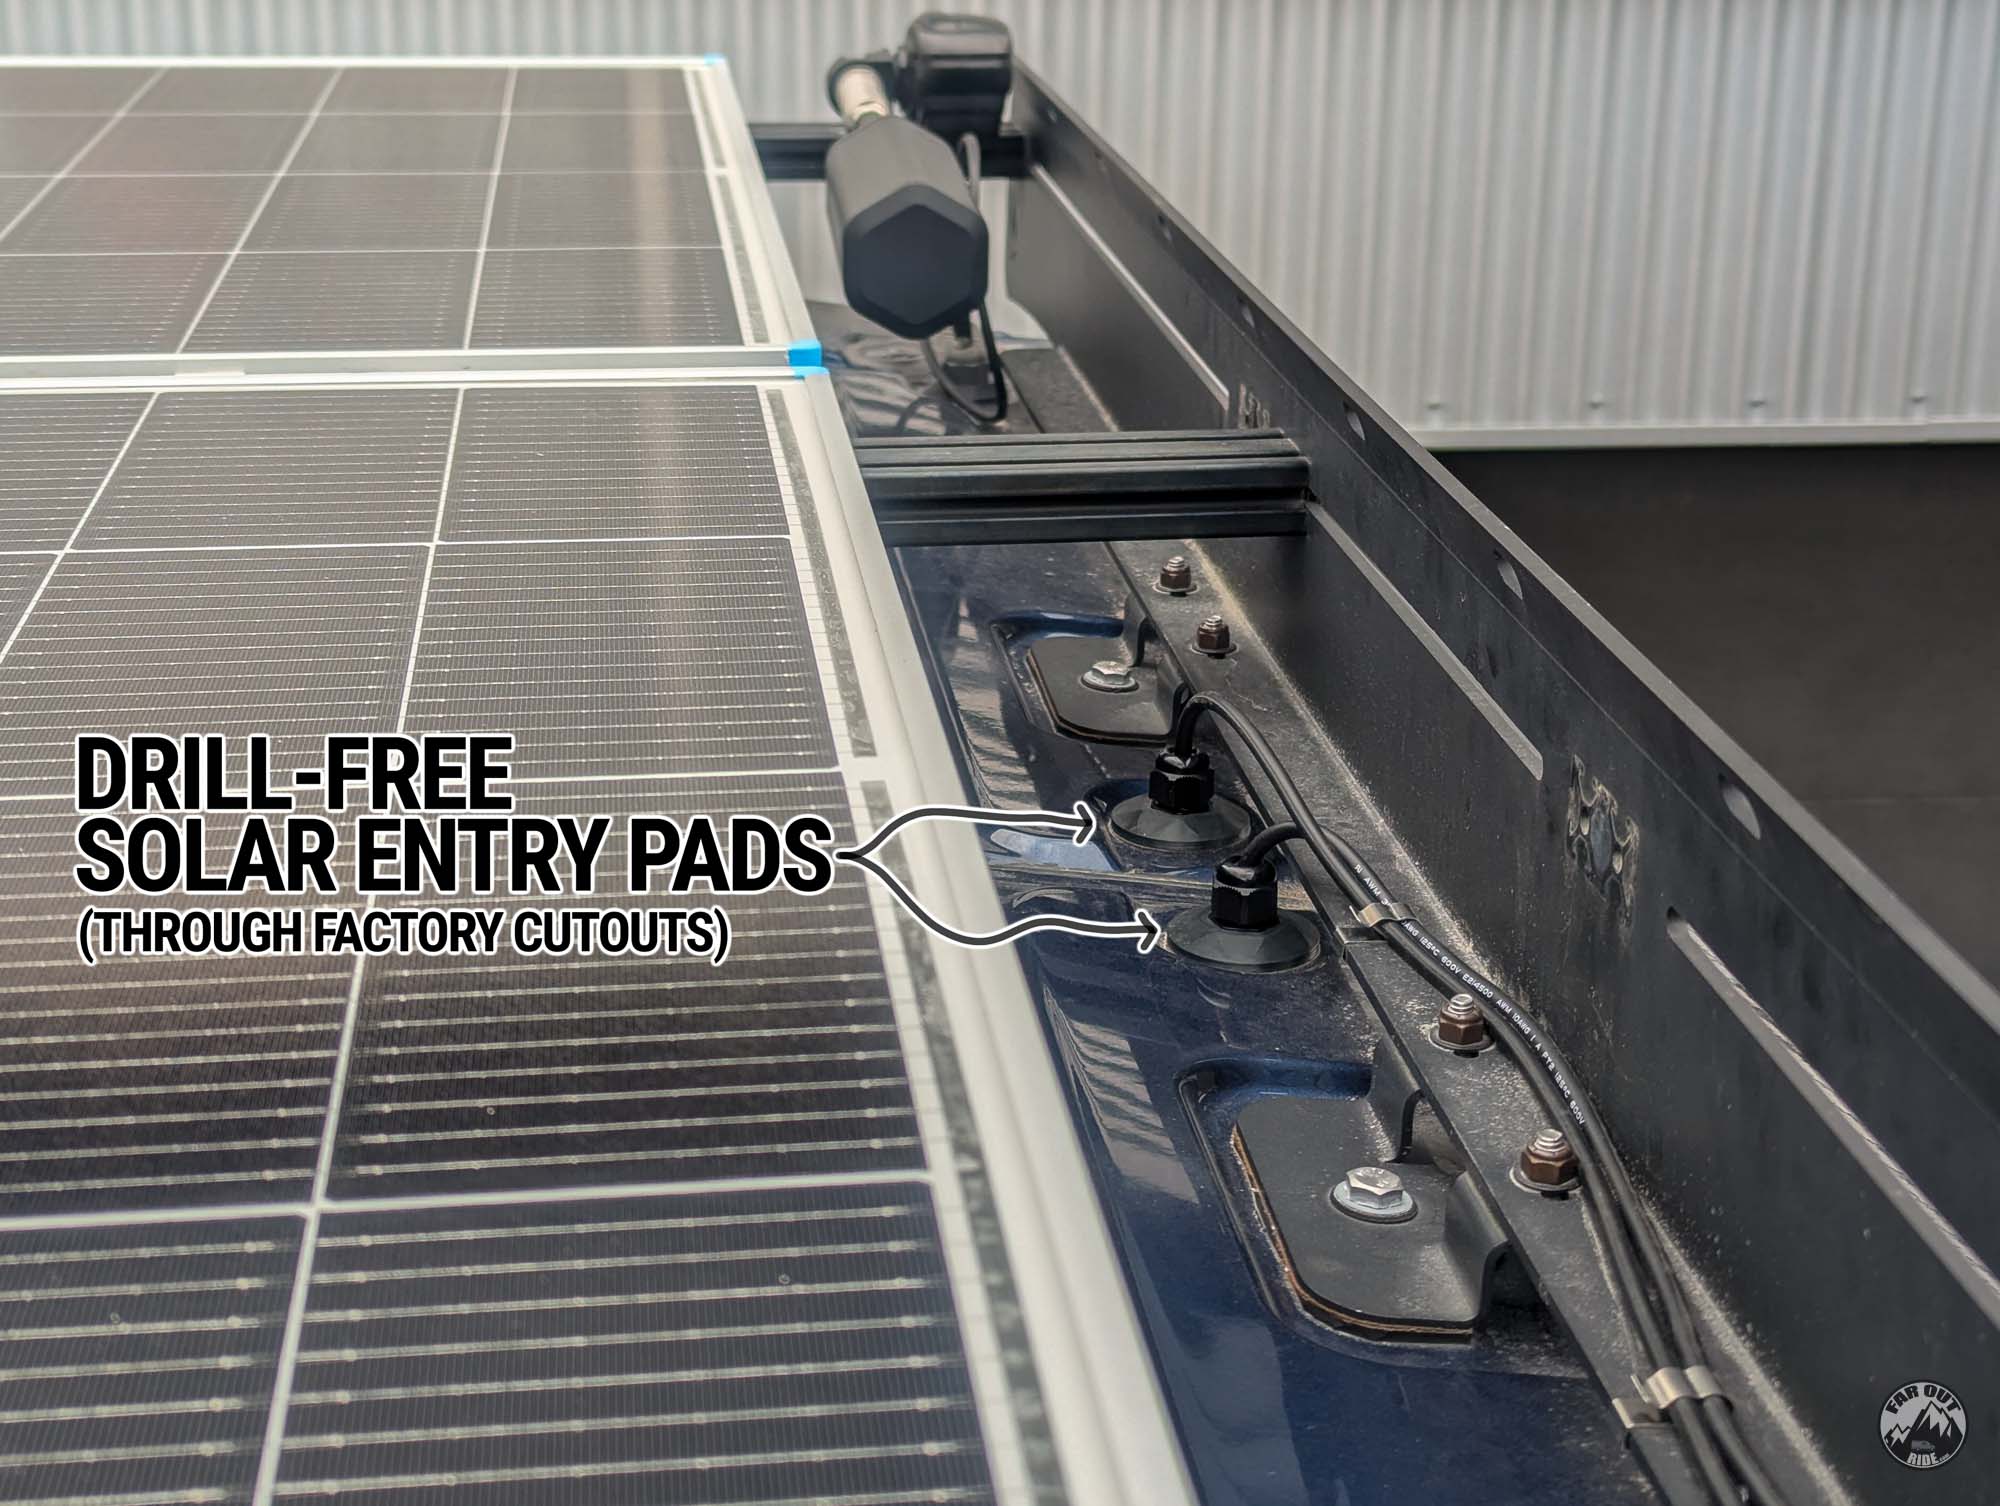
The cables enter through the roof via Drill-Free Solar Cable Entry Pads:
We also use a Cable Entry Pad for the Motorized WeBoost Cell Booster:

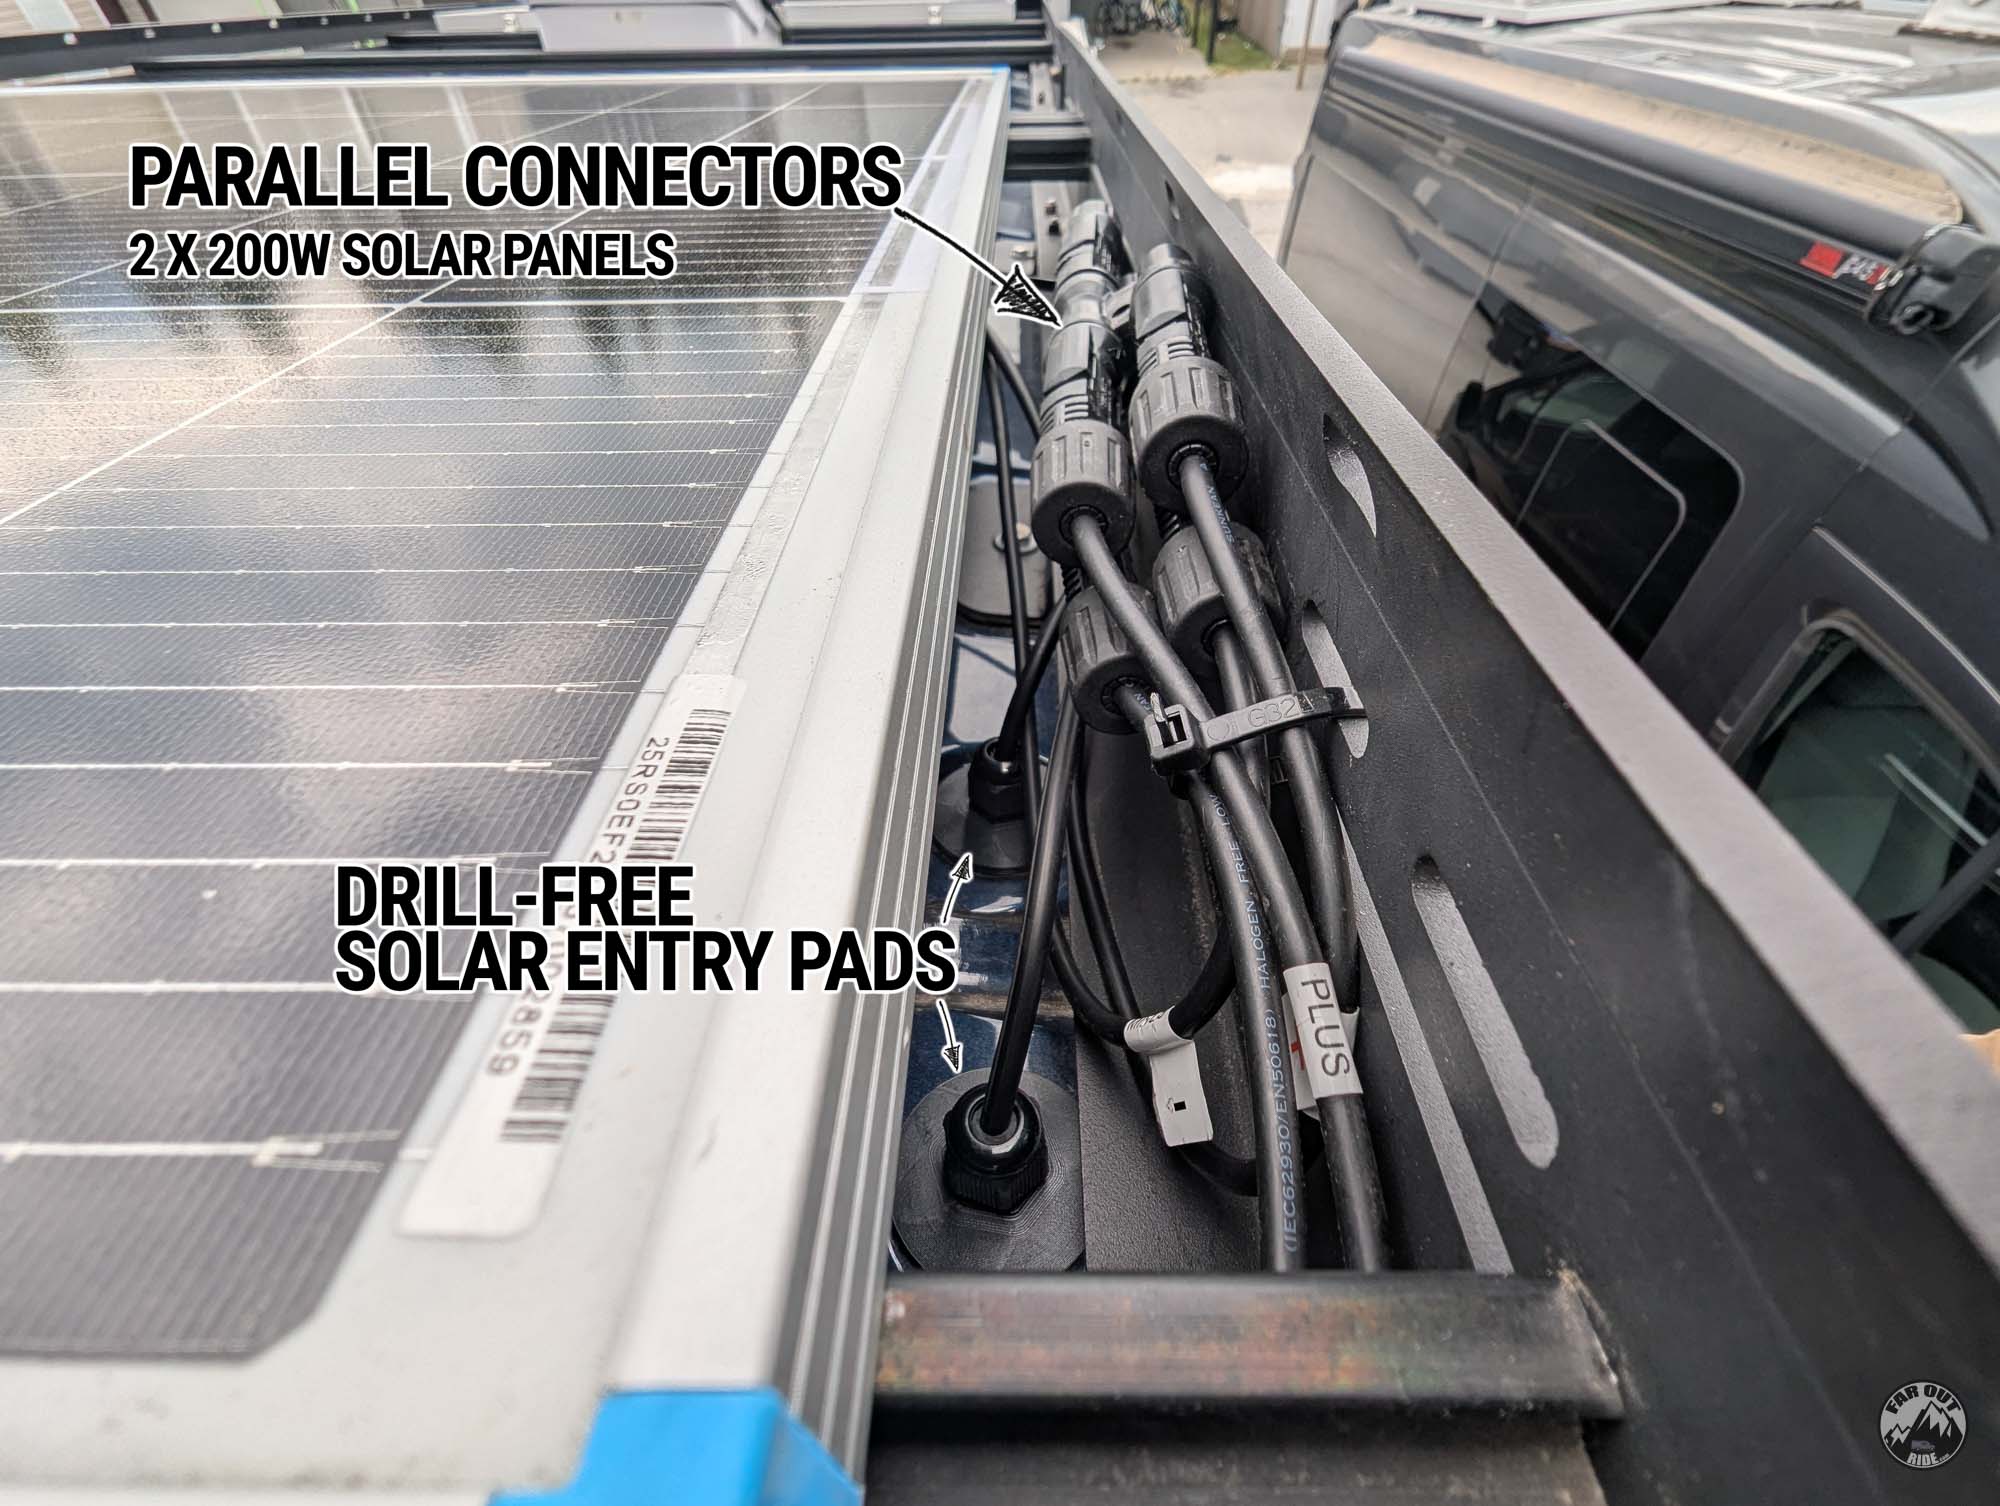
The 2 x 200W solar panels are connected in parallel using a Parallel Branch Connector, and the cables enter through the roof on the passenger side:
Up Next
We completed our roof by adding decking panels:


With the total of 500 watts in solar and I assume a couple hours driving every other day how well are you doing charging that large battery bank? I am looking at similar, but my numbers are not coming out to fully charge my batteries.
Did you wire your two main panels in parallel because the EcoFlow has a 60V max solar input? I would think the advantages of wiring in parallel to combat partial shading are not really an issue with modern panels containing bypass diodes, and wiring in series would make sense on a build like this for delivering higher voltage to the MPPT (especially in low light)… But the EcoFlow max voltage (60V) seems kinda crazy low.
We are also wiring two 200W Renogy Panels into the EcoFlow Gen 2… But not sure we can do it in series since the Open Circuit Voltage on each panel is 36.5V…
Correct, we wired our panels in parallel to stay below the 60V limit.
Apparently the 60V limit is for certification reasons…
With the Cable Entry Pads, can the smaller size cable hole be drilled out to fit a larger size cable if needed? I need six mixed cable sizes and wonder if it’s just easier to get six small size units.
You can’t drill them no, that would damage the sealing mechanism inside the gland…
To order the entry pads for the Ecoflow cables what size do we order I apologize if you listed, but I did not see it in the Install instructions
When we remove the connectors on the solar cables and reconnect them do we reuse them I did not see new connectors in your list of products to order
I am just putting two 200w panels up should I still put them in parallel or just use both solar input cables that came with the eco flow
Thank you Ted